
If you are reading this then you probably have one of these 5 problems:
- You can’t apply a warp stabiliser
- You can’t drag or drop your audio or video to the timeline
- Your media if ‘offline’
- You can’t un-nest your media
- Your clips are the wrong size in your timeline
If any of the above are true then you are in luck! Because we will fix them for you, right now.
Warp Stabiliser
Ok, so this is probably one of the most used, built-in, effects in Premiere Pro. It can do magical things for shaky footage but it doesn’t always work. If you’ve gone to apply a warp stabiliser to your footage and you see this:
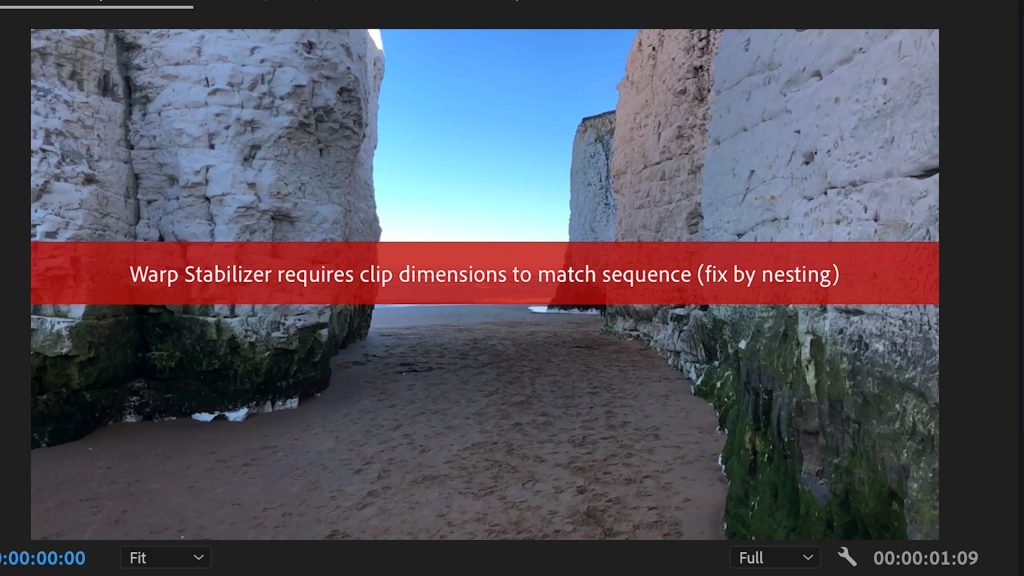
Then you have probably tried to apply the effect on a clip in your timeline that is a different resolution to the sequence settings you are working with. What we mean by that is that you may have 1080p footage in a 4K timeline or 4K footage scaled down in a 1080p timeline. Warp stabiliser will only work on footage that is natively the same size as the sequence.
How do we fix this?
Nesting.
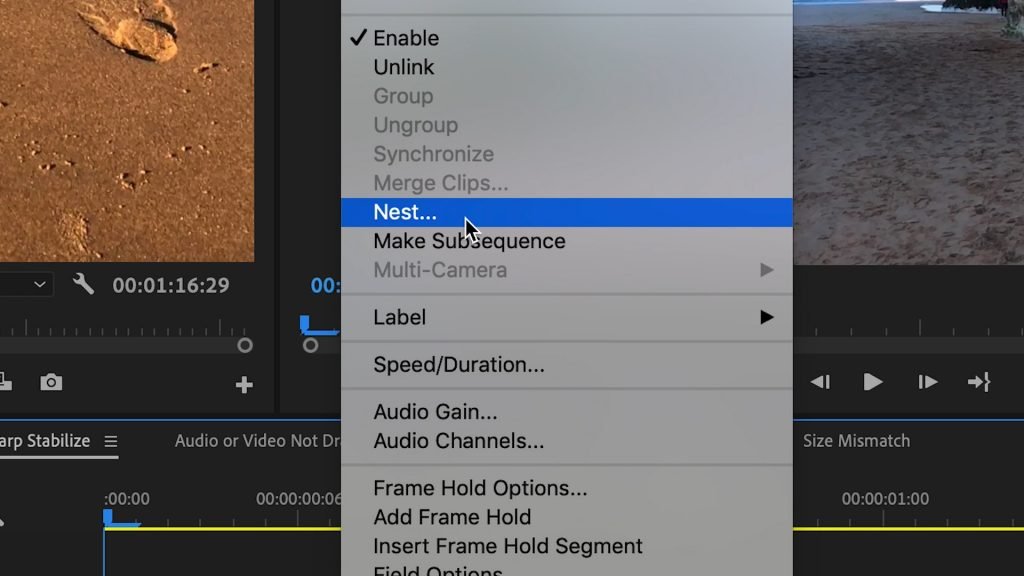
It’s that simple. Right click on your footage in your timeline and scroll to ‘Nest’. Click this and it will ask you to name your new nested sequence. Once you have done that you will see your footage has been replaced by a new sequence inside your timeline. This is a nest. It’s essentially like a pre-comp in After Effects or a group in Photoshop. You have grouped certain things inside one sequence and brought that into your main timeline.
Nests, when created, adhere to the timeline settings. Therefore, you can now add a warp stabiliser as it is being applied to the nest and not the footage inside it.
Warp Stabiliser and Speed Effect
So, there is another reason that warp stabiliser might not work and that’s if you have a speed effect on your clip and then try to add a warp stabiliser on top. The effect can only be applied on the original un-transformed media.
To fix this apply your speed effect first and then nest that clip. You can then apply a warp stabiliser to the nest with the speed effected clip safely inside your nested sequence.
Can’t Drag Media to the Timeline
This one catches everyone out at some point in their progression with Premiere Pro and you can spend a long time scratching your head. Once you know why you will kick yourself.
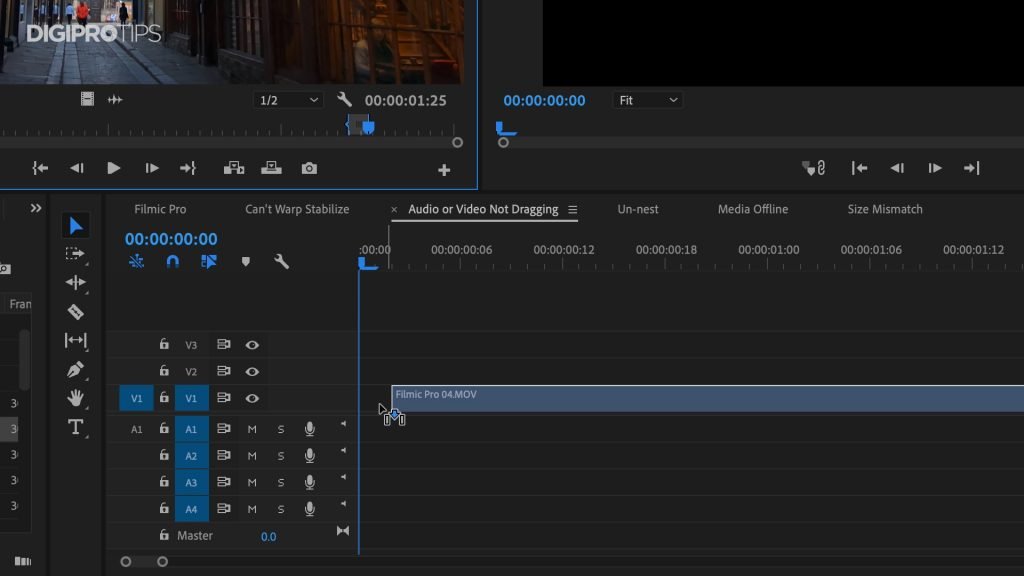
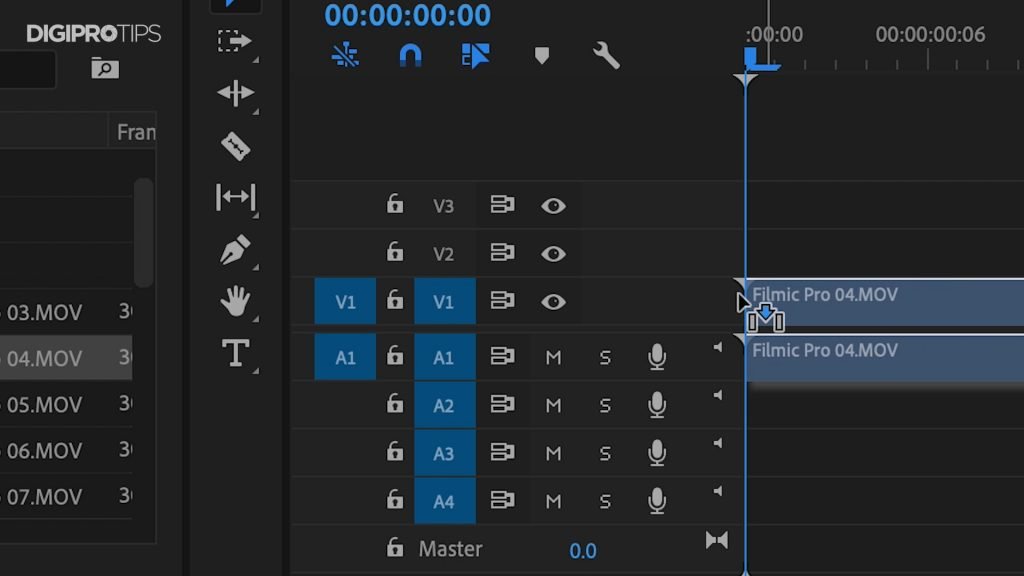
The timeline in Premiere Pro (and most NLE’s to be honest) work on a ‘patching’ system. When you create a new sequence you will usually see two blue highlighted ‘V1’ areas to the left of your main timeline. Above those you have V2, V3 etc but the main thing you need to take note of here is the far left V1. Similarly you will see two A1’s for the audio area of your timeline.
These far left V1 and A1 buttons are your patch selection buttons. If both are turned on and highlighted blue then you will be able to drag or drop both audio and video to your timeline. If either are turned off then you will only be able to add audio or video to your timeline.
The reason this is a function is that when using the source monitor to go through your rushes and create your rough cut you may want to add only audio or video of certain portions of your rushes and using hotkeys you can make an overwrite edit with just V1 or A1 activated and meaning you can quickly and efficiently create a rough cut from the source monitor with just the media you want to use without going through and chopping out audio from your B-roll or adding in audio from the A-roll to your B-roll sequence later on.
Media Offline
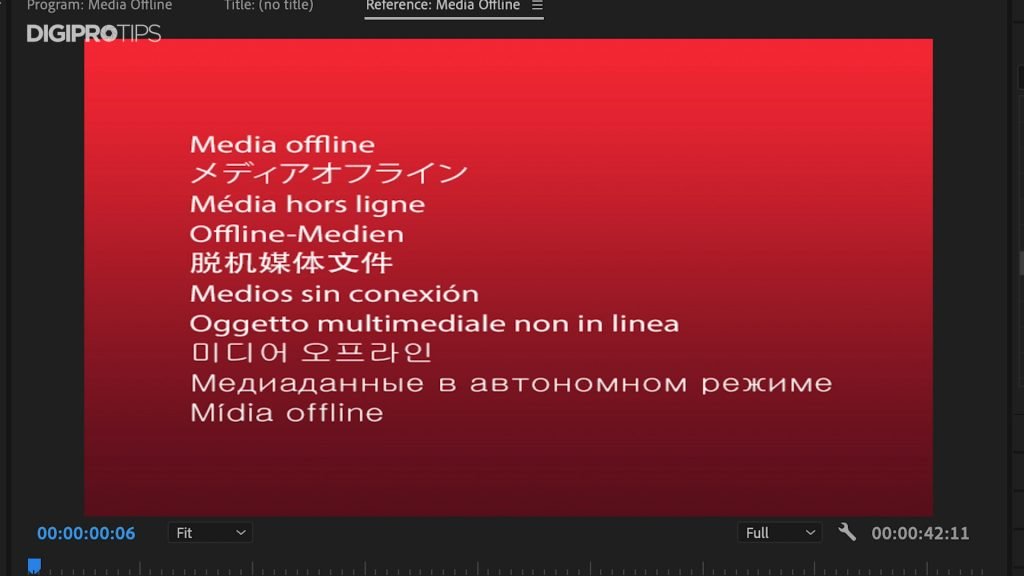
This will happen to every single editor at some point in their career. It can and will happen many times over in fact. It is also something that shouldn’t be feared and is usually very simple to solve.
Premiere Pro creates links and cache files to your footage when you import it into your project. It then looks for these every time you open that project. If for some reason it can’t find the footage in the place it last found it then it will ask you to try and relocate it or turn the media ‘offline’ until you can relocate it.
This can happen for a number of reasons but the most common one is that a project has been handed to another editor on a different drive from the original or you have copied a project from one location to another and even have a different folder structure for your media compared to when the project was first set up.
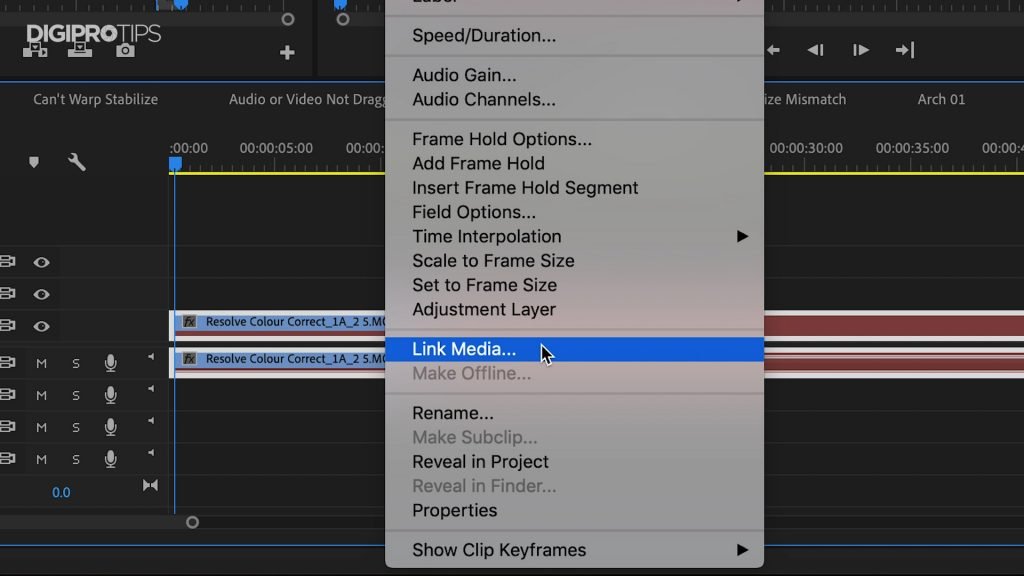
To fix this you can do one of two things. You can close the project, reopen it and use the media location window that pops up when Premiere looks for all the media at the start screen. You can alternatively hit CMD/CTRL+A in your project window or your timeline and right click and choose ‘Link Media’. This will bring up the same window that you would see using the first method.
We like to uncheck the box for using Premiere’s in-built media browser and prefer to use the operating systems file browser. We then hit ‘Locate’ and browse to where we know those files to be located. Usually once you point Premiere to the location of one of the files it will hunt in that location for the rest of them too and you will be back up and running in seconds. If for whatever reason it can’t find every file in that location you may need to help it retrieve them manually.
Un-Nesting Your Media
We spoke earlier about using nests to add a warp stabiliser effect but what if you want to get your media out of a nested sequence?
Well, unfortunately there is no ‘un-nest’ function when you right click on your nested sequence and there isn’t actually a tool to un-nest something. This is mainly because there could be a lot of media inside a nested sequence that wasn’t nested from the same sequence. Like pre-comps in After Effects they can consist of everything and anything that you want to group together from your Project bin and not be as standalone layers in your timeline. If you were to try to ‘un-nest’ the sequence the program wouldn’t know where some of the media should go as it wasn’t all nested from your original sequence.
To ‘un-nest’ something you can hit CMD/CTRL+Z to undo it if it was only one or two steps ago that you created the nest. But if it is going to destroy a lot of work by going back then you need to double click on your nest and delve into the sequence. Once in your nested sequence highlight the media you want to un-nest and copy it.
Go back to your timeline that you want the media in and make sure there is enough space between your shots to apply and overwrite edit or you can hold SHIFT+CMD/CTRL+V to apply a ripple edit and shift all your clips along the timeline so your don’t overwrite any of it with your un-nested media.
Mis-matched Clip Sizes

The fifth and final problem you may commonly face when starting out with Premiere Pro is when you have mis-matched clip sizes in your timeline. This happens when working with different sized media in your edit.
You should first asses which media type you have the most in your rushes before you create a timeline and then go with that resolution or aspect ratio. For instance, if I have 20 clips at 1080p and 5 at 4K I would create a 4K timeline and scale down the 4K footage. If I had 20 clips at 4K and 5 at 1080p then I would scale up the 1080p footage to meet the 4K clips aspect ratio. The resolution won’t scale as it lower quality footage but you can usually get away with a few well shot scaled up 1080p in a 4K timeline.
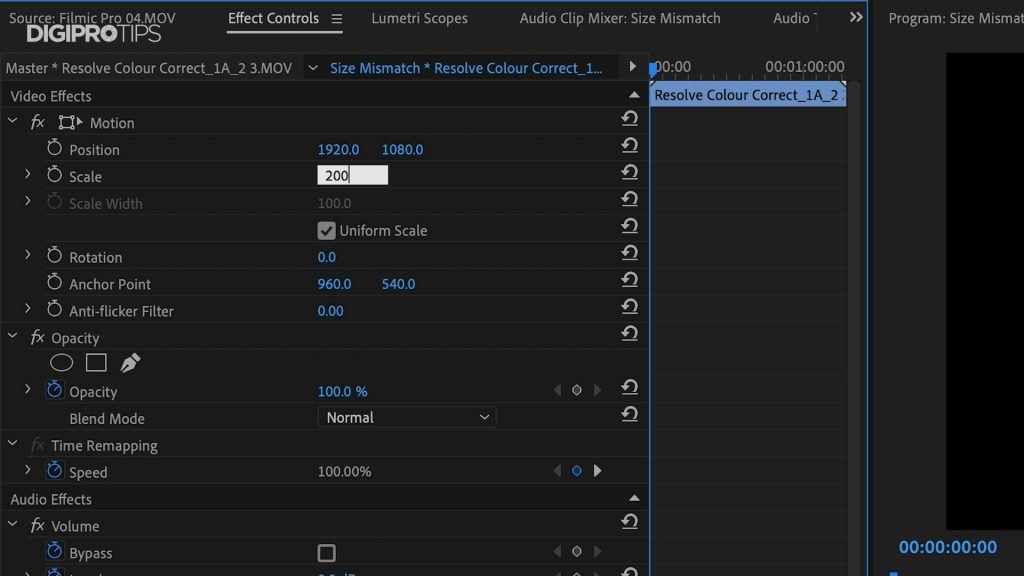
If you bring in media of a different size into your timeline then it will either look really punched in or really small with a big black border around it. To solve this head to the ‘Effects Controls’ next to your ‘Source Monitor’. Make sure your media to change is highlighted in your timeline and toggle down the ‘Motion’ settings. Here you will see a ‘Scale’ setting that you can alter. Depending on your footage you can use this scale value to make your footage larger or smaller to suit.
That’s it.
These are five most common problems you usually face when starting to use Premiere Pro regularly and it won’t be the last time you see these problems either. However, you should now have the knowledge of how to solve them.
If you have another problem that we didn’t cover then get in touch and we can add it to the article if it’s quite common or try and give you other sources of help if it’s not.
SUBSCRIBE
If you found the above video useful and would like to see more then you can subscribe to our channel here: https://digiprotips.com/Subscribe
DigiProTips

