When you first start learning video editing there are a handful of tools that can really help speed up your workflow- the ripple edit tool is one of them.
Learning to become a video editor becoming as efficient and proficient as possible seems like a steep learning curve. There are, however, a few tips and tricks that if you learn them early on they can make a real difference to the speed with which you can edit.
Here, at DigiProTips, it’s all about working smarter and not harder so that you have more time to be creative.
The ripple edit tool will do just that for you, save you time so you can be more creative.
How do I know what I’m talking about? Head to the DigiProTips Experience and Background page to find out how I’ve built up my knowledge over a career spanning feature film, broadcast TV and digital content production.
The Quick Answer to Using the Ripple Edit Tool
Step 01 – from the tools menu of your editing software select the ripple edit tool (B on the keyboard for Premiere Pro or use the Dynamic Edit Tool for DaVinci Resolve).
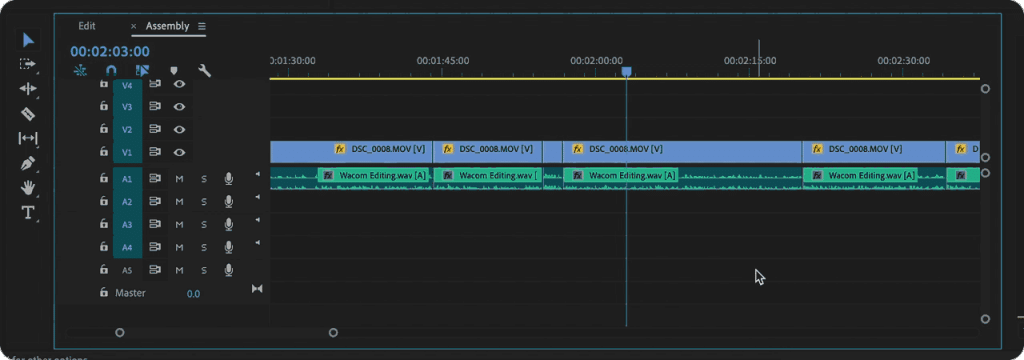
Step 02 – with your ripple edit tool selected hover over an edit point in your timeline.
Step 03 – the arrows will show you which way the ripple edit will move the rest of your timeline. Click and drag one end of a clip in that direction.
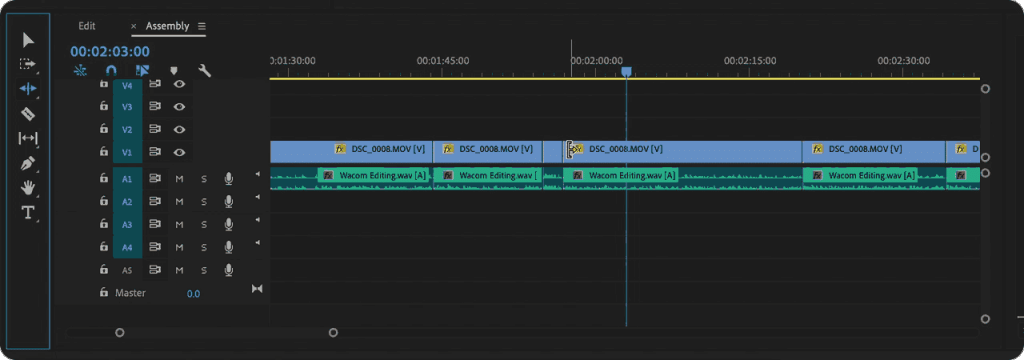
Step 04 – once you let go of the mouse the rest of the timeline will snap to the new edit position of that clip. This means no hole is left where the old duration of the clip used to start.
Step 05 – you can also ripple delete dead space by clicking that empty space, right-clicking, and then choose ‘ripple delete’.
What Does the Ripple Edit Tool Do?
The ripple edit tool isn’t immediately obvious in terms of what it does based on its name.
The tool is for changing in and out points of clips and having the rest of your timeline snap to that new clip duration.
It’s for making quick edit changes on the fly without leaving gaping holes in your timeline everywhere.
Advanced Cutting
Editing is all about cutting (editors used to be known as ‘cutters’ from the days of traditional film reel) and when you first start editing its very easy to get into a habit of using the cut tool to make edit points and then delete portions of clips as you go.
But this is inefficient.
By editing in this way you leave holes in your timeline and you end up making many more mouse movements and clicks than you really need to.
Being a more efficient video editor is about using the least amount of mouse movements and keyboard shortcuts as possible to get to the same end point.
Read my article on how a Wacom can speed up your editing workflow here:
By using the ripple edit tool you only need to make one click to change an edit point and have your timeline uninterrupted.
Pro Tips
The ripple edit tool is incredibly intuitive, you’ll get the hang of it in no time but there are a few things you should know in advance.
It’s best used in the assembly edit.
The ripple edit tool will ripple delete all of your timeline, it is not selective about layers.
So if you have a large timeline full of layers of graphics, overlays, effects and sound design, etc then using the ripple edit tool could destroy your beautifully crafted edit.
Instead, the ripple edit tool is most effective and efficient when you are putting your first draft together, or the ‘assembly’ as I like to refer to it.
Here, you are carving out the story and won’t destroy any of the polish you add at the end.
CTRL/CMD click and drag.
You don’t have to select the ripple edit tool to ripple edit.
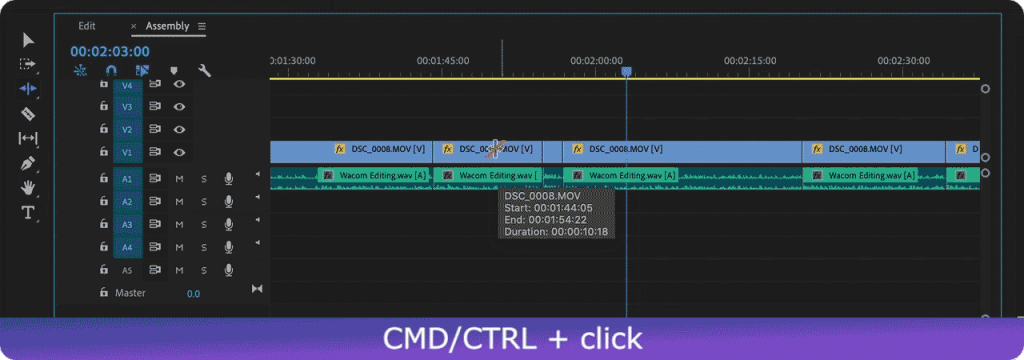
You can actually access the tool by holding down the CTRL/CMD key and hovering over an edit point (in Premiere Pro).
Once you have dragged the point to its new destination you can simply let go of that key and your cursor will be back to the select tool.
Option + Bracket in Final Cut Pro
In Final Cut Pro you can perform a ripple edit by selecting the edit point, moving the playhead to where you want the edit to start/finish and then use the keyboard command Option + ( to trim the in point to the playhead location and Option + ) to trim the outpoint.
Dynamic Edit Tool in DaVinci Resolve
In DaVinci Resolve edit tools are all combined in one tool, the Dynamic Edit Tool.
Select this tool then click and place your cursor on the inside edge of the clip. Your cursor icon will change to ripple edit and then you can drag your in/out point to ripple edit your clip.
Practice Makes Perfect
Getting the hang of the ripple edit tool in Premiere Pro, Final Cut Pro or DaVinci Resolve will make you a faster, better, and ultimately more creative editor.
So practice at it, make it second nature and you’ll be carving edits in no time.
For more shortcuts in Premiere Pro why not check out some of the most underrated keyboard hotkeys right here:
If you found this tutorial useful then let me know in the comments below and what you would like to learn next.
DigiProTips

