
Since Adobe Premiere Pro CC 2018 there has been a feature called Colour Match within the Lumetri Colour Effect. The effect uses the Adobe Sensei engine to analyse an image and apply colour temperature, contrast and exposure values to a separate image in an attempt to match the two images.
We take a quick look below on how to do this in CC 2019:
The tool isn’t foolproof and will only work with shots that are similarly lit, ideally from the same camera type, location and lighting settings. However, it can be quite a powerful tool when you need to match cameras and are stuck for time.
Let’s take a quick tour of the process.
First. After putting both clips into the timeline, reference clip and clip to be matched, head to the ‘Colour’ workspace in Premiere:

Now, on the righthand side of the workspace you will have a ‘Lumetri Colour’ panel in your workspace. Click on the ‘Colour Wheels & Match’ dropdown section of that panel:
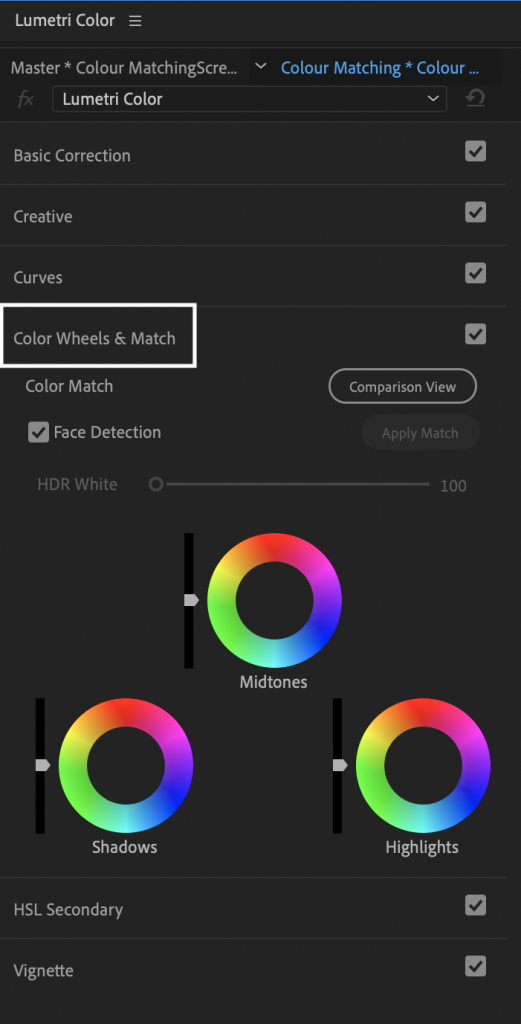
Within the ‘Colour Wheels & Match’ section you will now see a button called ‘Comparison View’. Ensure you have the clip you want to apply a match to selected in the timeline and then click this button.
Your Program Monitor display will change to show two monitors within it. They are labelled ‘Reference’ on the lefthand side panel and ‘Current’ on the right, which is your current playhead view. This should be your active selected clip to apply a match to:
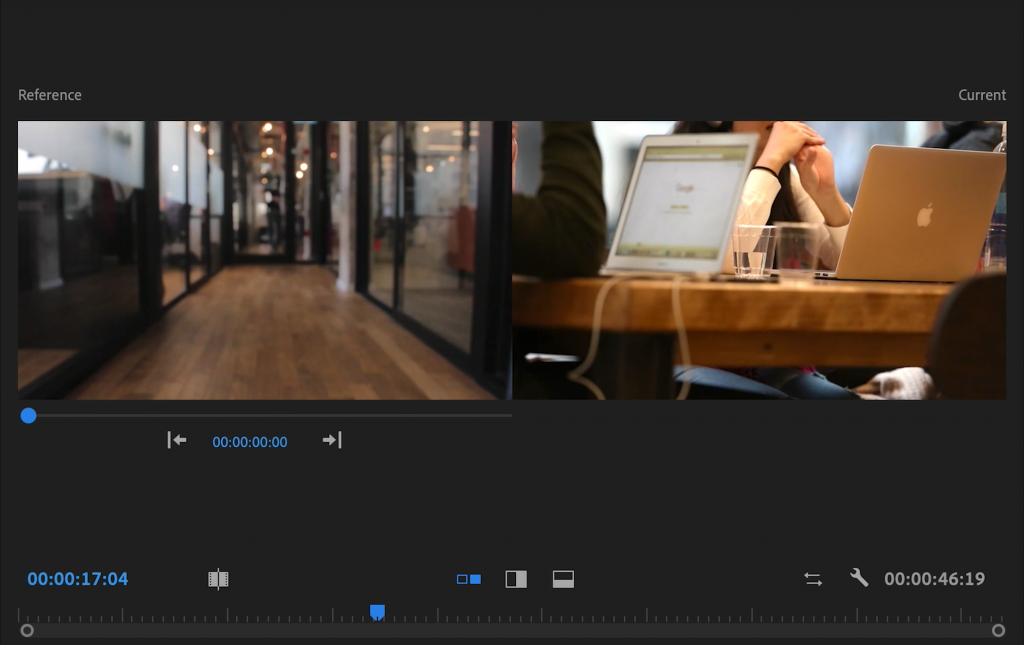
Use the timecode selector or edit point buttons under the ‘reference’ monitor to choose the clip in your timeline that contains the grade you would like to match. With your reference image chosen and your playhead over your selected active clip in the timeline you can now do one of two things.
You can hit ‘Apply Match’ under the ‘Comparison View’ button or you can uncheck the ‘Face Detection’ checkbox before hitting ‘Apply Match’. The latter will aim to do what it says, find faces in the images and match the grade of the reference clip and apply it your ‘Current’ image. However, we have found that this produces mixed results. Generally we try it with and without to find the nearest match and then tweak the grade slightly after the match process.
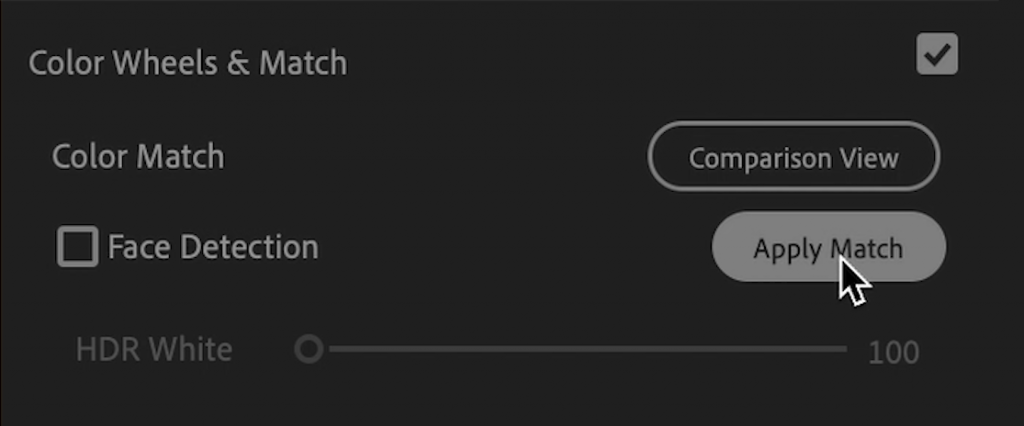
Once you have clicked ‘Apply Match’ the button will change to a greyed out ‘Analysing’ and shortly after your image in your ‘Current’ monitor will change its grade to match as closely as it can to your ‘Reference’ shot.
Matched.
Once you are happy with the grade you can export a .cube using the menu for Lumetri Colour:
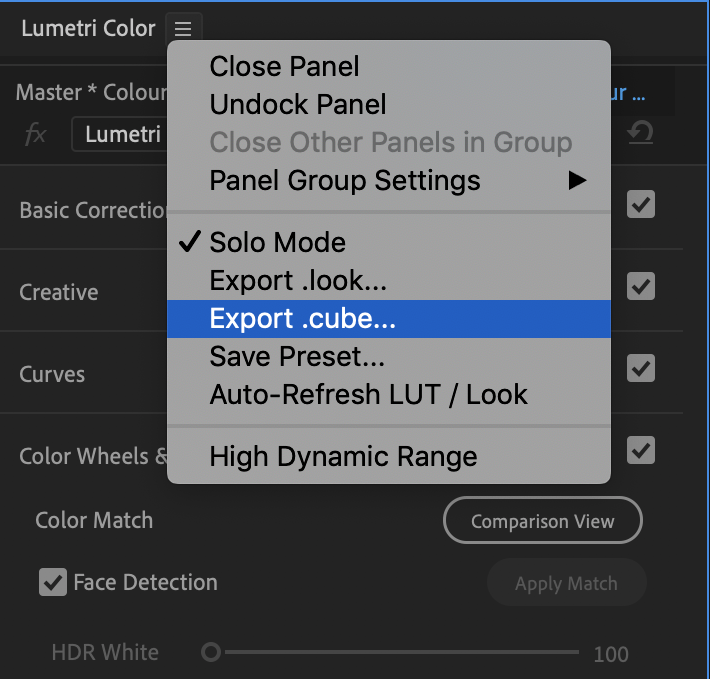
You can use this .cube file as a LUT and apply that to other shots that need this matched grade. To do that simply add the Lumetri Colour effect from the Effects Panel and under ‘Basic’ go to the drop down for LUT’s and browse to your newly created .cube file.
That’s it.
As we said, it’s not foolproof and can give mixed results. If you do have similar shots from the same shoot but from different cameras then it should do a good job of matching them for you without doing a colour correction yourself.
Let us know what results you get with the process but hopefully it could save you a bit of time here and there.
Note. You can get Adobe Premiere Pro for $20.99/£19.99 a month or the whole Adobe Creative Cloud Suite for $52.99/£49.94 right now and if you are a student or teacher you can save up 39% on those rates too:
DISCLAIMER: This post may contain affiliate links. We make a small commission if you buy the products from these links (at no extra cost to you). As an Amazon Associate, I earn from qualifying purchases. But we only recommend products we would use ourselves. For more information, click here to see our disclosures.
For more Premiere Pro content, check out our guide to auto-subtitle/caption your video:
And see if you’re shortcut knowledge is as good as you think it is:
DigiProTips


Pingback: X Rite Color Chart - Get Perfect Color in Camera, Everytime! - DigiProTips