Get to Grips With and Master After Effects Masking
Masking in After Effects is one of those learning steps that is essential to every professional motion graphics artist. It forms part of the basis of visual effects and compositing work.
Fortunately, it’s fairly simple to get started with and after your first few masking efforts you’ll have got to grips with it in no time.
Becoming a master at masking? Now, that takes time.
Masking in After Effects also has valuable skills that can be applied in other Adobe software, such as Premiere Pro, Photoshop and Illustrator.
It’s not an overstatement to say that masking is a career-level skill that you need to know and that you will take with you throughout your motion graphic journey.
In this article were going to look at:
- What a mask is
- How to create and manipulate a mask
- The properties of a mask
- Applications for masks in After Effects
- Pro tips for masking
How do I know what I’m talking about? Head to the DigiProTips Experience and Background page to find out how I’ve built up my knowledge over a career spanning feature film, broadcast TV and digital content production.
The Quick Answer to After Effects Masking
Step 01 – Highlight the layer you want to draw a mask on.
Step 02 – Click either the shape tool or the Pen tool from the toolbar.
Step 03 – Click and drag in your composition if using the shape tool. If using the pen tool then click to create a point and then keeping clicking to create more points, now close the path by clicking your first point again.
Step 04 – You can now keyframe your mask over time or you can create more masks to build up your composition.
What is a Mask in After Effects?
A mask is an invisible shape that instructs After Effects to use only what is inside or outside of that shape. It can be used to hide, reveal or clip part or all of a layer.

They are created by drawing what’s referred to as a ‘path’, this is the line that the shape is made from. The mask path can be tracked and keyframed to move with an object over time.
By using multiple masks on top of each other you start to build a composition. This is what compositing is all about, using many masked layers to create a new image or video sequence.
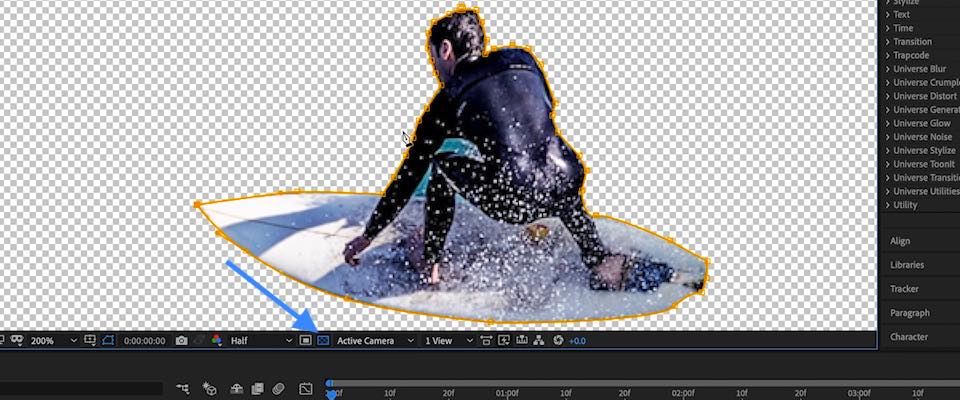
When working with masks you are affecting what’s called the ‘alpha channel’. The alpha channel is an additional channel that deals solely with transparency.
When you create a mask on a layer and After Effects cuts out the rest of the image, you have opened up a hole in the alpha channel. You can toggle the visibility of this with the alpha toggle under the composition window:
Masks shouldn’t be confused with shape layers. Shape layers are created using the same tool but a shape layer is a new layer object in and of itself, whereas a mask is a shape on a layer rather than being its own layer.
How to Create a Mask in After Effects
There are two main ways to quickly draw masks in After Effects, using the shapes tool or the pen tool.
Use the quick answer above to get started with creating a mask.
It’s important to note that when using the shapes tool you need to have your layer selected in your timeline before you start to draw, otherwise you’ll be drawing a new shape layer rather than a mask.
You don’t know how many times you’ll accidentally do that in the beginning!
You can quickly cycle through the different shape tools by pressing Q on your keyboard.

You can also draw your shape mask directly from the center of your layer by holding down CTRL/CMD and then clicking and dragging. Or to create a shape with equal sides hold down Shift.

This is great for creating perfectly round circle masks.

If you are drawing an organic, freehand mask using the pen tool (use G on your keyboard to bring up the pen tool) then you can create perfectly rounded corners by clicking and then dragging before letting go of the click.
This will reveal two toggles for you to push or pull and that will change the scale of the corner pin.
The Properties of a Mask in After Effects
When you create a mask the default mode for it is set to ‘Add’. This means everything within the mask is added to your composition and everything outside is taken away (subtracted).
However, Add is not the only mask mode you can have and using a combination of the seven different modes can make truly dynamic compositions.
The six other modes include:
Subtract – this is the opposite of Add and will remove everything within the mask and keep everything outside of it.
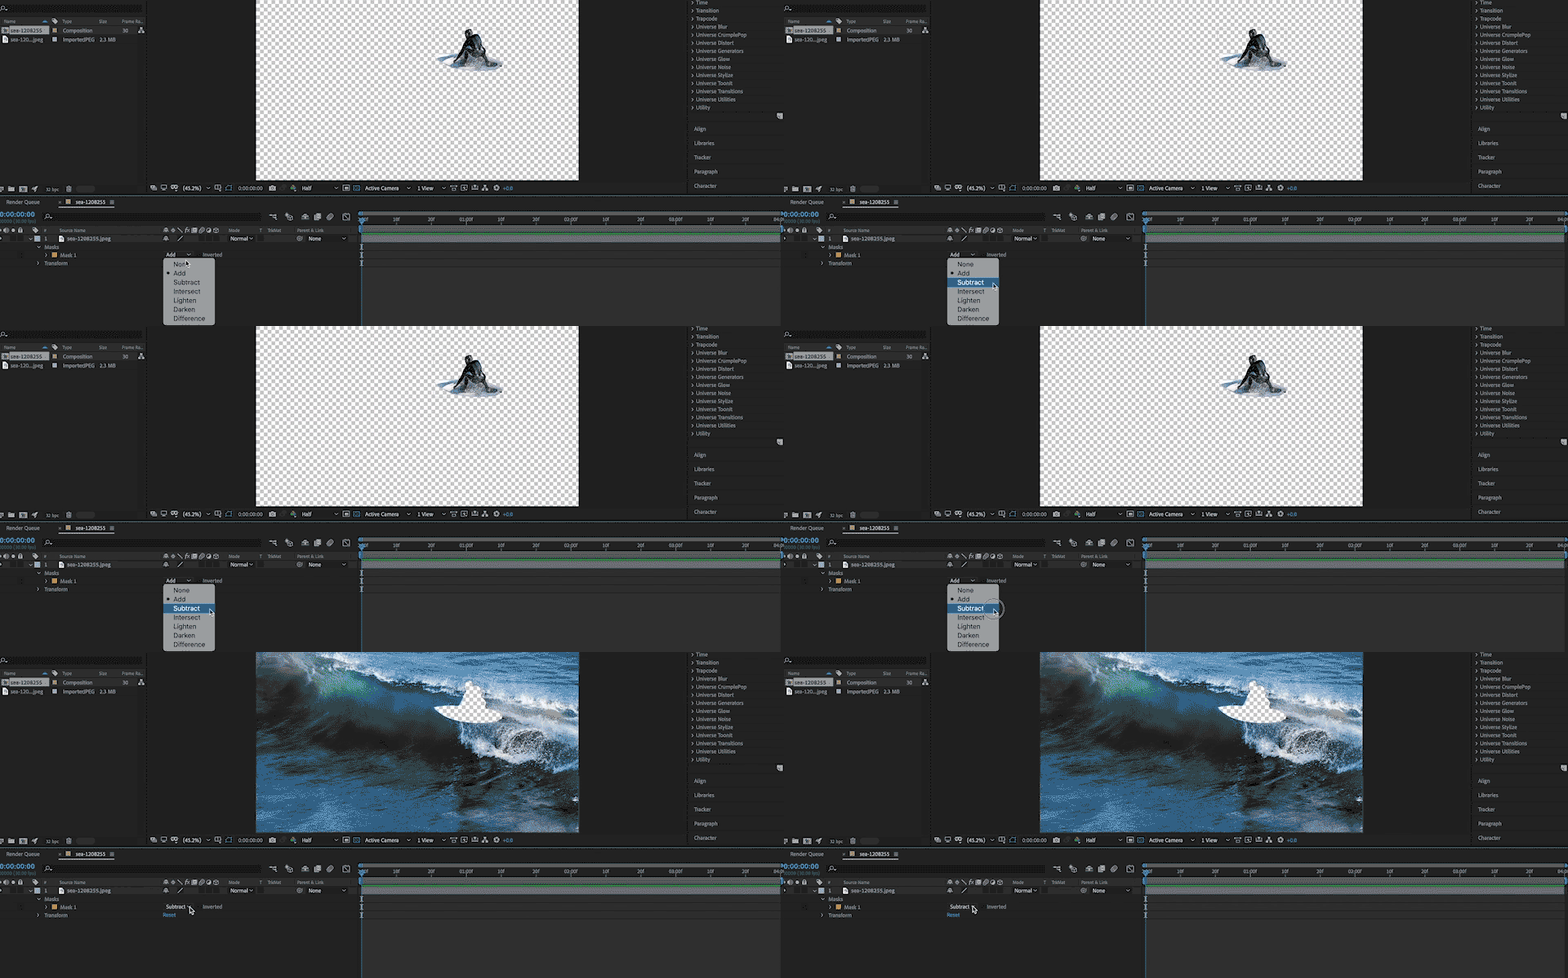
None – Use this mode to turn a mask off on a layer but keep the mask path there for future use.
Intersect – when you having two masks that overlap Intersect will only show the portion of your layer within the section where the masks overlap.
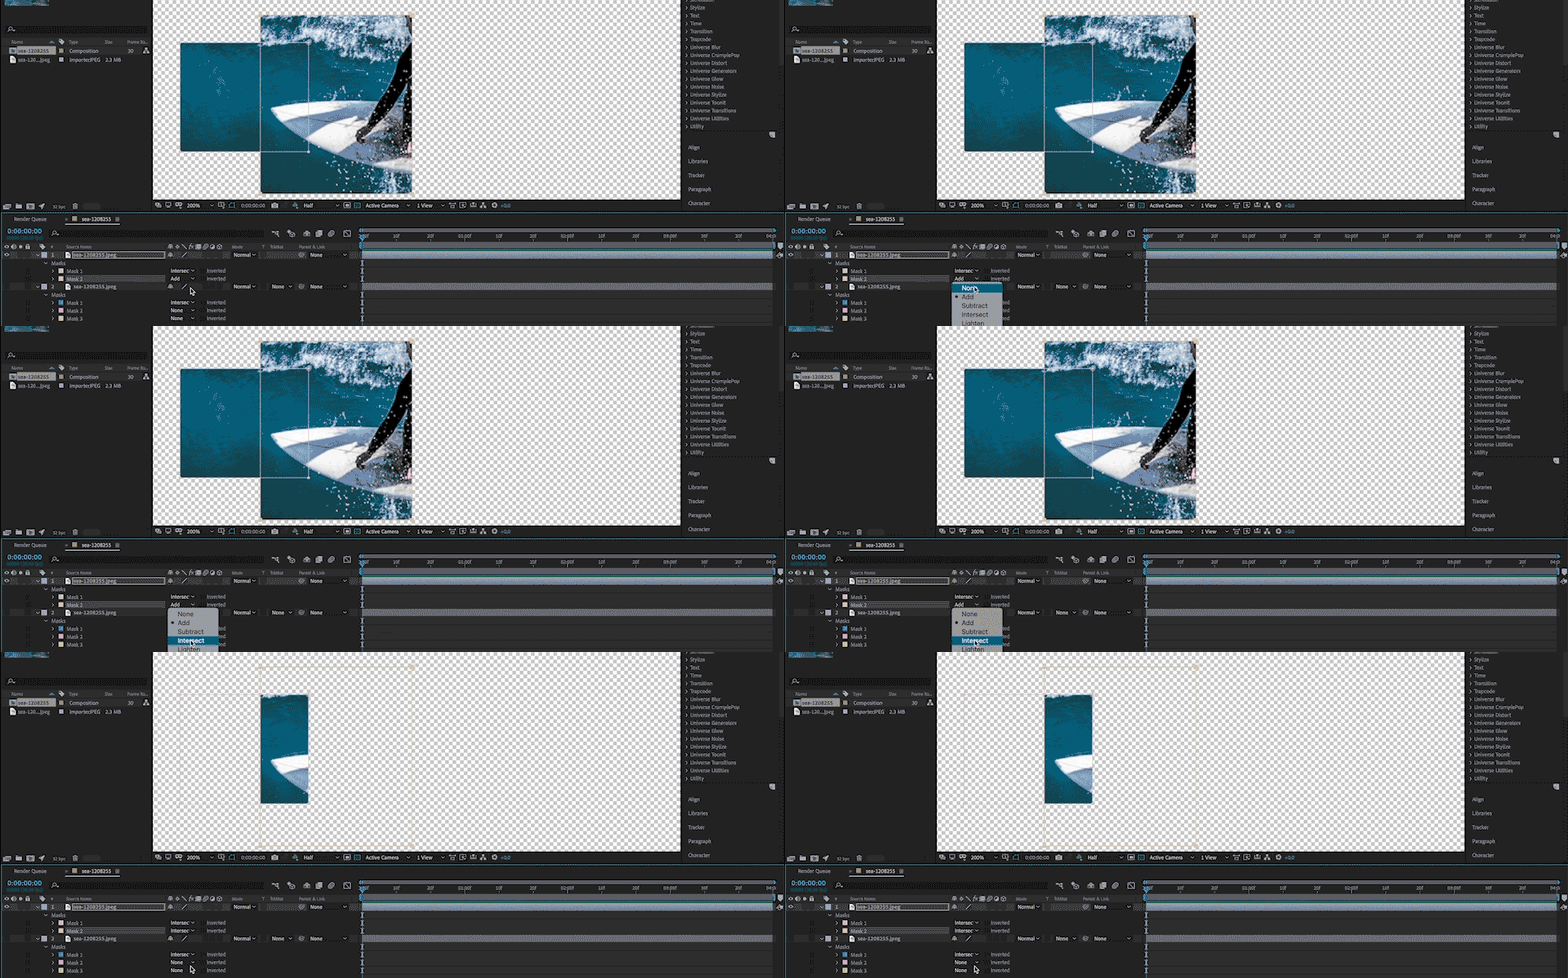
Difference – this is the opposite of Intersect and will subtract anything in the area where the masks overlap.
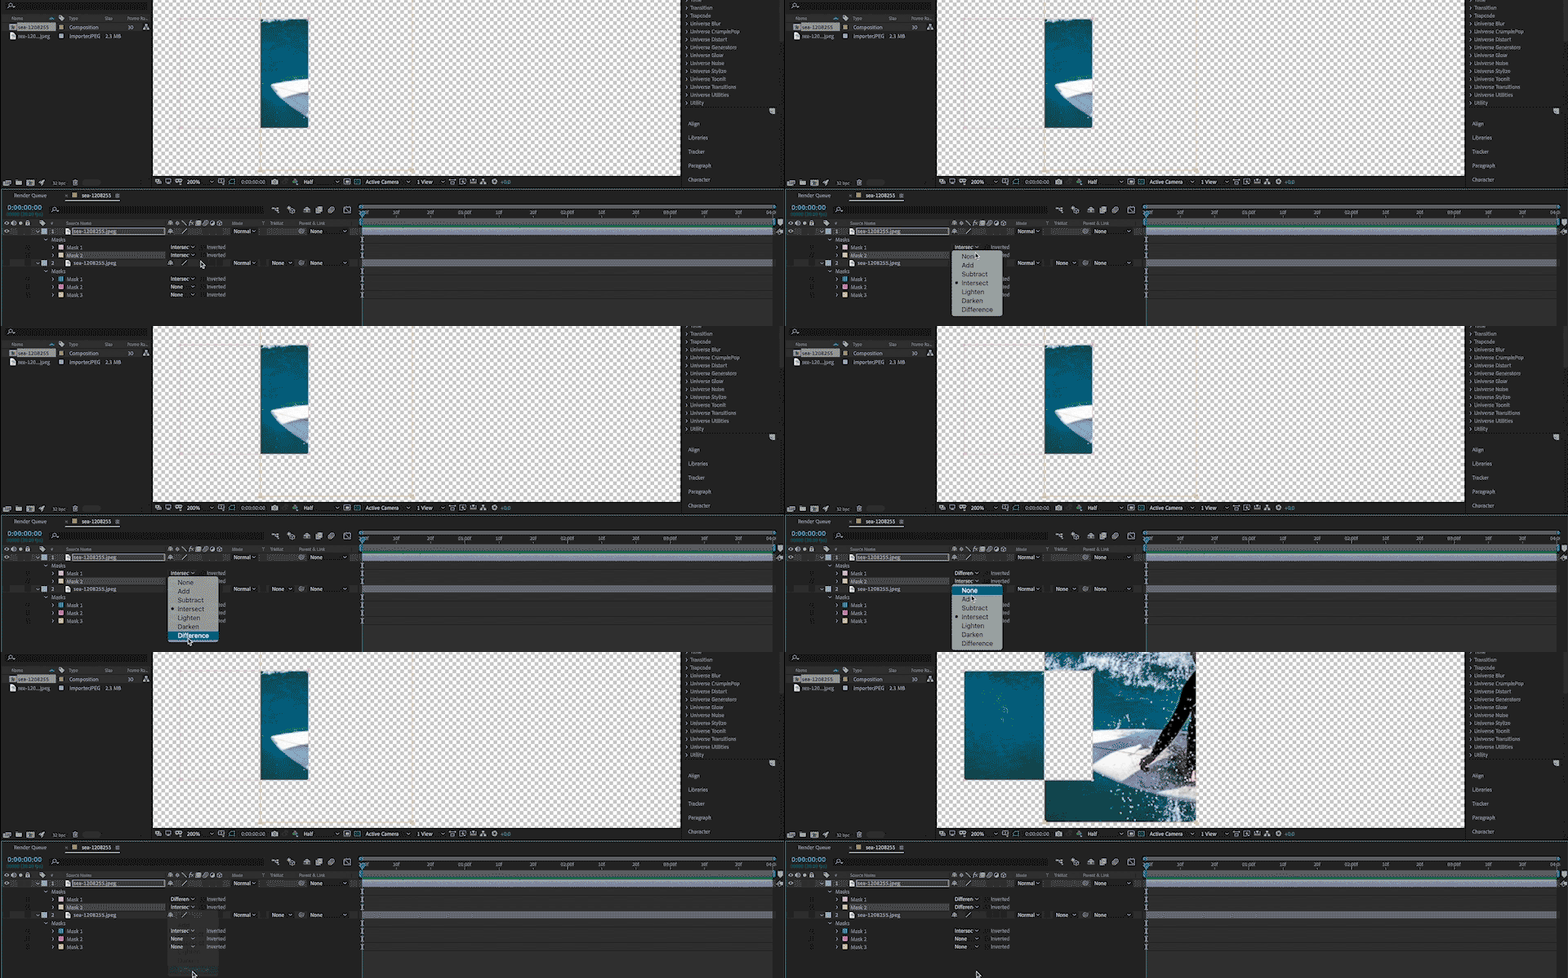
Lighten – when you have multiple masks overlapping with differing opacity settings the area that they overlap will be darker than the rest of the masks. Lighten compensates and evens out the opacity across masks.
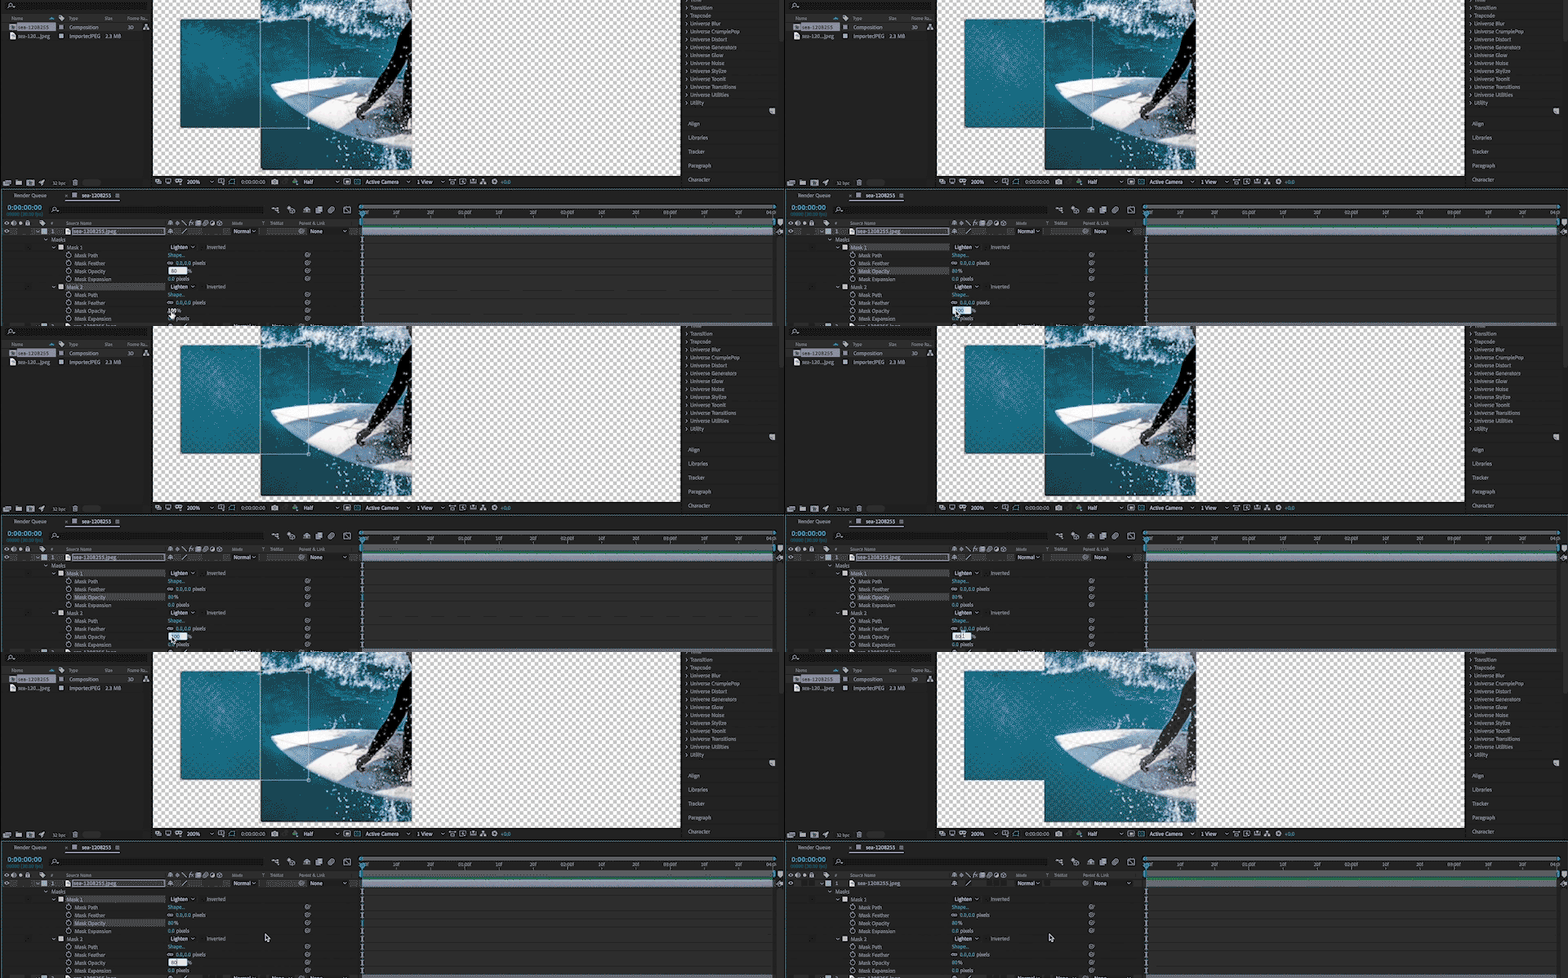
Darken – Darken will do the opposite of Lighten and will increase the opacity where the two masks overlap.
How you stack masks do matter, just as it does for layers. So playing with mask modes and getting to know them properly before you use them in a project is important.
Remember, for organizing, you can change the name of a mask by clicking and pressing Enter and you can also change the color of a mask by pressing the color chip next to it.
Mask Properties
We’re not done there. Aside from mask modes there are also mask properties that are individual to each mask as well.
These are the mask path, mask feather, mask opacity and mask expansion.

Each of these properties has a specific role for a mask:
Mask Path – this is the line shape your mask is made from and that you drew in the first place. This path can be animated and altered over time by keyframing (see my keyframing article to find out more).
By keyframing the mask path you can ensure an object on a layer stays masked as it travels across the timeline.
Mask Feather – by default your mask has a hard edge to what it is masking out or in.
By adding a feather to the mask you are adding an opacity gradient around the edge of the mask, making the edge less defined and mixing it in with any layers above or below it.
The numeric value of the mask feather is measured in pixels, how many pixels wide you want the mask edge to feather on either side of the mask path.
Mask Expansion – you can use this property to change the boundary line of your mask path. By reducing the mask expansion you bring the boundary closer to the center and by increasing it you push the boundary further away.
Mask Opacity – this is how transparent the layer mask is. By increasing the opacity the layer becomes more transparent and other layers and masks can be seen.
A valuable property when it comes to compositing visual effects such as smoke, fire, water, dust etc.
Applications for Masking in After effects
There is a multitude of possibilities when it comes to the applications of using masks within After Effects however, some of the most useful and easy to practice applications are described below.
Before getting to those, it’s important to know a couple of things when working with masks. The first is that masks always move and transform with the layer that they have been applied on.
If you want to move the layer around your composition but keep the mask in place then you can use the Pan Behind tool to achieve that. There’s more on the pan behind tool in my article on centering the anchor point.

If you want to keep the layer in place but move the mask instead then you only need to highlight the layer, press M on your keyboard to bring up your masks, click the mask you want and then either move the mask or use the mask path property to alter its position.
To free transform the mask, simply double-click on the mask path and then you can move it, scale it or rotate it. To keep that change you just need to click off the mask anywhere else in the composition.
Mask Tracking
A very common and incredibly useful application for masking in After Effects is to track a mask across your timeline. If you are cutting out an object that moves then this is a skill you need to know and master, it will save you a lot of time when compared with moving the path every frame.
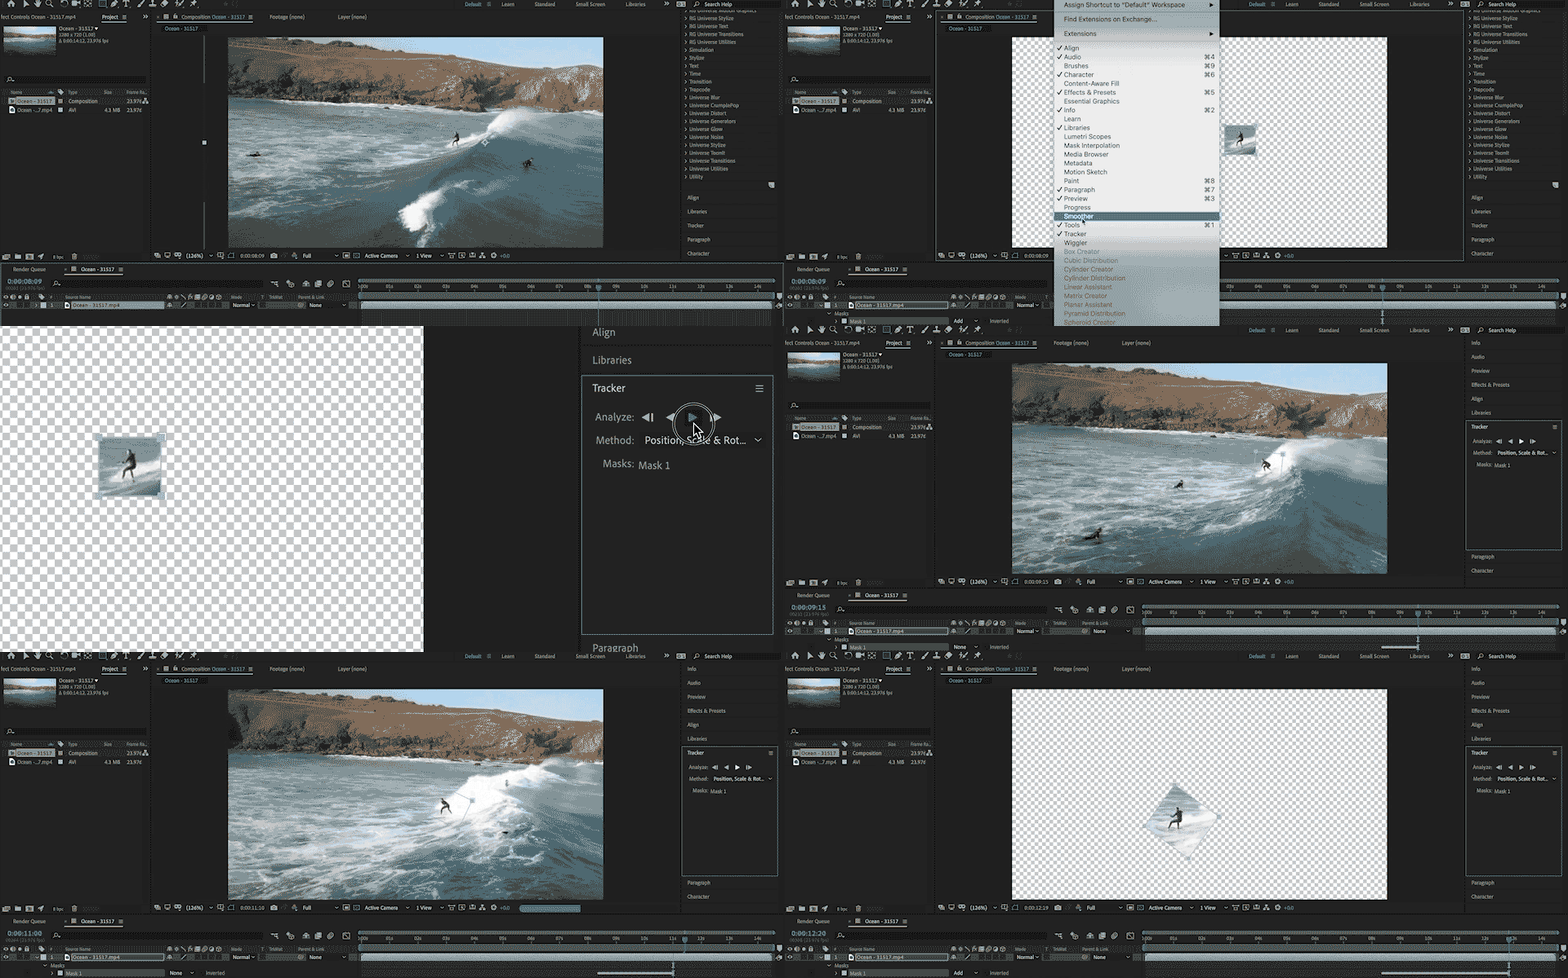
Step 01 – create your mask around an object using the pen tool.
Step 02 – head to Window and choose Tracker. This will open up the Tracker window pane which will allow you to track a mask over time.
Step 03 – click and highlight your layer mask and ensure you are on the frame you want to start tracking from. Now click the play button in the Tracker tool to start tracking the mask. It will create keyframes on each frame for the movement of the mask.
Step 04 – if the tracker doesn’t quite get the right placement of the mask on a frame then stop the tracker, move back to that frame, correct the mask and then start the tracker from that frame again. It will carry on creating keyframes from that frame and keep all the previous keyframes it created.
Step 05 – add any effect you need to the layer and it will now be applied only within the mask area and across the duration of your tracked mask. This is incredibly useful for blur masks, color corrections of certain objects and many more uses.
Creating a Vignette Using Masks
Vignettes are incredibly common and if used correctly they should also be incredibly subtle. Not only that but they are also very simple to create using masks in After Effects.
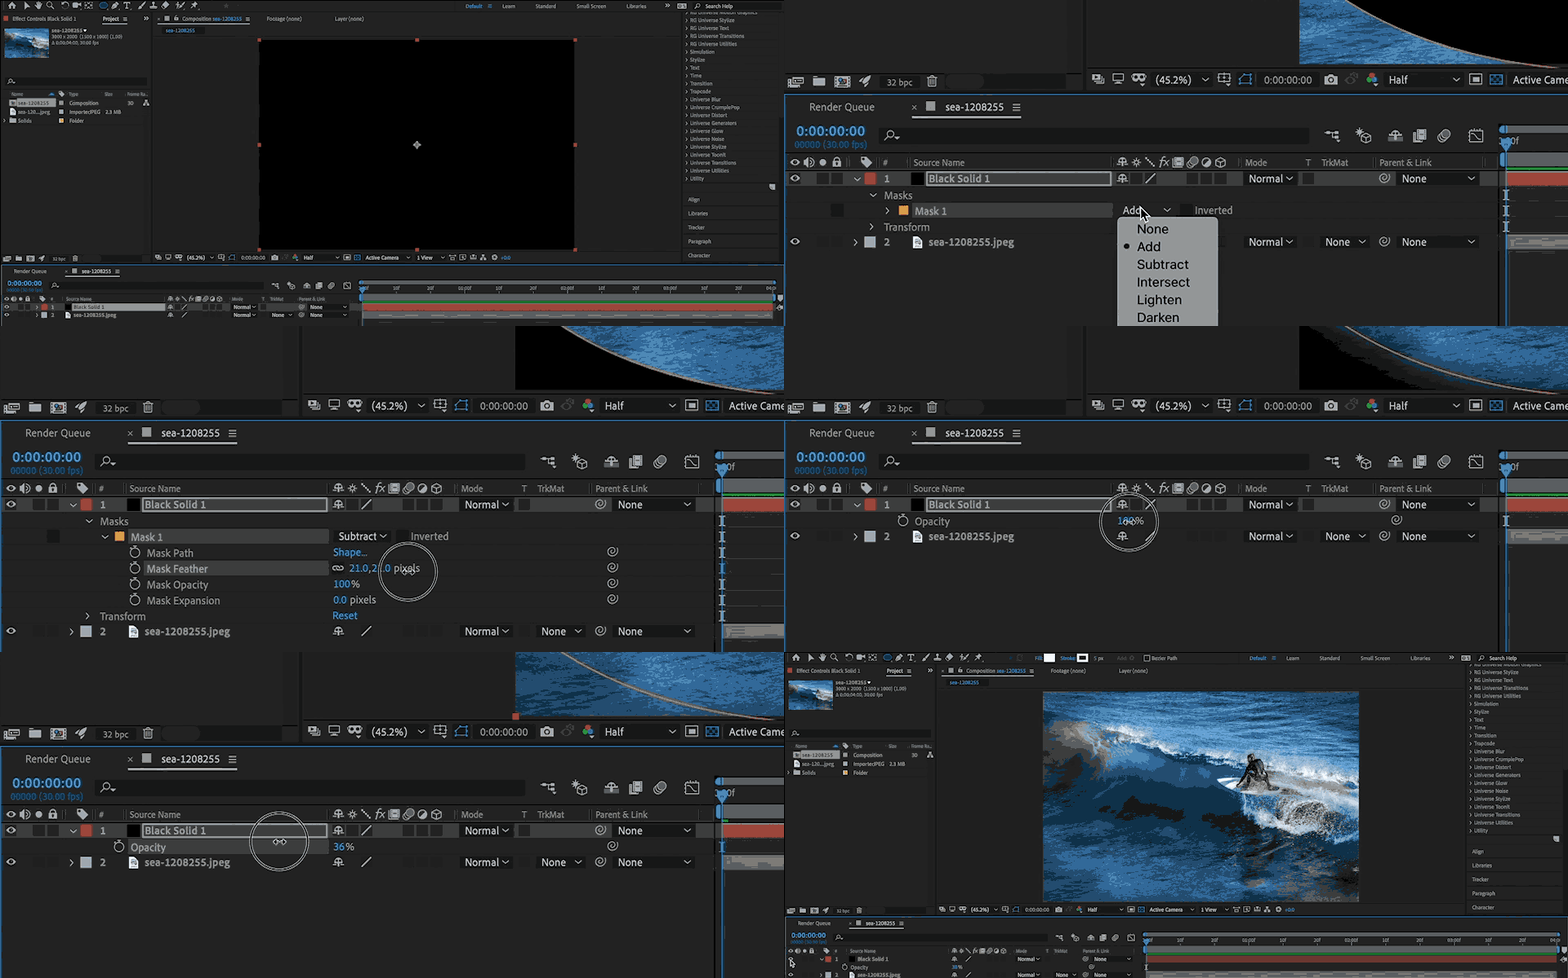
Step 01 – create a new solid layer by going to Layer-> New-> Solid.
Step 02 – make the solid black in color.
Step 03 – select the ellipse tool from the Shape tools or cycle through by pressing Q on your keyboard. Draw an ellipse across your composition on the solid layer.
Step 04 – now change the mask mode to subtract, so that the middle of the mask shows your comp through it.
Step 05 – use the mask expansion and mask feather to create a large gradient from edge to edge.
Step 06 – use the layer’s opacity property to bring the opacity of the black vignette down and make it more subtle.
Pro Tip: you can create a blur vignette using the same method but instead of creating a solid, create an adjustment layer then add a blur effect to it.
Practice, Practice, Practice
Masking is a skill you will hone over time and it really does just take practice to master it.
Using masks in the right way at the right time will also be a learning curve that you can’t avoid.
Remember to have fun with it and play around with what masks can do and the creative possibilities that they can present to you.
If you enjoyed this tutorial, found it useful and want to know more then let me know in the comments below what you’d like to see next.
Work smarter, not harder.
DigiProTips

