Quickly and Simply Add a Wiggle Expression in After Effects to Level Up Your Animation
Expressions are super useful tools when working with After Effects. The wiggle expression is probably the most used and easy to use out of all of them.
Pretty much every motion graphic designer, visual effects artist and editor who uses After Effects knows this expression.
If you’ve heard the name Andrew Kramer then you’ll certainly have heard of this expression!
So, roll up you sleeves, fire up After Effects and let’s dig in!
How do I know what I’m talking about? Head to the DigiProTips Experience and Background page to find out how I’ve built up my knowledge over a career spanning feature film, broadcast TV and digital content production.
The Quick Answer to Using the Wiggle Expression in After Effects
Find the layer property you wish to wiggle.
Alt/Opt click the stopwatch icon.
A text field will open to the right in your timeline.
Type in: wiggle(2,50)
Click off the layer and preview your timeline.
Your layer properly will now wiggle.
Change the values in the brackets to alter the frequency and amplitude of the wiggle.
What Does the Wiggle Expression Do?
The wiggle expression in After Effects pretty much does what it says it does, it wiggles something.
Whether that is the position, rotation, scale or opacity of a layer. They can all be wiggled.

Why would you want to wiggle something?
Well, there’s many reasons but if you’ve seen an effects shot where a candle is flickering or there’s camera shake, you can bet that it was achieved with a wiggle expression.
The wiggle expression is a very quick and easy way to automate what would usually be done through keyframing.
Not only do they save you time when setting them up but they are very easy to change afterward too.
So, if you are working on a client project and they ask to change the intensity of the camera shake you’ve applied, it’s as easy as putting a different number inside those brackets. Rather than having to go and unpick your Keyframes and mess about with that.
That’s working smarter and not harder!
Changing the Frequency & Amplitude of the Wiggle
As I mentioned in the quick answer above, you can alter the frequency and/or the amplitude of the wiggle effect by changing the value of either inside the brackets.
For example, if I change the value of the first number to 30 then the layer will try to rotate 30 times a second:
If I change the value of the second number in brackets then this will make the layer rotation pivot further each time it does rotate (amplitude):
What if I Want to Wiggle on Only One Axis?
So you may have noticed that the wiggle expression above makes that particular layer property wiggle on both the x and y axis.
However, that’s not always what you want to do. You may just want to wiggle the scale of something on the y axis and keep the x axis stable.
To do that you need to alter the expression slightly but it’s not too difficult to do.
To Wiggle Only on the X Axis (Horizontal)
Use the following expression:
org=value; temp=wiggle (5,50); [temp[0],org[1]];
To Wiggle Only on the Y Axis (Vertical):
Use this expression:
org=value; temp=wiggle (5,50); [org[0],temp[1]];
Non-Continuous Wiggle
Another aspect of wiggling that you may want to control is having the wiggle start or stop at a certain point, rather than have it wiggle continuously.
To do this we need to employ the use of a null layer (a non-rendered layer that can be used to control other layers).
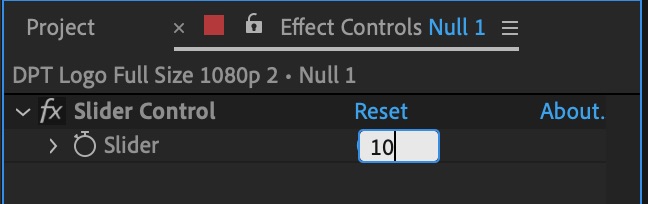
We’ll apply an Effects Control Slider to the null layer to control the amount of times the expression wiggles a second (frequency).
So, to do this. Add a new null layer to your composition.
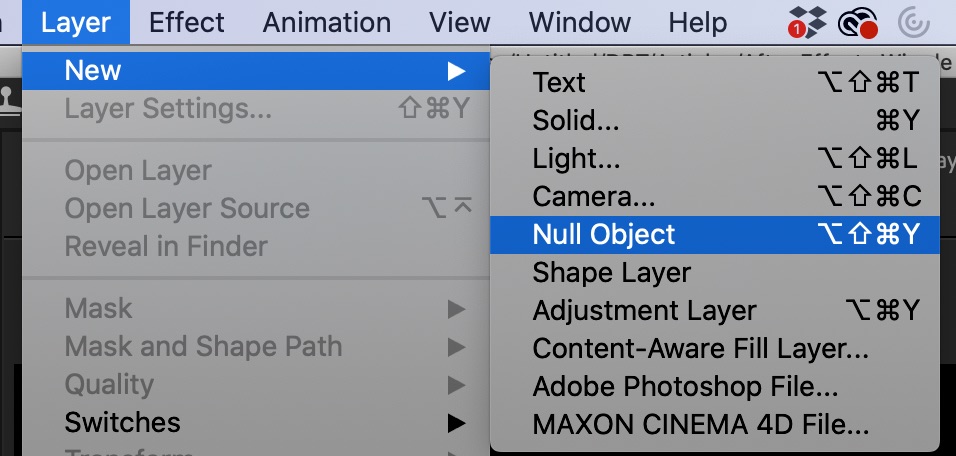
Add the Control Slider effect to that null layer.

Twirl down your layer to reveal the wiggle expression and then highlight the first number in the brackets.

Now grab the pickwhip (the curly icon) and drag it over to the control slider effect of the null layer.
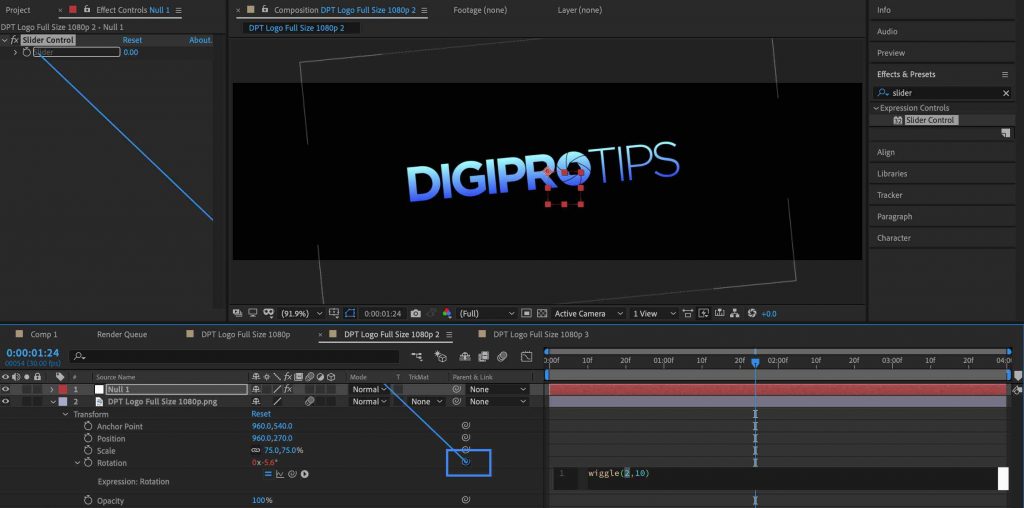
The slider control will now change the frequency value of the wiggle expression.
You can then Keyframe the control slider to bring the wiggle to a stop or a start whenever you like.
And That’s It!
There you have it, you will be wiggling forever onwards now that you know how easy the expression is to apply and manipulate.
For a tutorial on keyframing check out this post here:
And for more After Effects expressions why not learn how to add a bounce effect:
If you found this tutorial useful and want to learn more then please do write a comment below with what you would like help with next.
DigiProTips