You’ve done it! You’ve created your first motion graphic project in After Effects!
“Now, how do I export this thing so I can view it elsewhere, send it to someone or use it in an edit?”
Well, you’ll need to use something called the ‘Render Queue’.
“A what what?”
Don’t worry, we’ve got your back. Carry on reading and you’ll soon know how to export your After Effects composition for all the world to see.
How do I know what I’m talking about? Head to the DigiProTips Experience and Background page to find out how I’ve built up my knowledge over a career spanning feature film, broadcast TV and digital content production.
Watch the Video
The Quick Answer to Rendering in After Effects
Rendering/RAM Preview
Step 01 – define your work area by dragging the work are bar or move your playhead to the point where you want your composition to end and press the keyboard shortcut N.
Step 02 – press the spacebar on your keyboard and wait for After Effects to render the timeline to RAM. You’ll see each frame turn green in the status bar above the timeline once a frame is rendered.
Step 03 – watch your composition play in real-time. If you render is taking a long time to progress then you may need to change the quality to half, a third or a quarter resolution.
To Export
Step 01 – Make sure your composition is selected in the timeline.
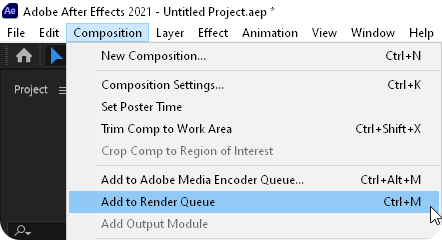
Step 02 – click Composition -> Add to Render Queue
Step 03 – define your format, codec and audio settings in the ‘Output Module’
Step 04 – choose your output destination
Step 05 – click the green play button to render and export your file.
Terminology – Rendering, Exporting & Encoding
As you have just read above, there are different terminologies for the process of rendering or exporting video in After Effects.
The term ‘render’ is often used interchangeably with ‘export’ in the industry but it’s not actually correct.
To ‘render’ in After Effects, or any graphics software for that matter, simply means to visualize your creation as a whole. It does not necessarily mean having a separate video file at the end of the rendering process.
So, in After Effects, this means that rendering is the process of storing each frame in the timeline in computer RAM, for it to playback in real-time. If you have disk cache turned on then that also means using disk space to store a pre-rendered version of your timeline that you can playback in After Effects more easily but it is not a separate video file.
Exporting on the other hand is the process by which After Effects will take rendered frames, re-encode them and export them to a separate video file of your choosing.
It becomes even more confusing when the tool inside After Effects that you use to export is called the ‘Render Queue’.
RAM Preview/Pre-Render vs Render Queue
As I mentioned above, there is a difference between rendering and exporting.
One is to visualise what you have created and play it back within the software.
The other is to have a separate video file using what you have created in After Effects.
Confusingly, rendering does not use the render queue but the render queue does ‘render’ when it is exporting.
Yep, it’s enough to make your head explode but it is logical, trust me.
You see, all frames you create in After Effect need to be ‘rendered’ at some stage, whether that’s to playback or to export. However, not all playback needs to be ‘exported’.
Using the Render Queue
So, if you followed along with the quick answer above then you will have used the render queue.

This is the in-built exporting tool within After Effects that is used to create a video file from the frames in your timeline.
There are a couple of routes to get your composition into the render queue (and a couple of extra options below in the pro tips too).
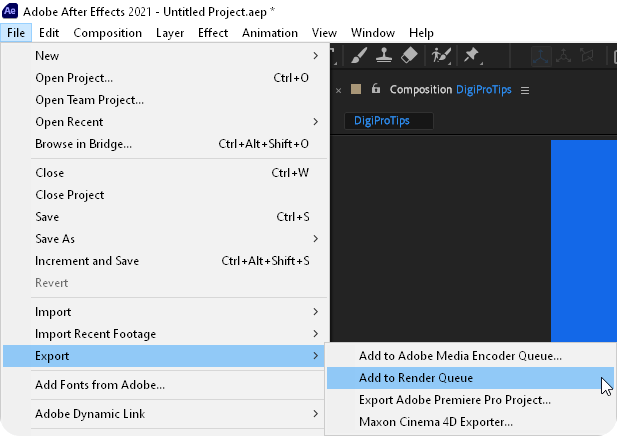
Add your composition to the Render Queue by clicking anywhere in your timeline and then going to Composition -> Add to Render Queue OR File -> Export -> Add to Render Queue.
As was mentioned in the Quick Answer, a new Render Queue tab will open up in your timeline panel and you’ll be presented with a few options to change before hitting Export.
Render Settings
In the Render Settings you will choose the quality level of your final video file.
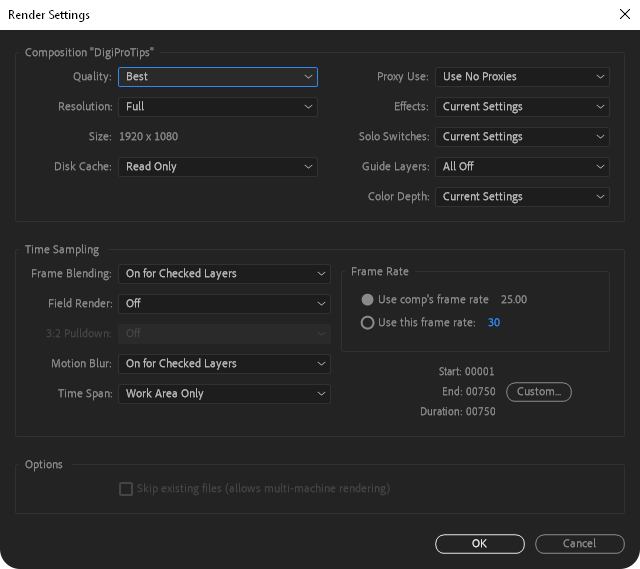
After Effects defaults to ‘Best Settings’ and this is usually fine but it is always worth checking this section to ensure it is the correct resolution and quality level you require.
The reason being that if you have a half-resolution comp that you use within your main comp and you want to export this comp at full resolution, well After Effects will use the composition settings to export with as its ‘Best Settings’, instead of the full resolution that it could be.
Output Module
The output module is an important setting that you will use to change the format wrapper and codec of your video file. Including whether you need an alpha channel or not.
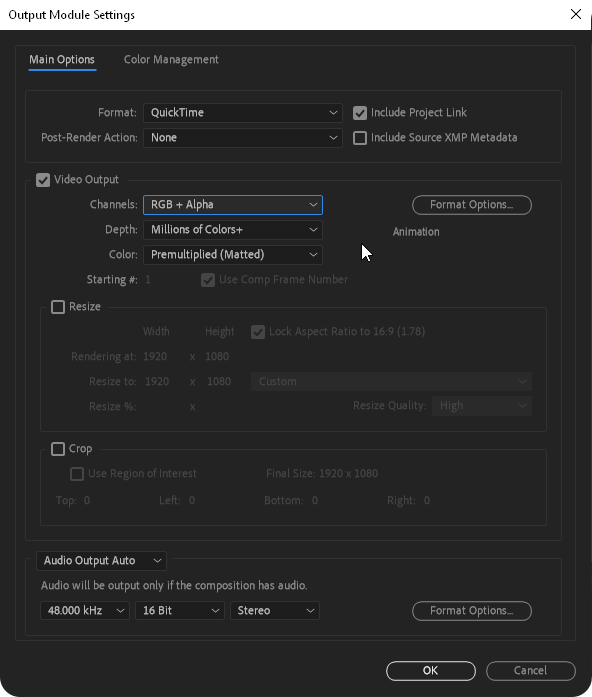
For more on alpha channels, codecs and video formats then check out my article here:

In most instances, and for any animation that utilizes an alpha channel then using the Animation codec in a Quicktime wrapper will do you perfectly. It has a great balance between quality, file size and render speed.
Output To
The Output To setting is purely where you would like your final video file to end up.
The best practice is to render your file to a separate disk to the one that After Effects will be using to read your data from in the rendering process. Reading and writing to the same disk at once will slow your export time.
Rendering Pro-Tips
Working smarter and not harder is all about saving time wherever you can to get to the same result so that you have more time to be creative.
These tips do exactly that but get to know how the workflow works before jumping into using these.
Drag & Drop
A great Pro Tip for getting your composition to the Render Queue quickly is to just drag and drop it.
If you have the Render Queue tab already open then you can simply drag your composition to the Render Queue and it will be added as an output task in the queue.
Keyboard Shortcut
Even better than clicking and dragging is to use keyboard shortcuts.
The keyboard shortcut for adding your composition to the Render Queue is CTRL+M/CMD+CTRL+M.
This will work from any composition as long as your composition panel is active.
For more After Effects shortcuts check out some of the most underrated right here:

Multi-Machine Rendering
Now, this will only be an option for you if you have shared storage and your post-production team are all connected to it from the same LAN. Remotely connected teams won’t be able to use this functionality.
For information on getting your team set up on shared storage then check out my post-production storage solution article here:

Multi-machine rendering is the ability to use After Effects on multiple machines to create a render farm and export your composition much quicker.
To caveat, each machine needs an Adobe seat on a license and each machine needs to be using the same version of After Effects.
A further caveat is that this only works for image sequence exports.
To take advantage of this great feature then send your composition to the Render Queue and click the drop-down menu next to ‘render settings’.

Here choose ‘Multi-Machine’.
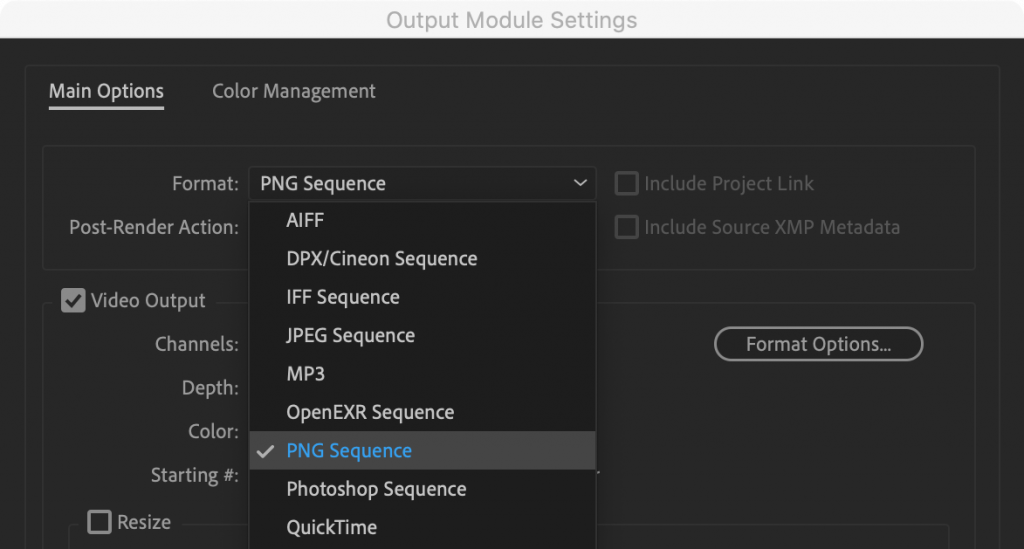
Now go to the Output Module and choose an image sequence of your choice. Once those are configured choose where the final sequence is to be saved in the ‘Output To’ settings.
Save your project and hit export on this PC.
Now you simply need to open the saved project on each of the other PCs and hit export too.
You’ll see each computer take a different frame to render and therefore share the load between all the computers in the chain.
For a more in-depth guide to multi-machine network rendering take a look at our article on it right here:
Work Smarter, Not Harder
There you have it, everything you need to know and more about rendering from After Effects.
If you found this tutorial useful and would like to learn more the let me know in the comments below what I can help you with next.
For more information on export settings and specifically MP4s then check out this article:

DigiProTips

