Welcome to part two of our series on greenscreening. In part one we looked at how to set up a greenscreen, light it and where to place your talent. In this part we’re going to look at the post-production side of greenscreen work and how to pull the perfect key.
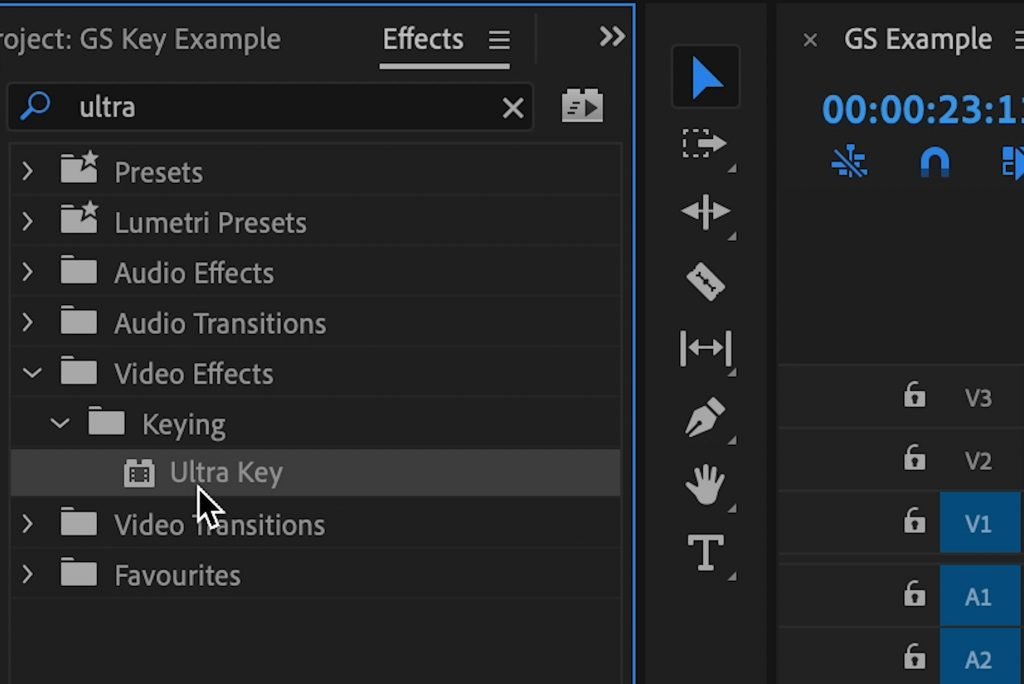
To do this we are going to use the ‘Ultra Key’ effect inside Premiere Pro but you could also use the ‘Keylight’ effect inside After Effects if you are more familiar in that environment.
First steps
Once we have our footage of our talent against the greenscreen in our timeline we need to scroll through to find a frame with the most movement in it.
By this we mean if your talent moves their arms around the frame then we need to find the frame where the talents arms cover the most of the frame.
After locating this grab your pen mask tool and mask out around the talent at that point.
Why are doing this?
Creating a garbage mask means that the software is only keying out the information that it needs to and not doing unnecessary work by keying out areas of greenscreen within which the talent never enter.
Now, Let’s Key
Now, grab the Ultra Key effect from the effects panel in Premiere Pro and drop it onto your footage in the timeline. Head to the Effects Control panel and locate the effect there.
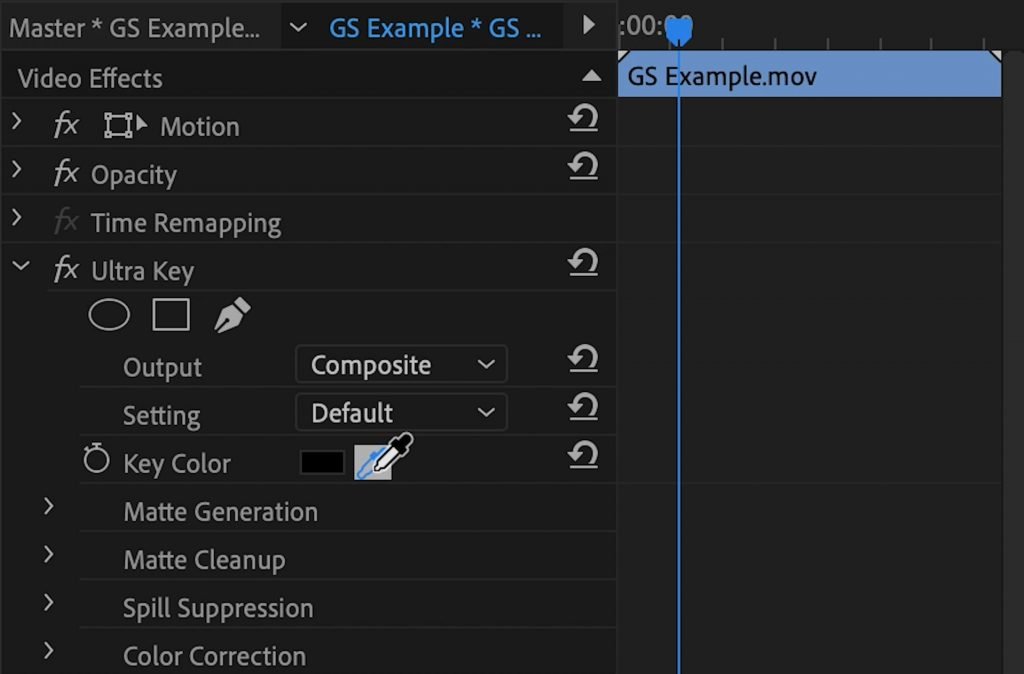
Click on the eye dropper next to ‘Key Color’ and then click on the space nearest to your talent’s head or focal point of the frame. This should automatically choose the correct shade of green from your image and instantly provide you with a default key.
Granted, this won’t be the best key you’ve ever seen and you should never rely on the default key that the effect will pull for you. In fact, if you are going to rely on any of the default settings at all (we strongly advise against it) then you can use the ‘Aggressive’ setting. This will refine edges and tolerance further than the default.
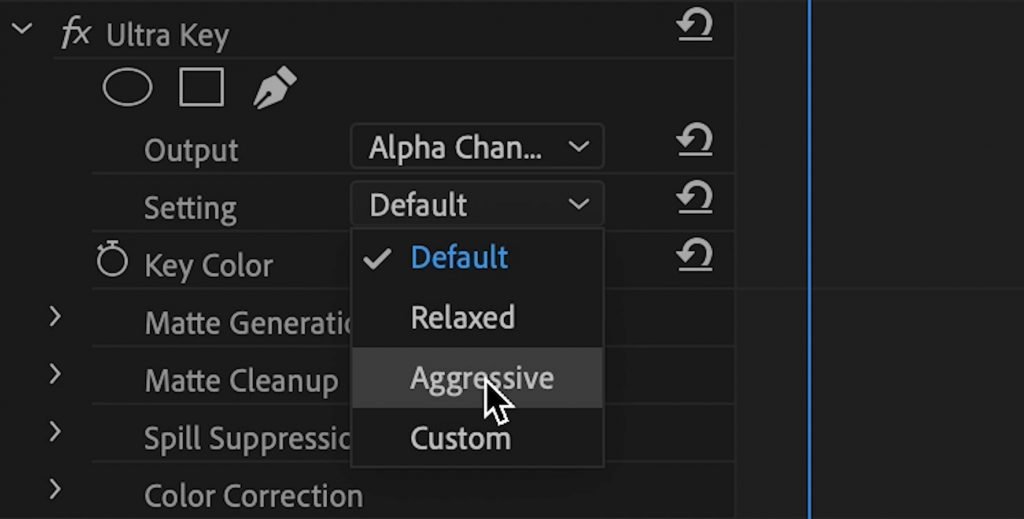
We are going to use the ‘Aggressive’ setting as the base for us to work from to refine our key further.
The Perfect Key
The perfect key is the elusive goal that we all strive for when working with chroma screens. There are many steps of trial and error when pulling a key and every key will be different to the last due to lighting differences, the talents clothes, skin tone etc.
However, following the steps in part one to set up your greenscreen properly before shooting will give you the best fighting chance at a great key in post-production. Following the below steps will also give you great results every time with tweaks here and there.
We are now going to manipulate each of the individual parameters under the four dropdown options in the effect, ‘Matte Generation’, ‘Matte Cleanup’, ‘Spill Suppression’ and ‘Color Correction’.
Matte Generation
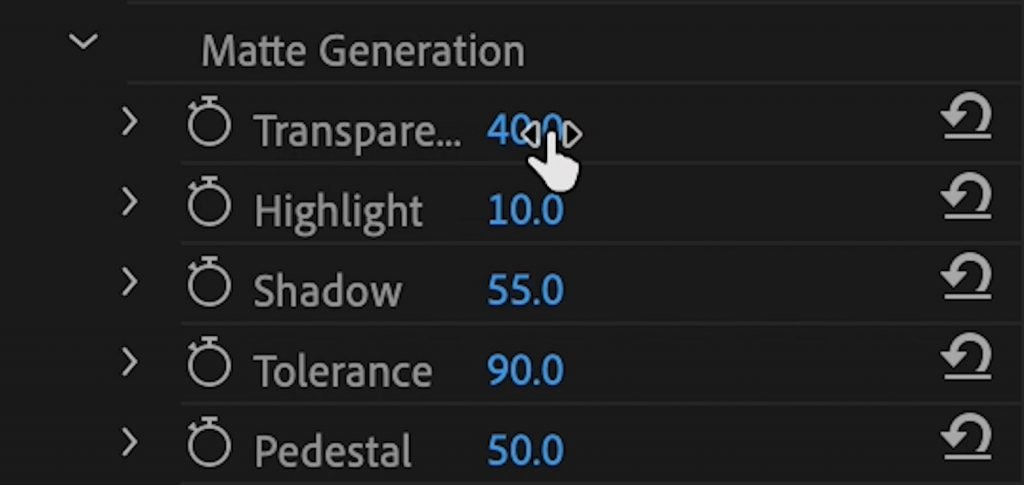
Drop down the toggle for matte generation in the Ultra Key effect and you will see the further options of transparency, highlight, shadow, tolerance and pedestal.
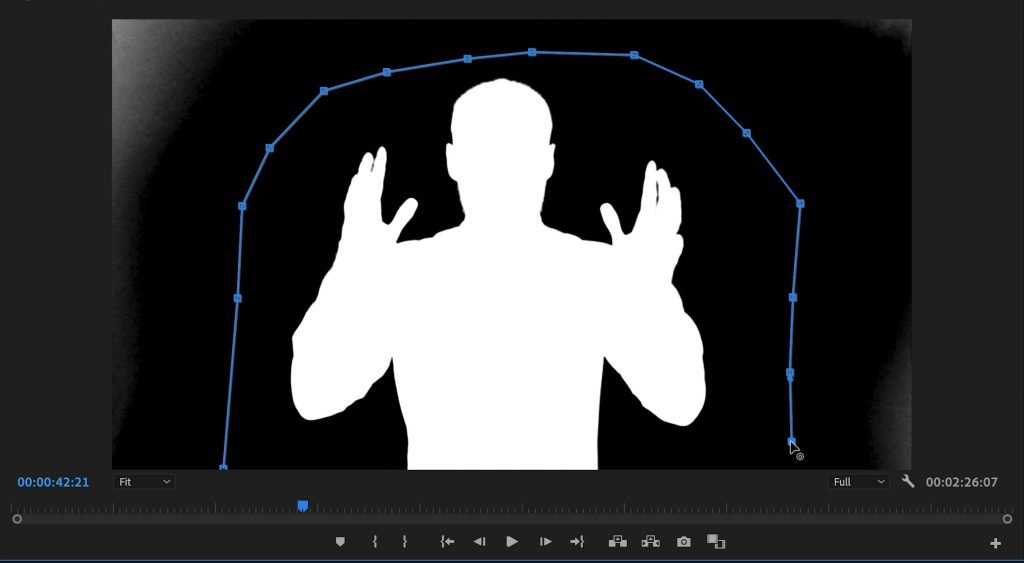
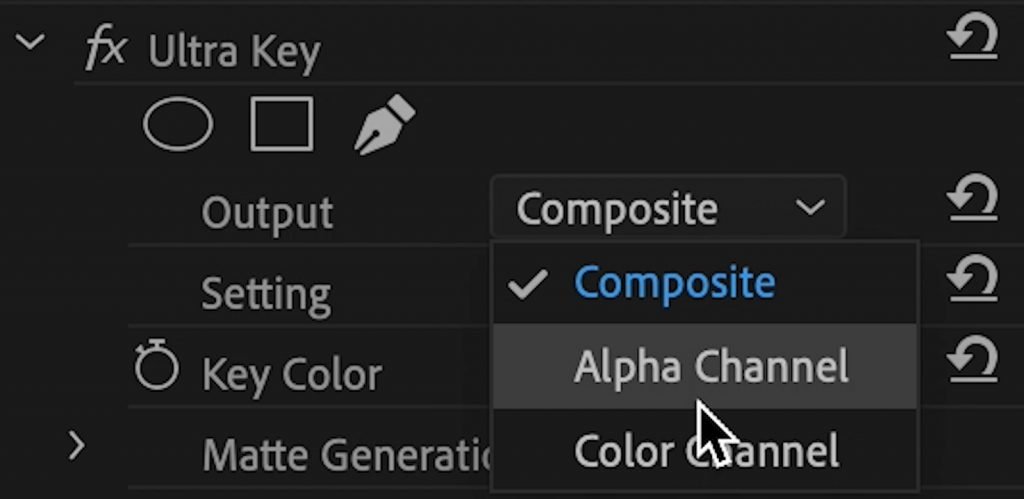
Let’s look at ‘Transparency’. The transparency toggle controls exactly what it says, how much transparency you will see through your new greenscreen alpha channel. You obviously want the greenscreen to be completely transparent so adjust the slider until it is (if it isn’t already) but be careful not to introduce transparency on your talent by pushing it too far. To check your alpha channel matte you can go back up to the ‘Output’ dropdown box and change it to ‘Alpha Channel’ to see exactly what your matte looks like.
The highlight slider will control the lighter areas of your greenscreen key and alter the alpha matte of those areas. You shouldn’t need to alter this too much if your screen and talent were set up and lit properly first.
The shadow slider can change a lot in terms of refinement of your matte. If your footage is under or over exposed then this slider will help get those shadow areas to become transparent that the effect might not have been able to get in the default ‘aggressive’ setting. Again, be careful with this setting as you can start to make the shadow areas of your talent become transparent too. This will be most evident in their hair when you play your footage back.
Tolerance is exactly what it says it is, it controls the tolerance of the generated effect mask. Altering this will show changes around the edges of your talent the most but we will get to edge cleanup in the next big drop-down menu.
Pedestal. We’re not completely sure why pedestal is included in Ultra Key as it harks back to TV days with analog signals and sets but essentially this is the same as a ‘lift’ setting in grading software. It compresses your black levels across the whole image. Be careful with altering this setting too much.
Getting the sweet spot for your alpha matte involves a lot of trial and error at the start and you can spend a long time getting it ‘perfect’ but that in itself is subjective when it comes to greenscreen keys. Instead of ‘perfect’ we want to get our key to a level where it is not perceivable that the greenscreen was ever there in the first place.
Matte Cleanup
This is where we look at the edges of your new key around your talent or subject.
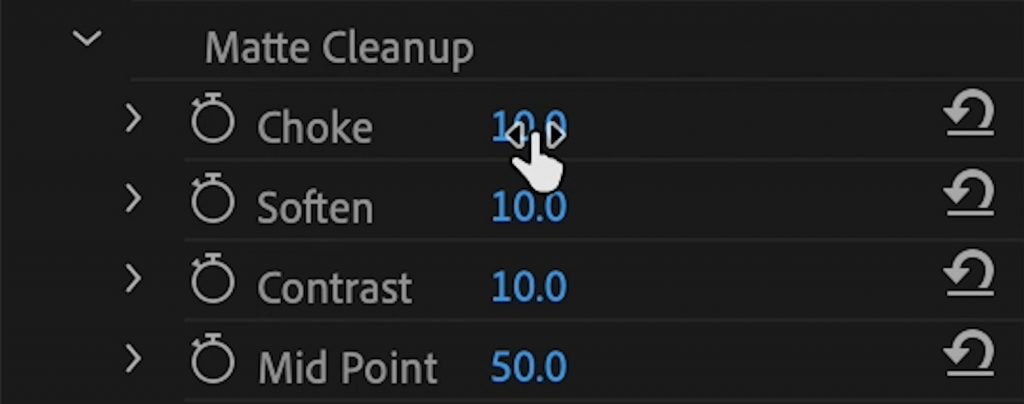
In this category of Ultra key settings you have further sub settings of ‘Choke’, ‘Soften’, ‘Contrast’ and ‘Mid Point’. We are only really going to concern ourselves with choke and soften here.
Choke is the word Ultra Key uses for saying how far to take in the edges of your greenscreen key. If you alter this setting and look closely at the edges around your talent or subject you will notice that it starts to come in around your talent and you can quickly lose an ear of your talent if you’re overzealous with the effect. Our advice here is to use the effect to reduce any noticeable green edges but don’t lose too much detail. We can then ‘soften’ that edge to blur it into our background after.
As stated, soften will find the edges of your greenscreen key and essentially blur them to ‘soften’ them against the background, which in this case is currently our alpha channel. Again, be careful and use the effect to take the edge off but not be noticeable that your talent has a weird blurred edge all around them.
Spill Suppression
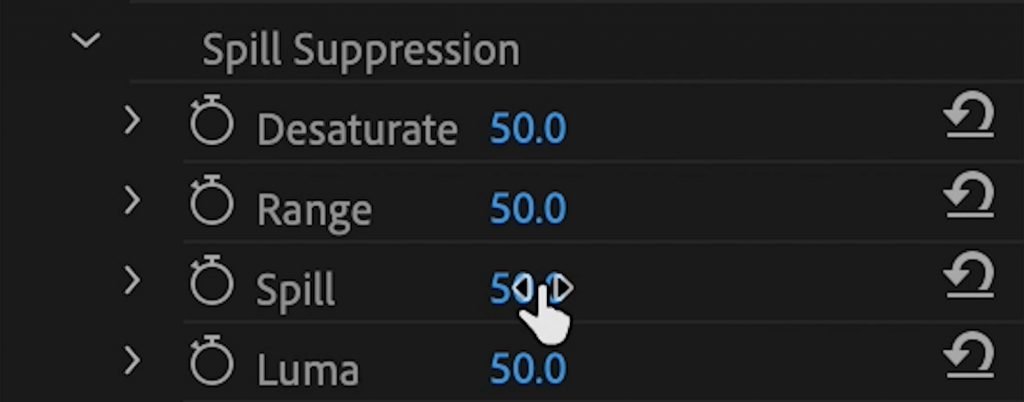
Spill suppression is where we can take care of any green hue’s that are still affecting your talent or subject. Greenspill happens when your talent is too close to the greenscreen without adequate lighting between the screen and talent to negate that bounce-back of green light onto them.
Our advice here is to use the ‘Spill’ setting first to find a level of suppression you are comfortable with and then use a small amount of the ‘range’ effect to ever so slightly change the hue away from green and towards red where you will see more natural skin tones start to come back. Only use a very, very small adjustment of the range value though.
Color Correction
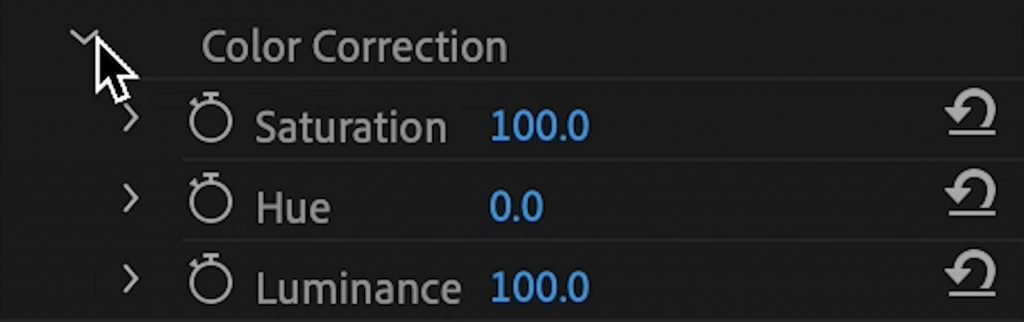
The settings in here are rather limited and we would actually advise you use a separate adjustment layer with a Lumetri Color effect on to make any color corrections on your newly keyed out talent or subject. You may also find it more worthwhile to use that instead of the ‘range’ setting under spill suppression.
Tweak and tweak again
That is the fundamental basic setup for pulling a great key in Premiere Pro. However, as we stated above getting it to where you deem it ‘perfect’ is very much going to be trial and error. Play around with the settings to see how they affect your image and resulting matte and then refine.
The video at the top of this post will give you an even better visual representation of how each will alter your key and give you our ‘best practices’ for priority order of key manipulation.
Happy keying folks!
Think you know your Premiere Pro shortcuts inside out? Check out some of the Most Underrated Shortcuts here:

DigiProTips


Pingback: How to Set Up a Greenscreen -
Pingback: How to Get the Best YouTube Channel Studio Setup - for the Lowest Budget -