It’s happened, you’ve finished your shoot, got back to the edit suite, opened up your footage and there it is… noise all over your shot! And now you’re Googling ‘noise reduction in Premiere Pro’.
Why? How? What can I do about it?
These are very good questions that we’ll answer right here, right now.
How do I know what I’m talking about? Head to the DigiProTips Experience and Background page to find out how I’ve built up my knowledge over a career spanning feature film, broadcast TV and digital content production.
What is video noise?
Video noise/grain is when your video footage has a grainy/noisy/fuzzing look to it and it usually happens on particularly dark shots. It is also something that only affects digital footage, though traditional film has grain that is a result of the negative film strip composition rather than the method within which the footage was captured. Traditional film grain has a certain look, and appeal, that digital noise does not.
It comes from a combination of your hardware set up and the shooting environment for your shoot.
In traditional film, you would not see grain/noise and instead would just see black. The reason for both black on film and noise on digital footage is the same though. The exposure was incorrect at the point of capture.
With traditional film, the negative is exposed to light through the lens and the image is imprinted on the film. If there is not enough light then the negative stays dark. With digital footage, you are exposing light to a computer sensor that then reads and captures that light to a digital image as part of a video file.
Because a sensor is neither black nor white, it needs to fill in the missing information with something. This ‘guess’ by the sensor is the resulting grain/noise. There wasn’t information in the light presented to the sensor therefore meaning the sensor does its best to represent the light it received. It is true that the bigger (and more expensive) the sensor, the more light it can capture from darker settings.
How to Stop it Happening Again
What causes digital noise is low light levels and not enough ‘information’ hitting the sensor. We therefore either need a bigger sensor to receive more information from lower light levels (which will be an investment in new hardware) or we can try to increase the light levels in the scene to allow more information to get to the sensor.
Investing in more lighting and learning how to light more effectively can be a significantly cheaper route than buying a new camera with a bigger sensor. My post here on lighting setups should get you off to a good start if you are new to this.

Even low-cost fill lights can improve your results by allowing you to reduce the ISO in your camera settings. The higher the ISO the more grain/noise you will see in your image.
Ultimately, you want the lowest ISO you can get while maintaining a good image composition. Lighting is key to this. Even with the biggest and best sensor in the world you still need to light your scene properly in order to achieve good results from your shoot.
What Can Be Done About It – Noise Reduction In Premiere Pro
Now that we know what caused the noise in the first place and how to stop it from occurring again, we can try and mitigate the results this time by removing background noise from video in post-production.
Luckily there are two plugins that are great for removing background noise from video. They also work with most NLEs but for the purpose of demonstration, I’ll be talking about noise reduction in Premiere Pro.
DISCLAIMER: This post may contain affiliate links. We make a small commission if you buy the products from these links (at no extra cost to you). As a ToolFarm Associate, I earn from qualifying purchases. But we only recommend products we would use ourselves. For more information, click here to see our disclosures.
Neat Video
The first denoiser for Premiere Pro comes from a company that specialises in doing exactly this, removing background noise from video, and only this.
Neat Video has been engineered and designed with the sole purpose of cleaning up noise in video footage. Be it mobile, film, digital, or any type of digitised footage, Neat Video can clean it up.
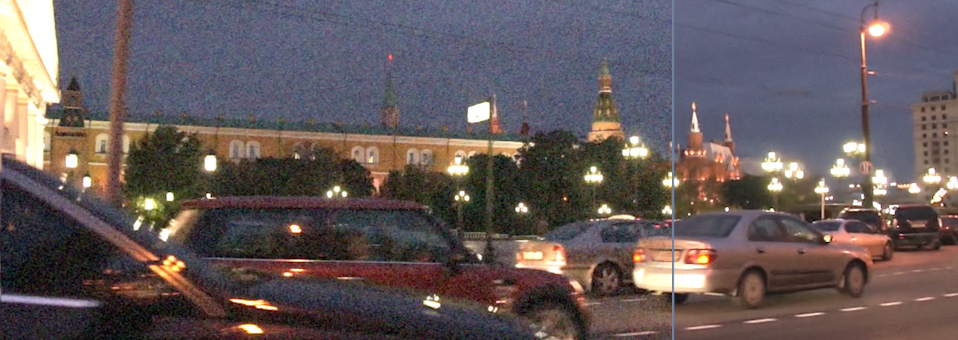
The way that Neat Video works is similar to how the noise cleanup software inside audio editing programs works, such as Adobe Audition’s noise reduction feature. It analyses a section of the clip to create a noise ‘pattern’ it then knows what it is looking for in the rest of the clip, and perhaps subsequent clips, to filter that pattern out.
This is all done automatically too. Once a pattern has been identified, it uses a process of spatial and temporal filtering, frame-by-frame, to further reduce noise, grain, and scratches to achieve smooth, polished, noise-free pictures.
Neat Video has been designed to work with a wide variety of computing power available today and can be utilised by pretty much any system. It can even utilise GPU acceleration, if available, to help speed up the process.
Because Neat Video is so dedicated to this one task it makes it one of the best noise reduction in premiere pro plugins out there.
When it comes to buying Neat Video, there are two options to choose from, Home & Pro. However, home is not for commercial use and is restricted to 1920×1080 output only. This means the Pro will be more appropriate for most reading this.
Pro is available for around $124. No monthly subscription, you buy the plugin and you own it.
How to Use Neat Video’s Noise Reduction in Premiere Pro
Neat Video is pretty easy to use once you are used to it but the first time could be slightly daunting.
Fortunately, I’ve provided a short breakdown here. Alternatively, you can also view the Neat Video Basic Workflow below:
To get started with Neat Video denoiser for Premiere Pro you need to install the plugin and then head to your effects panel and search for Neat Video.
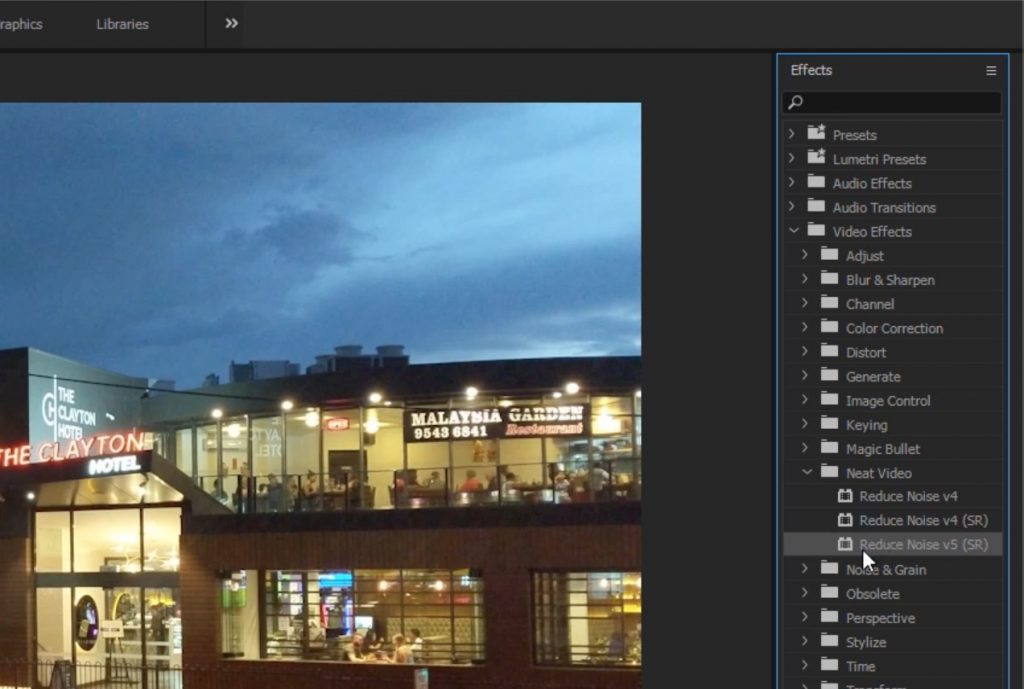
Drag ‘Reduce Noise v5’ onto your footage in your timeline and then head to the effects controls panel.
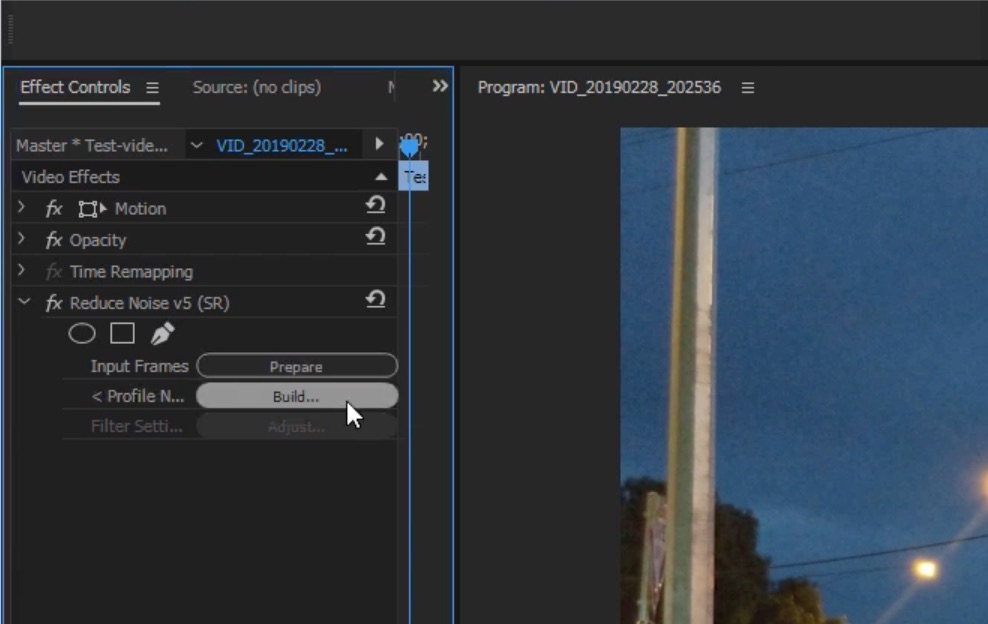
Click ‘Prepare’ to tell the plugin to use the frames in your clip and then click ‘Build’ to start the profile analysing process.
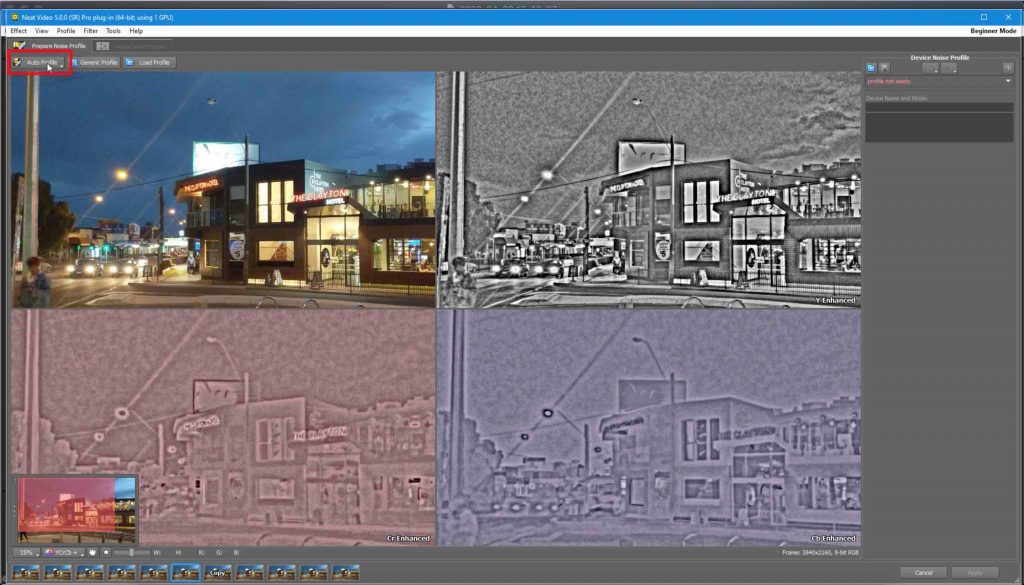
Once the Neat Video interface loads up you can choose to automate the build process by choosing ‘Auto Profile’ in the top left corner.
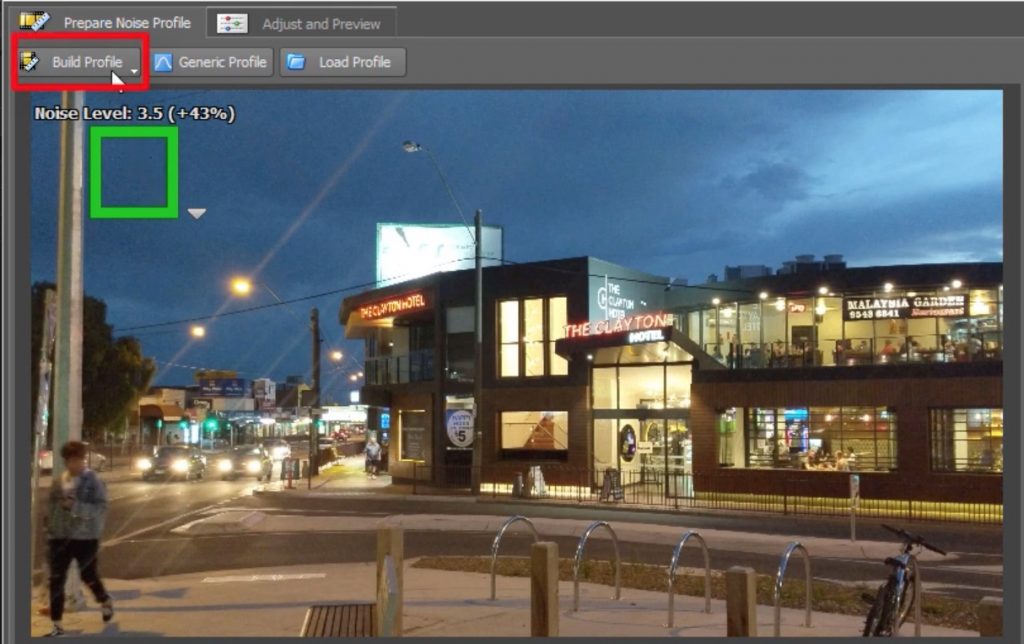
If the auto profiler doesn’t capture the worst of the noise then you can always move the capture box and choose ‘Build Profile’ instead
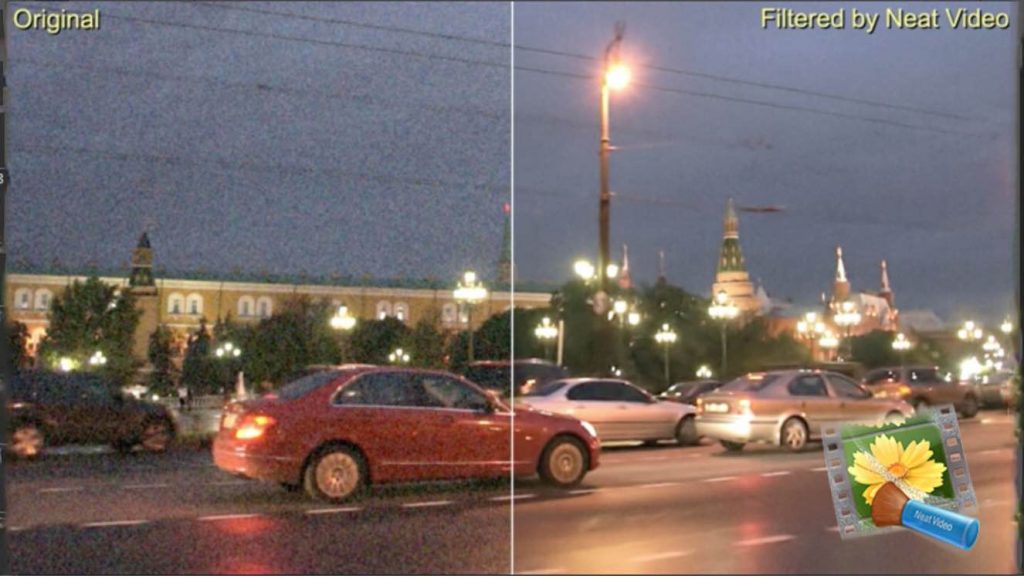
Once the profiler has worked its magic go ahead and press ‘Adjust and Preview’ to see your cleaned-up image.
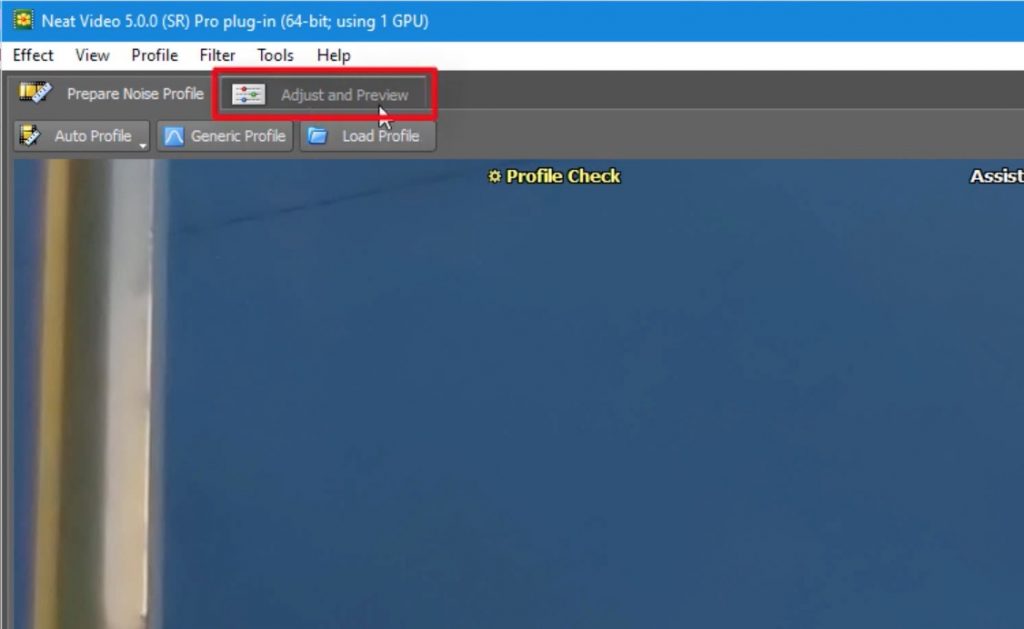
Click ‘Play All’ in this section and if necessary, you can adjust the settings of the noise reduction on the right-hand side. Once you are satisfied you can click ‘Apply’ in the bottom right and your clean up process will be applied to the footage in your timeline.
Your noisy/grainy/flickering shot is now fixed!
Easy, right?!

Neat Video Pro is one of the most advanced plugins for removing background noise from video. Remove, noise, grain, flicker and other digital errors in your footage.
Magic Bullet Denoiser III
The second way of removing background noise from video that I have for you is from a DigiProTips favourite brand, Red Giant.
Red Giant’s noise reduction for Premiere Pro, Denoiser III plugin, comes as part of the Magic Bullet Suite, a robust colour correction and grading software package.
Denoiser III is a powerful denoiser for Premiere Pro but the interface is substantially reduced, and at first glance easier to use, than Neat Video. However, when it comes to advanced noise reduction Neat Video does have the upper hand.
For ease of use and great results straight off the bat, then Denoiser III is a great option for removing background noise from video without having to go into too much detail and mess around with settings. Great for beginners to intermediates.
Their tagline for this software, ‘Fast, easy video noise reduction’, gives you an idea at how simple this is to use for noise reduction in Premiere Pro.
How Denoiser III works is also not as well explained by Red Giant and it’s probably fair to say, that it doesn’t go into as much detail with different filters behind the scenes as Neat Video does.
Denoiser III is GPU accelerated though. So, if you have a decent video card in your system then I highly recommend using it, noise reduction tools take a fair amount of computing resources to render!
It’s also worth noting that Denoiser III is only compatible with Adobe After Effects, Premiere Pro and Apple FCPX. It is not as widely supported for other programs, such as DaVinci Resolve, like Neat Video is.
To get Denoiser III, and the simplicity it brings. there are two ways you can get your hands on it. The first is a monthly subscription to Red Giant Complete, at $49/month, it gives you access to all of Red Giant’s plugins, not just the Magic Bullet Suite. I highly recommend taking a look at the other plugins from Red Giant and considering this option for access to many more powerful tools.
The second is to purchase the Magic Bullet Suite and get all of the powerful tools it brings, including Magic Bullet Looks, Denoiser III, Magic Bullet Colorista V, Magic Bullet Mojo II and more.
The Magic Bullet Suite is $999, which is a hefty price tag but for any videographer or editor looking to get into the game, this is a worthy investment that will pay for itself in the years to come!
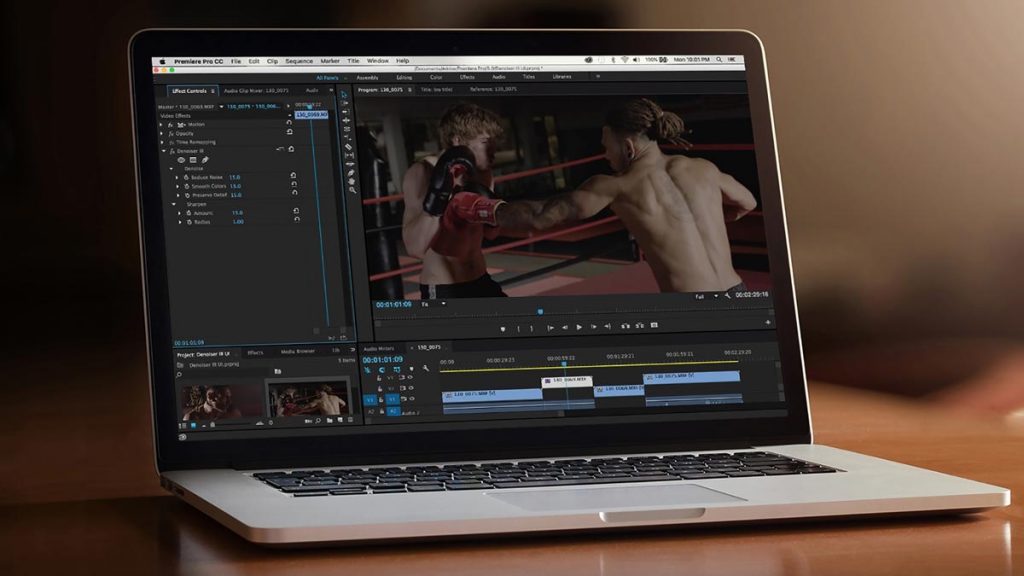
How to use Denoiser III for Noise Reduction in Premiere Pro
As the tagline suggested, getting started with Denoiser III really could not be simpler.
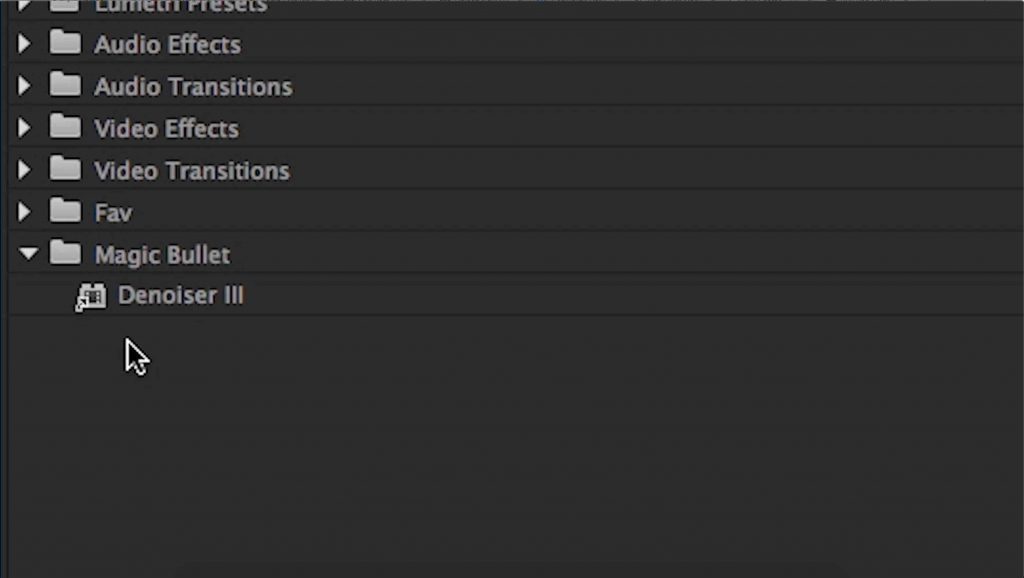
Search for the effect in your effects panel and then drag it on to your clip in the timeline.
As soon as you add the effect to your clip you should see an instant transformation.
Give your timeline a play and see the results in action (you might need to pre-render first depending on your hardware specs).
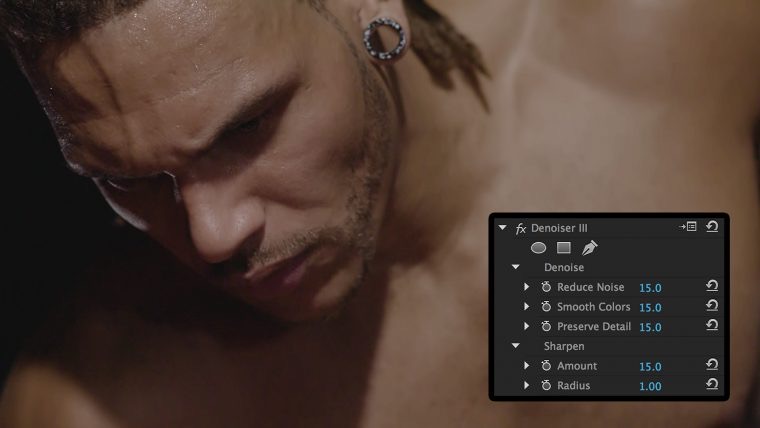
If you aren’t immediately impressed you can tweak the settings further and push the plugin using the controls in the effects control panel.
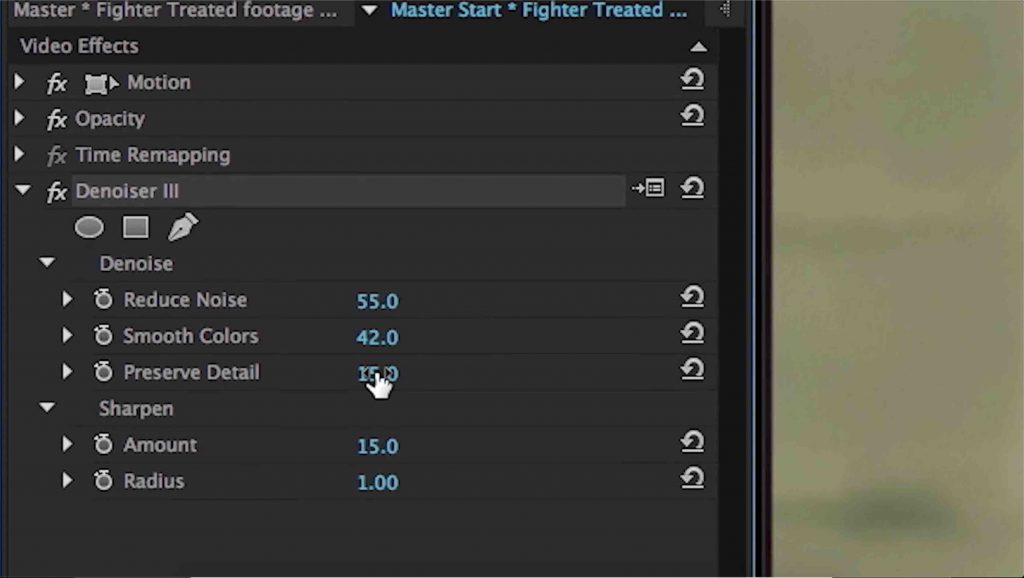
However, by simply adding the effect and leaving the default settings usually does the trick.
And that’s it!

Trapcode Suite, Magic Bullet Suite, VFX Suite, and Universe now available together as an inexpensive annual subscription from Red Giant.
So, there we have it. Now you know what caused the noise in the first place, how to stop it from occurring again, and two ways for removing background noise from video as well.
If you want more from Red Giant, check out my article on Why Red Giant Universe is the best Red Giant plugin:

DigiProTips

