How to record a podcast on iPhone or Android. Is it even possible?
Podcasts are big!
Podcasts are even bigger since lockdown and now everyone wants to join in on the action.
I’ve covered how you can set up a podcast studio for three different budget levels here:
But I only briefly touched on how to record a podcast on iPhone or Android in that post. I’m going to go full-on mobile-first in this one.
How do I know what I’m talking about? Head to the DigiProTips Experience and Background page to find out how I’ve built up my knowledge over a career spanning feature film, broadcast TV and digital content production.
Audio Recording on iPhone or Android – Recording Environment
Where you record is just as (if not more) important as to how you record a podcast on iPhone.
The environment within which you set up your podcast equipment has a huge impact on the sound quality of your recording.
We therefore need to think carefully about where you are intending to record, whether it’s a static position each time, or if you are going to be travelling around then what you can take with you to minimise external factors and ensure a consistent sounding production each time.
Let’s take a look at some examples:
Home Studio
The thicker the carpet, the better!
Now, if you are setting up in your home then you need to be looking for the following:
- A small room that can comfortably fit you and your guests (if you are recording a podcast with multiple microphones set up in it).
- Carpet – you need to try and reduce as many materials as you can that will reverberate sound waves around the room. Carpet can act as a great sound absorber.
- The least amount of windows as possible – glass is terrible conductor of sound and will deflect sound waves hitting it. This will introduce reverb in your recording – which we don’t want.
- Away from noises – Try and find a room that is away from the roadside, away from the kitchen or any room that could create noises.
- Curtains – Similarly to carpet, curtains can act as sound blankets that soak up those nasty reverberations.
Small Office

Try and avoid large spaces with lots of glass and flat surfaces.
If you are setting up for your company’s podcast then you will most likely be having to resort to converting an office space in to a recording studio.
This is not ideal but it is also doable, so long as you try and find the following:
- A small room – offices come in all shapes and sizes but the bigger the room the more reverb you will have.
- A room without A/C – air conditioning is a nightmare. It can be intermittent, it can be loud and it can also be uncontrollable. If your building has a building-wide A/C system you may not be able to control the ability to turn it off. The only thing you can then do is remove that frequency in post (which adds time to your turn around workflow) however, if it is intermittent then that will make it even harder to do.
- Windows – as with the home set up, try and find a room in the office with the least amount of windows or glass as you can.
- Flooring – try to find a room without laminate, wood, concrete or any type of hard flooring. It will make reducing reverb that much harder to do if you have it.
Will all of the above give me flawless audio?
Erm… No.
Simply having the correct space to set up will not stop all of the unwanted noises you could experience.
Depending on your budget, you will want to invest in some sound absorption materials. These will stop sound waves bouncing off surfaces that you cannot control and will make your audio sound ‘closer’. This is a more comfortable sound for us to listen to through headphones in the final product.
Sound Absorption Materials
DISCLAIMER: This post may contain affiliate links. We make a small commission if you buy the products from these links (at no extra cost to you). As an Amazon Associate, Skimlink & Descript Affiliate I earn from qualifying purchases. But we only recommend products we would use ourselves. For more information, click here to see our disclosures.
Moving Blankets
Moving blankets may not sound like a high-end sound absorption solution and that’s because they’re not! They are a low-cost alternative to those solutions BUT they work great!
Moving blankets are tightly woven but dense blankets, which are great at trapping and absorbing radical sound waves in your room.
Grab 2-3 of them and place them on or over hard surfaces in your room or even hang them from places if you can. Placing one above your speakers and one on the floor underneath them will give great cushioning against reverb. Yes, it may not look the best but this is a podcast, not a TV production. If you do have a video element to your recording then by placing them in crafty positions you won’t even catch them on camera.
They cost between $20-30 each, so the total cost is not huge considering the improvement in sound quality that you will get.
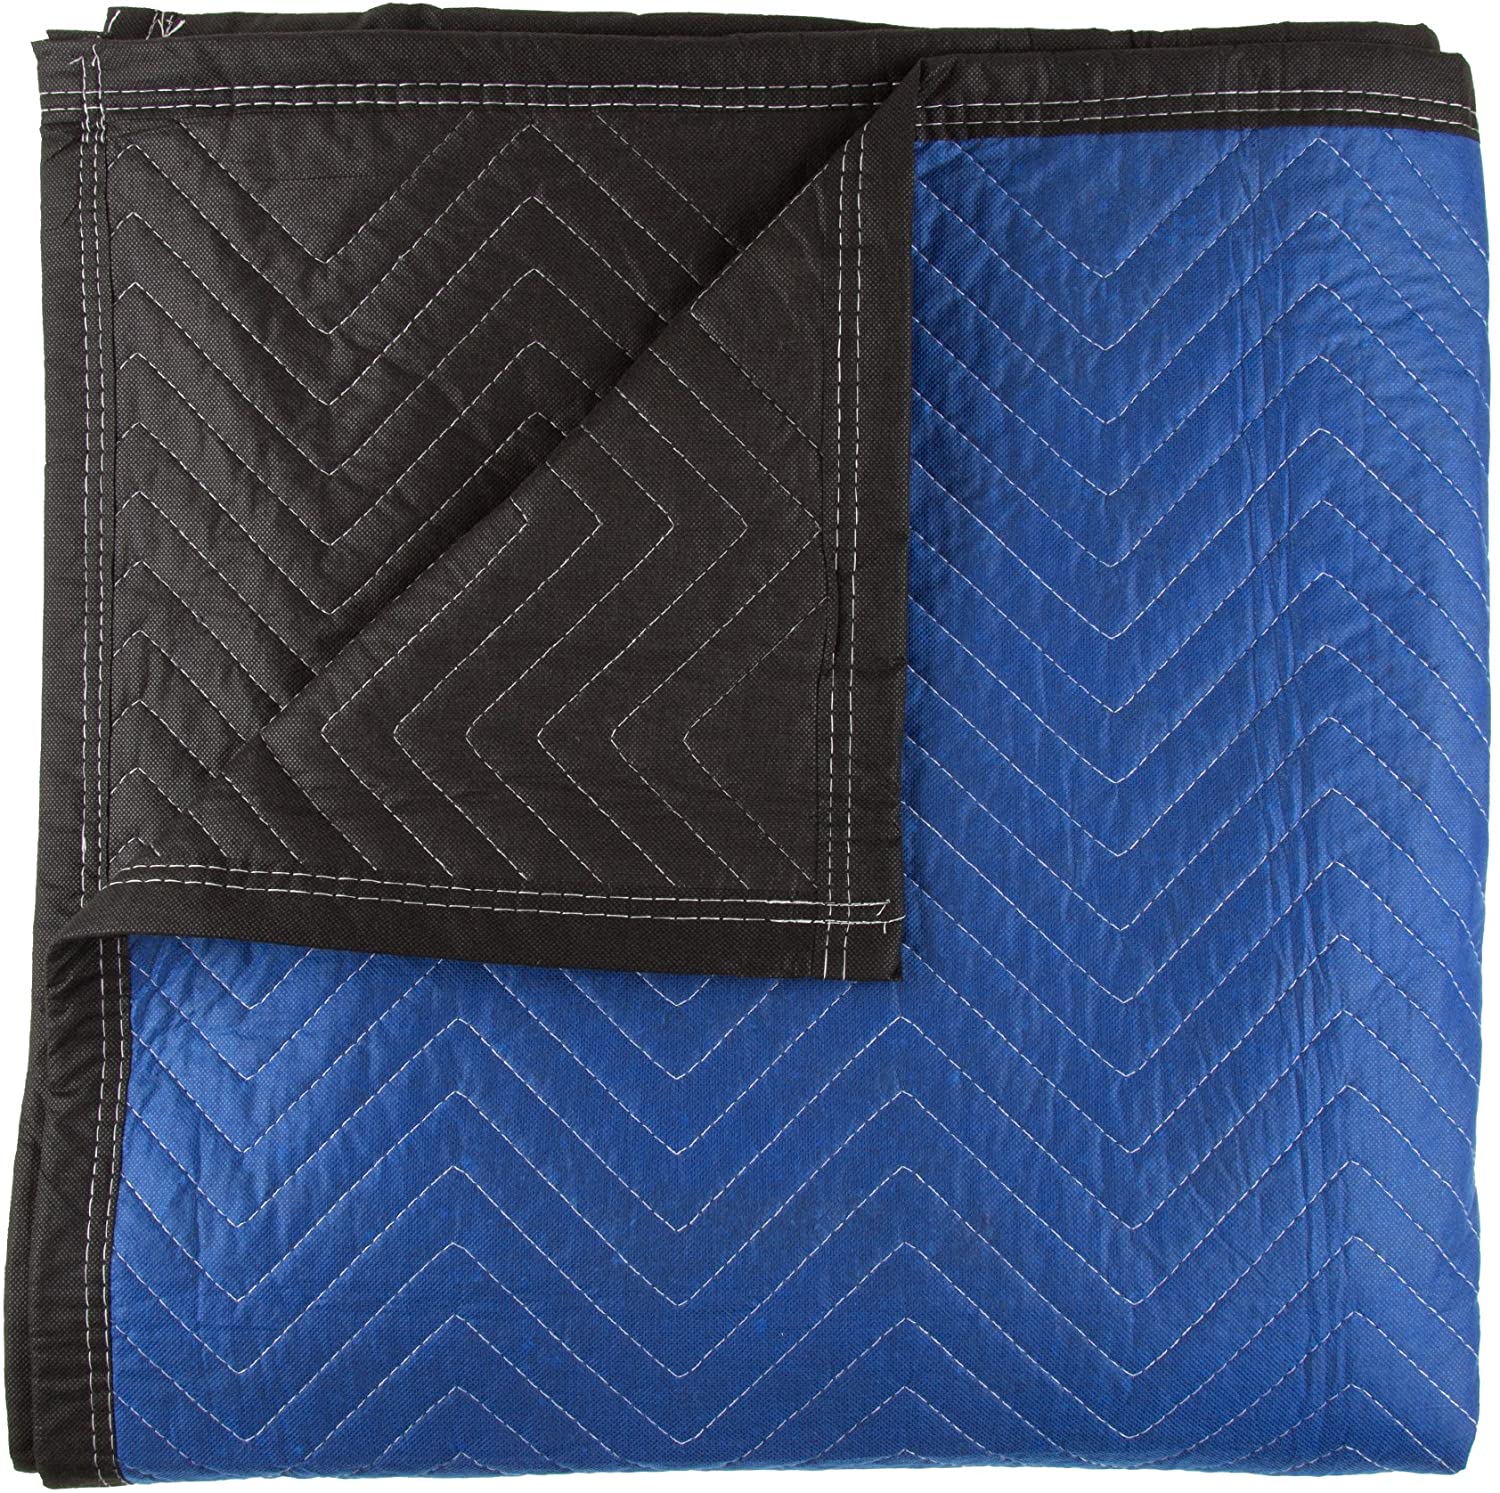
Catch rogue sound waves and minimise reverb with these cheap, heavy-duty, moving blackets.
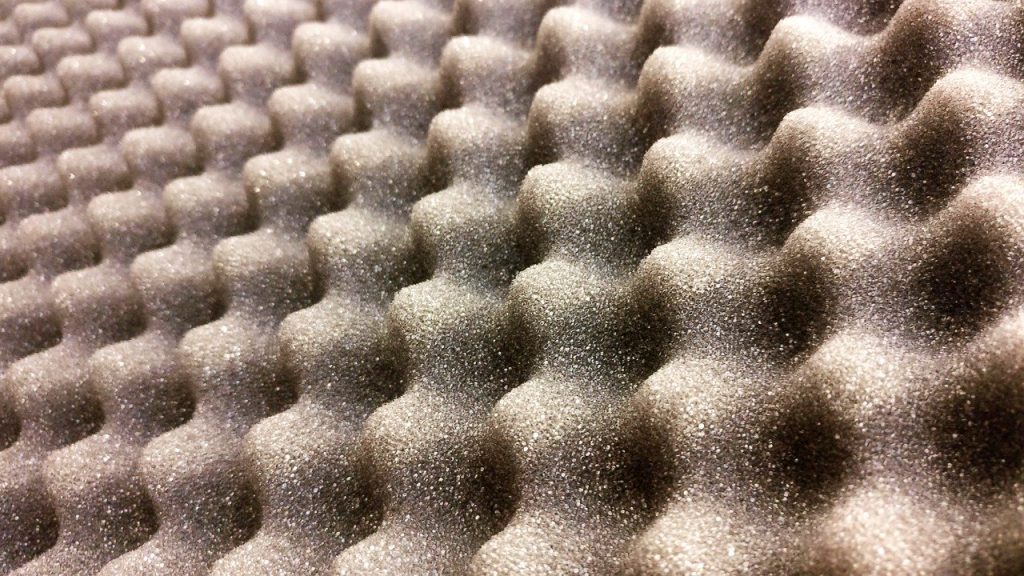
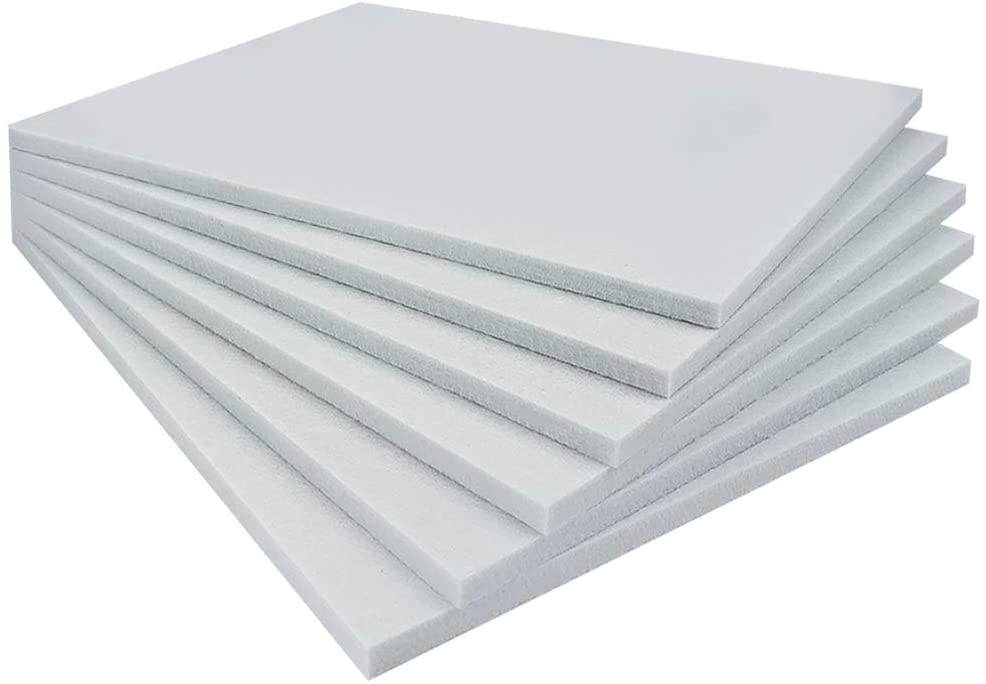
Acoustic Foam Panels
Moving up the monetary scale, you have the typical acoustic foam panels you see in studios everywhere. There’s a good reason for that – they work!
Foam is essentially pockets of air trapped in plastic. These air pockets kill the speed of sound waves as they hit it, meaning they make great sound absorption materials.
You want to stick these to the middle of your walls, in alternating patterns, to catch as many rogue waves as possible. You will want to try and place these on as many walls as you can, without it becoming ugly on camera or it starting to get in the way of switches, cabling, or anything else you need regular access to.
Packs of 12 start at around $22 and move up quickly from there. You will want 3 or 4 packs though, as they don’t go as far as you would think, once you start putting them up.
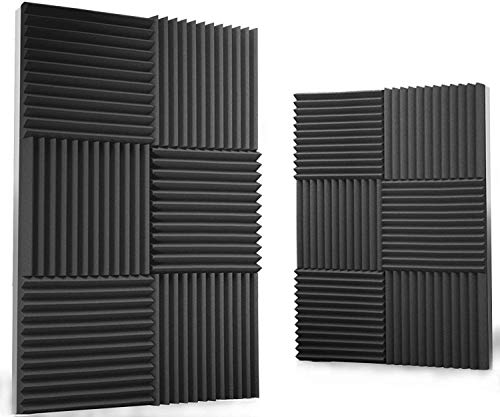
A few packs of these in alternating patterns on you walls will help catch unwanted reverb from your audio recordings.
Bass Traps
Bass traps are exactly what they sound like they might be – they trap bass.
Bass sound waves tend to find their way into the corners of your rooms and are the low-end frequencies created by road traffic outside a window, an A/C unit whirring away in another room or any other deep sound, it could even be one of your guests’ voices.
By placing bass traps in the corners of your room, where your walls meet, you can stop the low frequencies from reverberating back into the microphone and creating a nasty low rumble.
Packs of bass traps come in many varieties and start around $30 for smaller blocks. Grab 8-12 of these and place them strategically in the corners of your room.
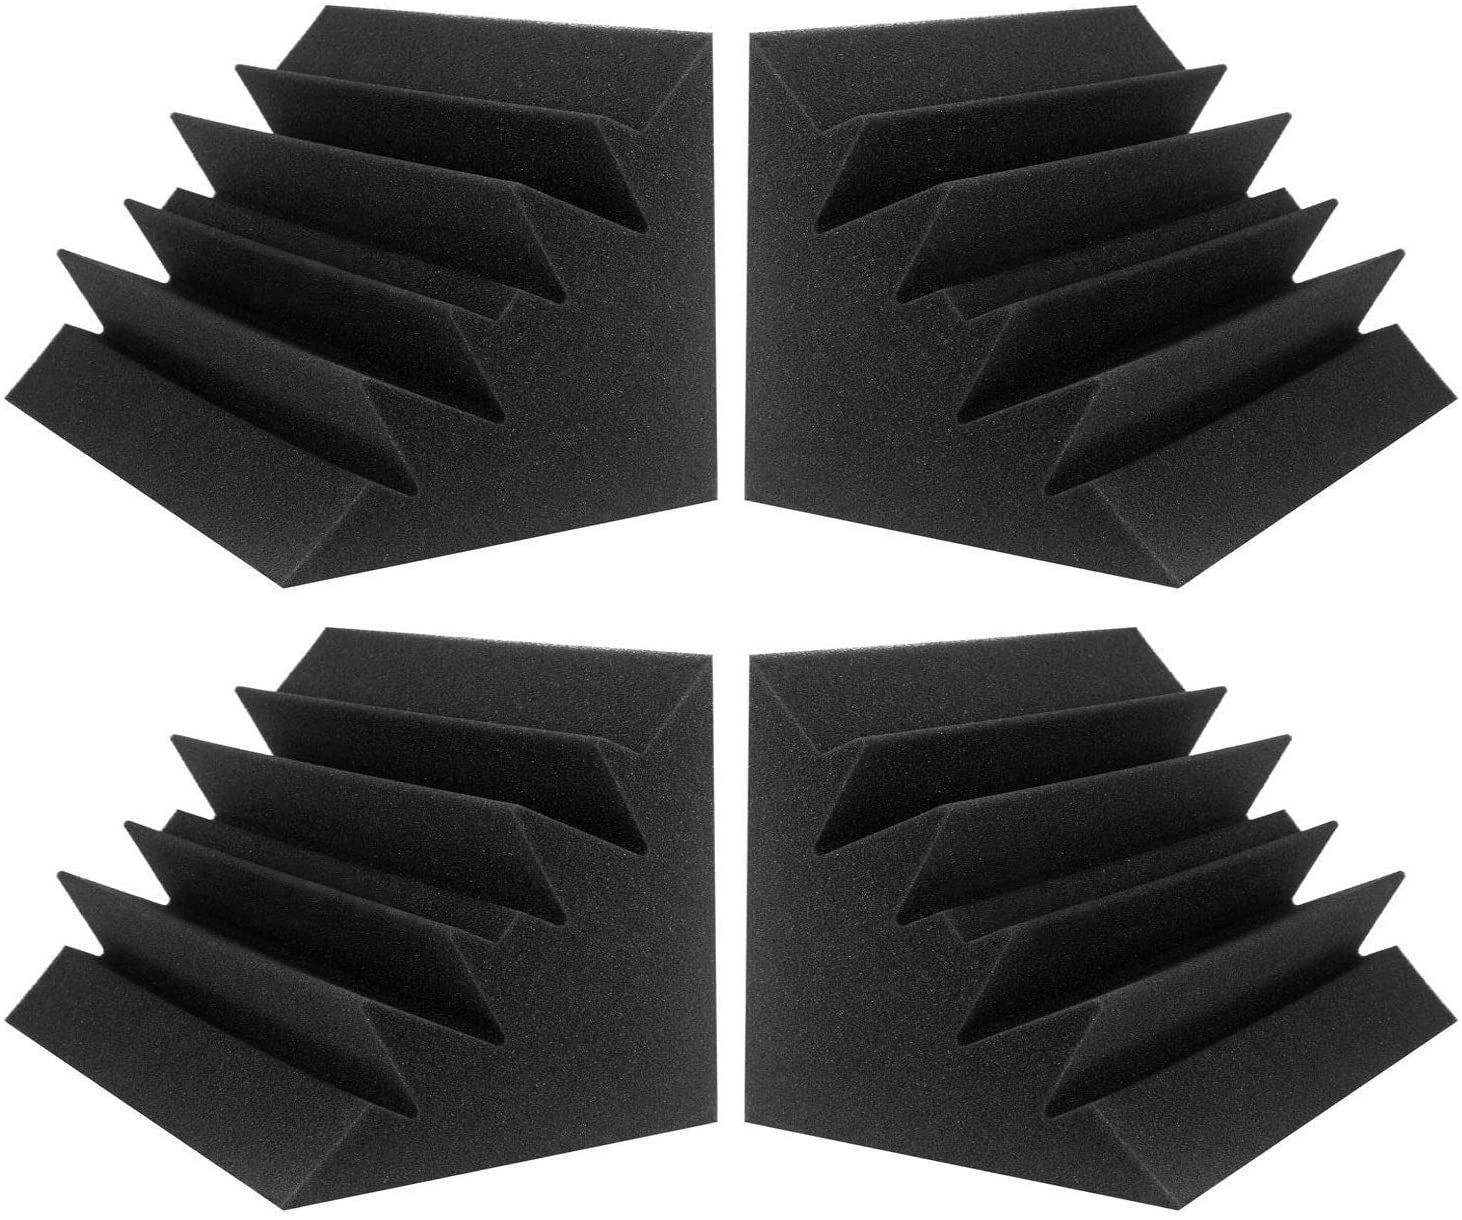
Minimise low level bass hum and rumblings from your recording by placing bass traps in the corners of your recording environment.
Ceiling Baffles
Office ceiling baffles reduce noise crossing a room.
If you have the budget and you are converting an office space into a podcast studio, then a great investment is ceiling baffles.
They are incredibly dense foam panels that you hang from a ceiling using baffle hooks and they stop most frequencies from reverberating around your office space.
I have used these in every space I have set up a permanent podcast recording studio and the effect they have on your recordings is exceptional.
A 6 pack of 800mm x 600mm panels will set you back $115 and you will need a few packs or more, depending on how big your office space is.
Reduce reverb from projected voices by hanging ceiling baffles above your recording area.
For more on studio sound reducing panels, check out the dedicated post on it here:
Which Android/iPhone External Microphone to Use?
This is where we start to get to technical side of the equation. Where what you buy as an investment to audio recording on iPhone/Android starts to make a real difference.
Ordinarily you would either record into a digital audio recorder, and audio desk or computer audio recording software to capture your guests voices. However, when asking the question, ‘How to record a podcast on iPhone or Android’ you are essentially eliminating this part of the setup because we already know we want to record into a mobile device.
The question always comes down to, ‘Which Android or iPhone external microphone to use?’.
And, to be honest, there’s no real right answer.
In fact, there are quite a few different routes that you could go. Don’t let that put you off though. I’ve got three solutions for different budget options to choose from.
iRig Lavalier Microphone

The cheapest and easiest option for audio recording on iPhone or Android is the iRig Lav Mic system.
This is a simple plug and play product that connects to your phone via TRRS 3.5mm jack (if will need your 3.5mm to lightning adapter for iPhone) and has the lav mic attached to it and it also has a jack input for another mic or for headphone monitoring.
You can daisy chain two together to record multiple speakers into a stereo recording or you could choose to record to two separate phones.
A two mic pack costs $80 and you can be set up and running in minutes.

Get started with learning your podcast recording skills using these quick and simple to use lav mics from iRig.
Are these mics going to give you broadcast quality sound? Honestly, no. However, if you are on a shoestring budget and what to know how to record a podcast on iPhone or Android then this is a great starting place. You can purchase better and more expensive kit as you progress.
RØDE SC6(-l) & smartLav+
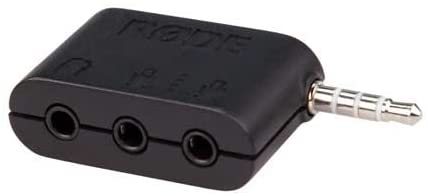
The first (of two) RØDE products in my three options is to use an input/output breakout box for smartphones. The SC6 is just that.
Similar to how the iRig above operates, it has two TRRS mic inputs and a headphone output for monitoring. This allows you to record up to two speakers at once into your phone.
The RØDE SC6 won’t allow you to record just on its own, you will also need the lapel/lava liner mics to go with it.

There are many different smartphone-compatible lapel mics available, in all sorts of price ranges (the iRig above included) but my recommendation is to stick with RØDE and get two of their smartLav+ lava liner mics.
These are broadcast quality mics and can be used with other recording equipment aside from a mobile phone.
If you are audio recording on iPhone then there is also the RØDE SC6-L Mobile Interview Kit for iPhone. This provides a direct lightning connection and includes two smartLav+ mics in the kit too.
The SC6 on it’s own retails for $20. The smartLav+ retail at $80 each. So, you’re looking at about $180 for the full setup. The SC6-L Interview Kit retails for around $160, saving you about $20 or so when audio recording on iPhone.

Connect up to two microphones to your phone and monitor through the headphone output to record great audio directly to your smartphone.
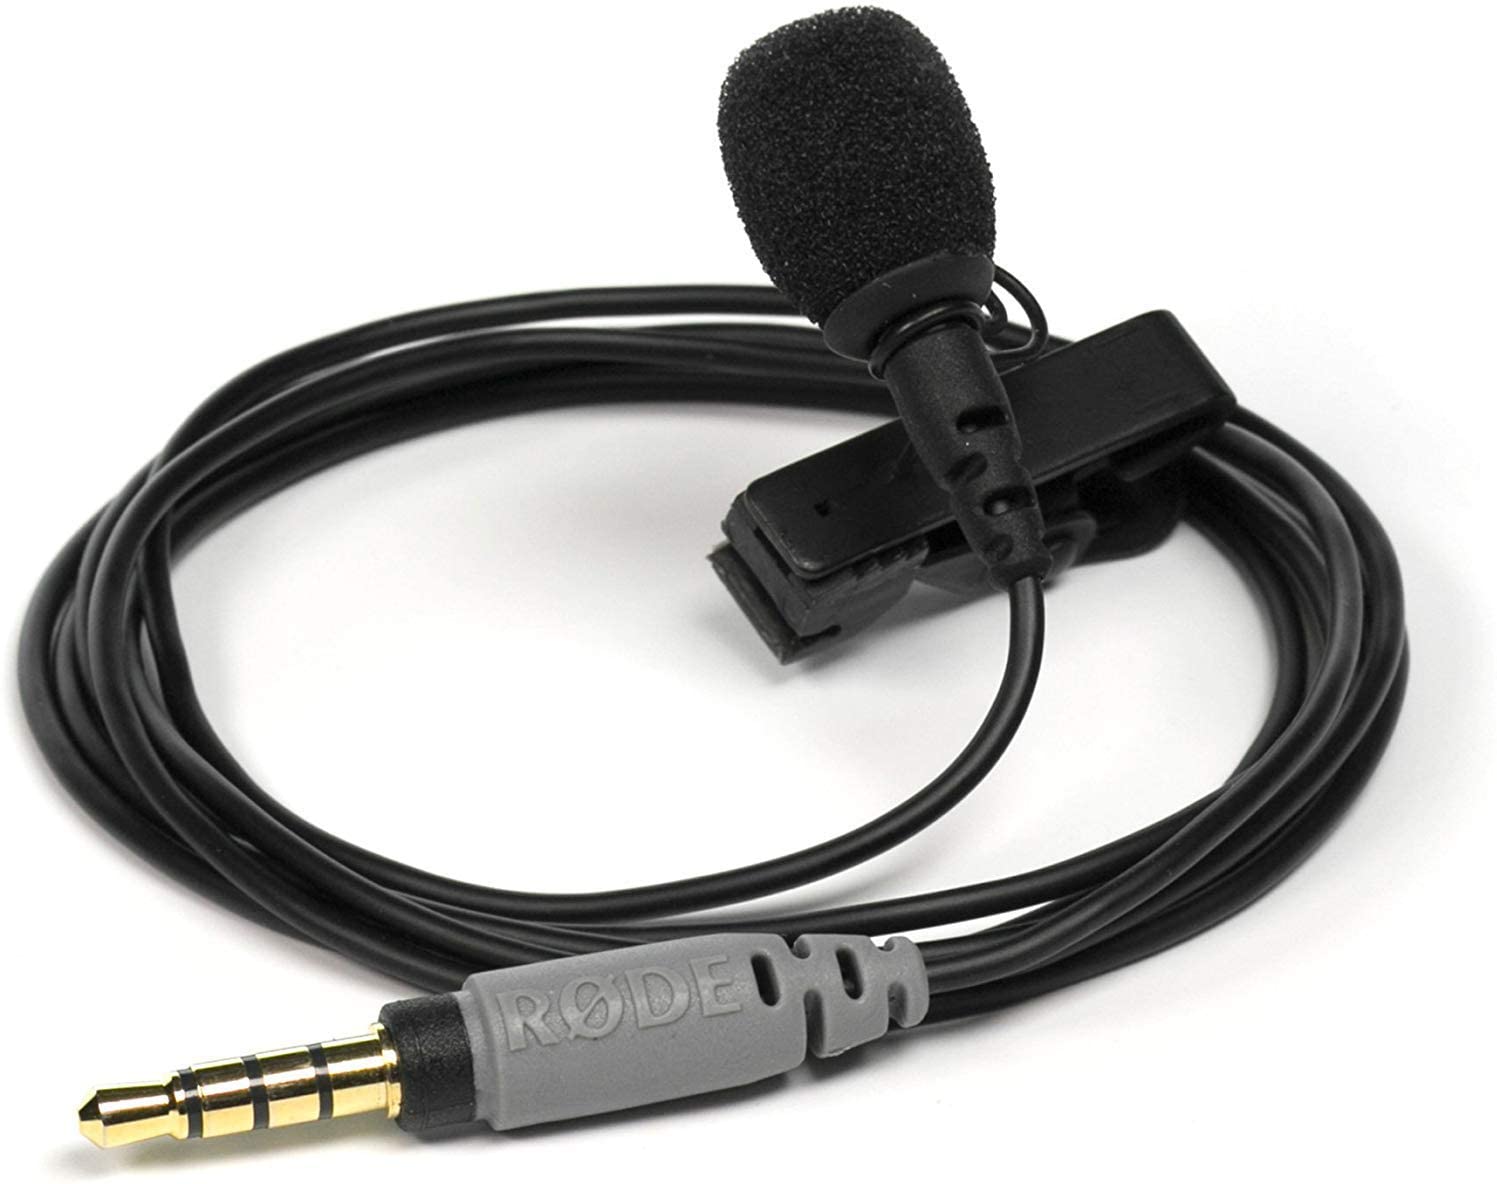
RØDE smartLav+ is a broadcast quality lavalier microphone for audio recording on iphone, Android and other mobile devices. Record fantastic audio into your smartdevice.
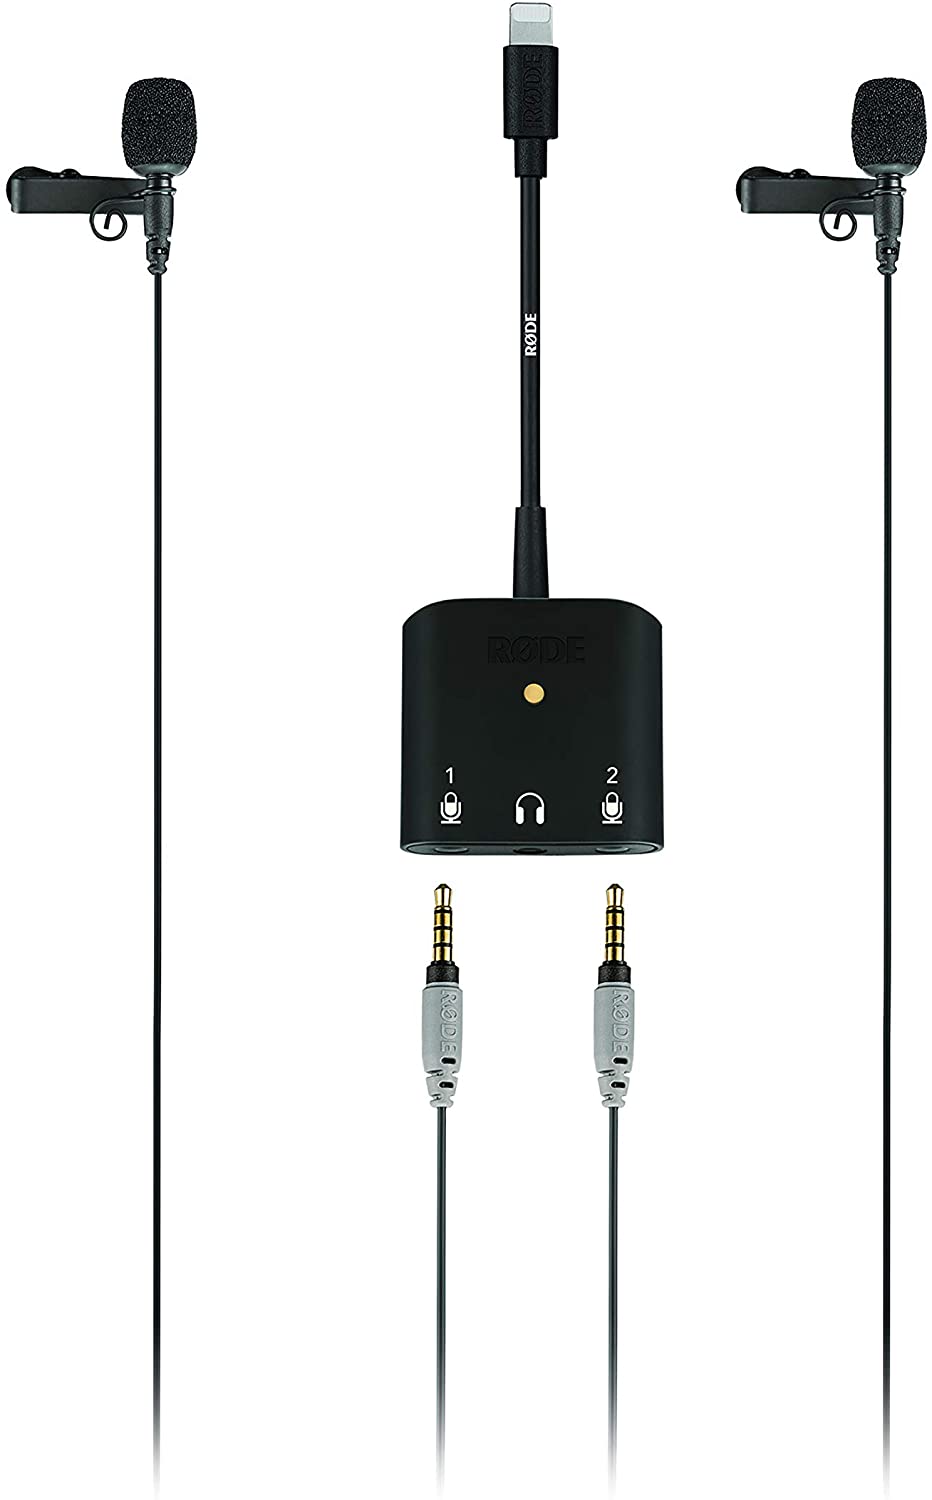
Audio recording on iPhone for podcasts and meetings couldn't be simpler with this two piece setup from RØDE.
RØDE Wireless Go
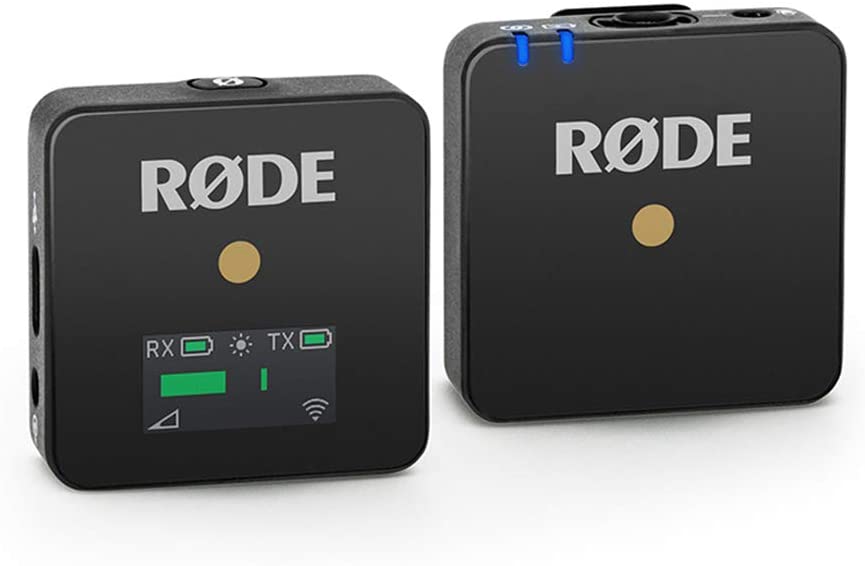
The second RØDE option is to use their Wireless Go system for audio recording on iPhone or Android.
These little packs are fully housed mic transmitter and receiver pairs. There is a built-in omnidirectional condenser microphone in the transmitter pack to deliver broadcast-quality sound. The units last for 7 hours on one charge and can be used up to a distance of 70m.
These are proper wireless microphone systems operating on the 2.4Ghz frequency range. For most circumstances and indoor private recordings you won’t need a license to operate them but if you are planning to use these in open or public spaces you will. Find out more on frequency licenses here: https://www.fcc.gov/cgb/wirelessmicrophones
The RØDE Wireless Go system retails for $200 a pair. So you can have a broadcast quality set up for $400 for two speakers.

Get broadcast quality, wirelessly, when audio recording on iPhone & Android. Roam up to 70m for 7 hours with these wireless mics from RØDE.
Another thing to note about the RØDE Wireless Go packs is that they have auxiliary input. So if you have other microphones you would like to use instead of the inbuilt ones then you can add them to these packs.
The Best Audio Recording App for Android & iPhone
Now that we have our recording environment and hardware set up, we need to look at the software side of things.
Specifically, which audio recording app for Android or iPhone should you use to record into?
Now, you could use the internal voice recording app of either iPhone or Android phones to record your speakers but they don’t give much in terms of features and advanced settings.
Instead, I’m going to show you two audio recording apps for Android and iPhone that are tried and tested and work great with the kit above.
ShurePlus MOTIV

The first app is from Shure, a company best known for producing microphones. They have also entered the game for audio recording on iPhone, Android and many mobile devices and have started to create clip on mics and peripherals specifically for them.
They have created an audio recording app for Android & iPhone that works very well with their own mics but it also works incredibly well with other external mics for iPhone & Android as well.
The app has a simple interface with three options at the bottom to access different Shure mics, to record and to hear your recordings. When you plug in an external mic the app will instantly recognise it and switch to that mic system. You can choose between 44 & 48kHz recording and it gives you a live monitor to show levels.
I like using this app purely for its simplicity but also because it doesn’t compress or adapt the audio you record in anyway. You can get great, uncompressed, audio using this app.
The app is free for both platforms.
RØDE Reporter App (for iOS)
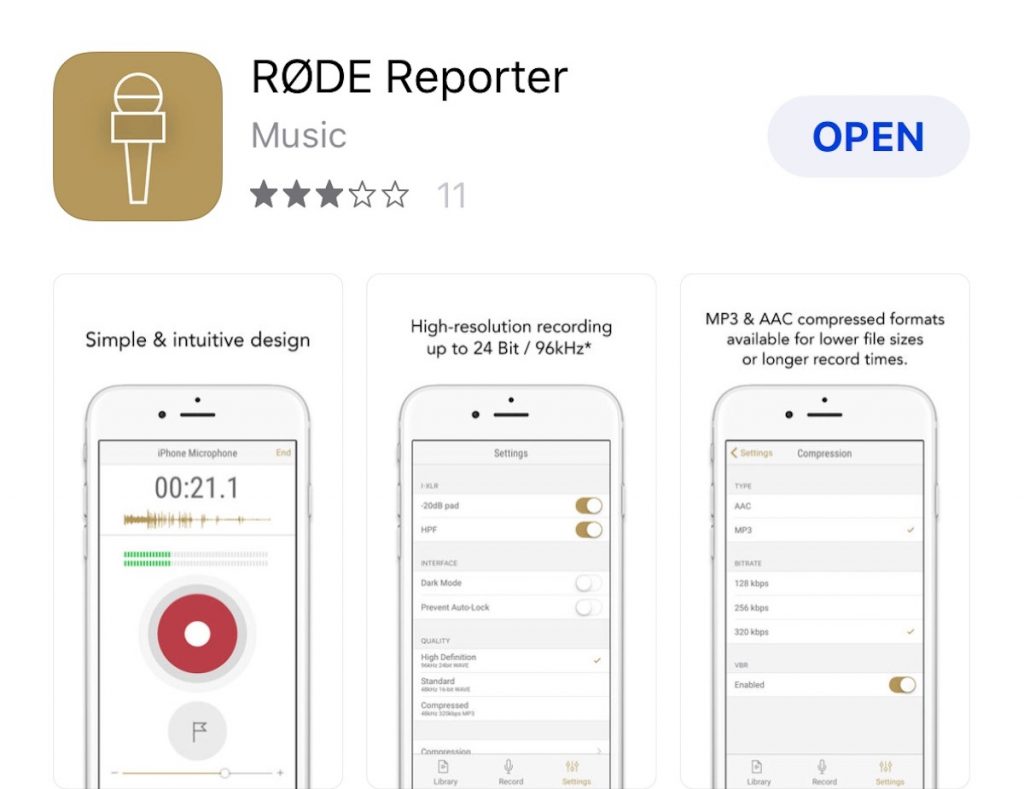
Ok, so this app is only for audio recording on iPhone and not Android, unfortunately. Which is why I wanted to give the option of ShurePlus MOTIV for Android users.
The RØDE Reporter App is just as simple to use as MOTIV is BUT the RØDE app gives you just a few more advanced features than MOTIV does.
The RØDE Reporter App is made to work with RØDE mic products and it is therefore a great companion app to some of the products I mentioned above. You can see how RØDE are dominating the market in this area of audio recording.
With this app you can have a little more fine tuning of the quality settings that you can record. It allows you to choose your compression type, MP3 or AAC, it allows variable bitrate and has a few different nitrates to choose from also. Depending on your mic and phone you can also choose the quality type too. High-Definition 96kHz 24bit WAVE, Standard 48kHz 24bit WAVE or Compressed 48kHz 320kbps MP3.
These features should allow you to record the highest quality audio on a mobile device other than recording into a digital audio recorder or sound desk.
This app is also free on the App Store.
The Only Thing Left To Do is Edit
Now that you know how to record a podcast on iPhone or Android you just need to edit your podcast together.
To do that you can use a number of different audio editing software programs. However, by far the simplest for beginners and how advanced this software is getting, I only have one recommendation.
Descript
I want to highlight a piece of software that could be transformative for anyone who doesn’t want to have to play around with in-depth audio tools to edit their podcast.
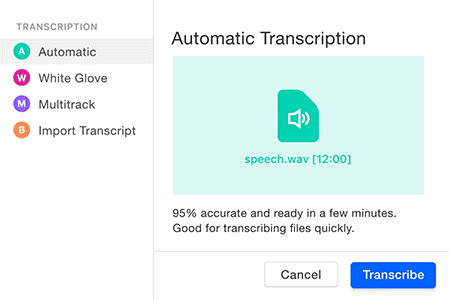
With Descript the program will transcribe your audio recording and give it to you in a text doc format. You can then go through and clean up your audio by either editing the text like a word processor or lifting sections of the waveform out.
Descript will save you hours of time and it also has the ability to edit video this way too. So if you are recording your podcast on camera you can edit the video using the word processor method too… Incredible!
Descript gives you 3 hours worth of free transription and then you have a subscription payment method after that.

It’s well worth it in my opinion.
That’s it! You now know how to record a podcast on iPhone or Android and how to get the best possible sound whilst doing it.
For more podcast related articles check out my definitive guide to podcast equipment for any budget:
DigiProTips