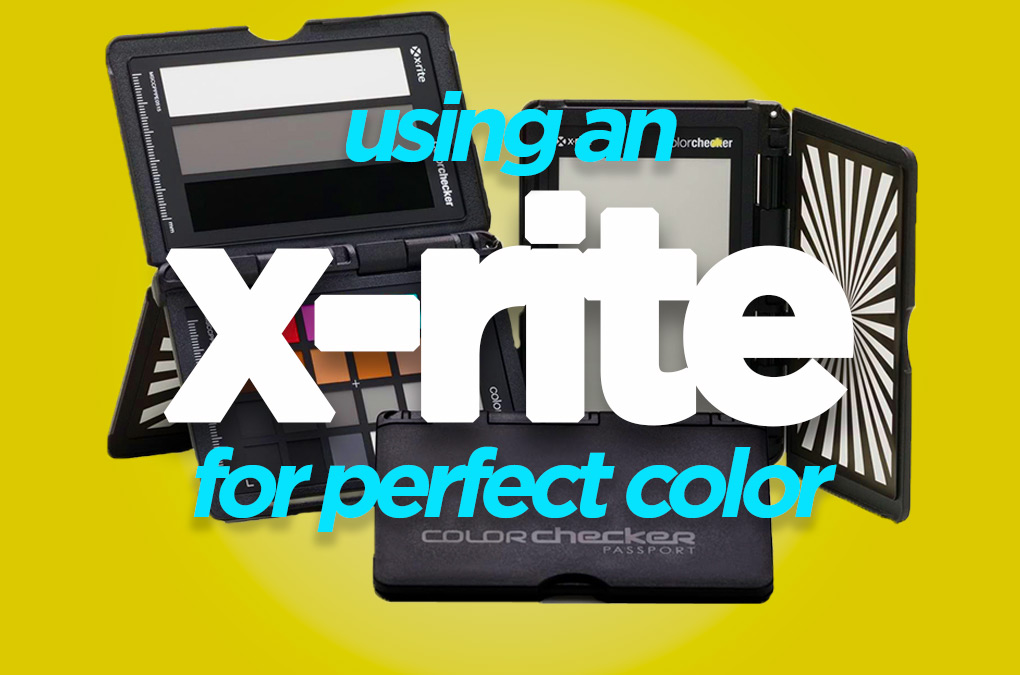
An X Rite Color Chart Makes Color Correction Easy
So, you’re saying if I use an X Rite color chart then I can get perfect color, in camera, everytime?
Yep, that’s exactly it!
No matter the camera or the setting, using an X Rite Color Passport will mean you can get perfectly balanced shots across the board.
How do I know what I’m talking about? Head to the DigiProTips Experience and Background page to find out how I’ve built up my knowledge over a career spanning feature film, broadcast TV and digital content production.
X Rite Color Passport
DISCLAIMER: This post may contain affiliate links. We make a small commission if you buy the products from these links (at no extra cost to you). As an Amazon Associate, I earn from qualifying purchases. But we only recommend products we would use ourselves. For more information, click here to see our disclosures.
Before we begin it’s worth noting that this tutorial is talking specifically about using the X Rite ColorChecker Passport Video. That’s because we are looking at how to get perfect color, in camera, for shooting video rather than stills photography.
HOWEVER, that doesn’t mean that you cannot apply this to still photography. The only difference is that you will most likely want to purchase the X Rite ColorChecker Passport Photo instead, as it has more elements appropriate for stills photography than video. And the post-production side of this tutorial will not be relevant. Instead you will want to use something like Adobe Lightroom to edit your stills.
Designed for Filmmakers: this color tool will help you get a better camera-to-camera match, achieve perfect exposure & easily edit for mixed lighting in a convenient portable protective case. Reduce video editing time & Get to your creative look faster.
Why Do I Need This?
Well, if you’ve ever shot in two completely different locations with different lighting set ups or shot on two or more different cameras with different bodies or lenses then you will know exactly why you need this.
If you are fairly new to shooting on video or photography then the reason why this is a vital part of your kit bag is because not every shoot is equal.
What do I mean by that?
Well, if you set your camera settings up for one shooting scenario and then move to another, you will more than likely see that, at the very least, your exposure will be off but also your color will be off too.
Everything and everyone in a set can alter how a camera reads light exposure and color temperature.
As well as this, not all cameras are built equal either.
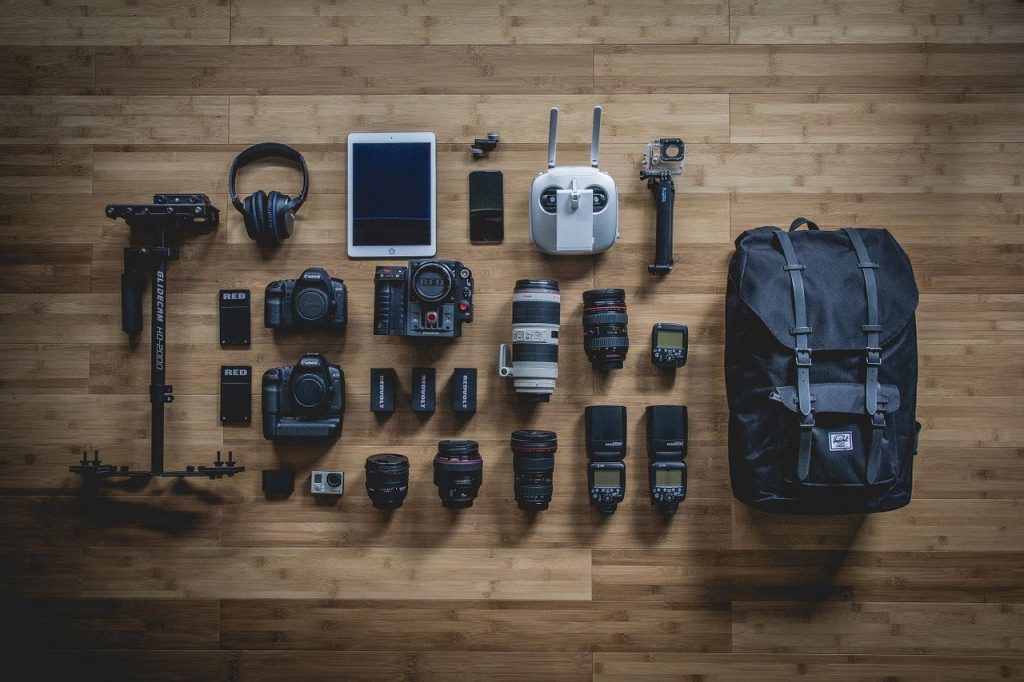
Each manufacturer builds their camera bodies, camera sensors, lenses and recording codecs differently. You simply cannot rely on the fact that setting each camera to the same ISO, aperture, white balance temperature and frame rate will result in similar looking shots once you get into post.
And quite frankly, it can get very tedious. Getting back to the editing suite to find you have shots that look completely different is not only a hassle but it’s also lost time in post, that could be spent being creative or getting that cut over to the client sooner.
So, How Can an X Rite Color Chart Help?
X Rite color chart’s are specifically designed to combat all of the above grievances.
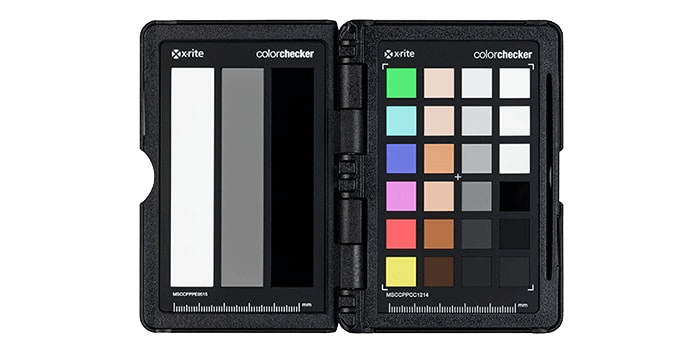
The chart, in this case the X Rite Color Passport Video, have specific elements on them that you can calibrate your camera to to ensure similar looking shots across your shoot.
No matter the setting or the camera type.
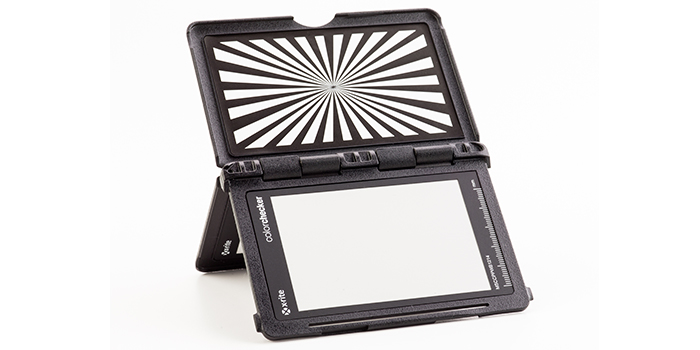
Using the included X Rite grey card, the color chart, the focus card and IRE bars you can ensure that each camera is set to match the values of this card rather than trying to match the values of each other.
Placing this little chart in front of your camera, before each take, will mean you can then very simply, in post, apply some simple grading effects to match the cameras or set locations up.
The X Rite ColorChecker Passport Video retails for around $150/£110. So it is a small investment for your kitbag. However, the time it will save you over its lifetime more than makes up for that initial outlay.
If you’re familiar with DigiProTips then you may have seen our Color Matching with Lumetri Color video/article and are thinking, ‘Can I not just use this?’

Well, yes and no.
Yes, you could give it a go if you know your location and lighting set ups do not change all that much. And if you have the same camera bodies and lenses, then that could also work.
But no, if you vary from that ideal set up in any aspect.
The Adobe Sensei engine is getting better all the time at trying to reproduce the look of one shot to another in Lumetri Color, inside Adobe Premiere Pro but it’s still only AI and doesn’t have the human eye to tell it’s wrong.
It’s much safer and easier to shoot with an X Rite color chart before each take. That way you know you can match cameras no matter where you are.
So, How Do We Do It?
Ok, so let’s get in to it.
The shooting side of things is fairly simple. You need to point and shoot.
Ok, maybe not THAT simple but it’s not far off.
Get your positioning and framing for your shoot set up, as you normally would. Then, before you start to adjust your color values or exposure settings get the X Rite Color Passport Video out and using the included X Rite grey card part of the passport, face that towards camera.
Zoom in on your camera (of you have a zoom lens, if not then move the subject closer), so that the card fills the screen. Now, go to your white balance settings and capture that screen as a reference for the camera to use as a white balance indicator. Hit ‘set’ on your camera to use that value as your white balance.
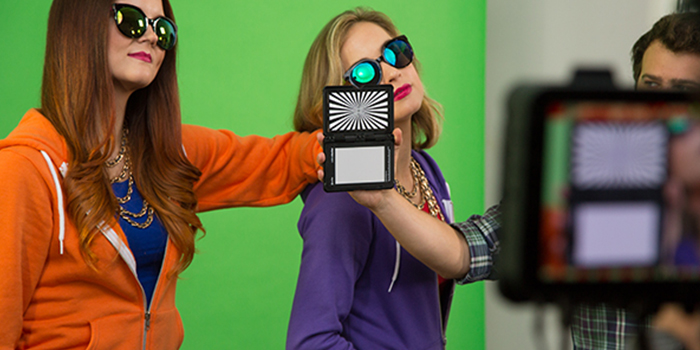
Note. The reason we are using a ‘grey card’ instead of white is because the X Rite Grey Card is specifically designed for this. It is a spectorally flat image. That means no light is absorbed by the grey card and all frequencies are reflected. This is the ideal reference for your camera to calculate ‘white’ balance from.
Next take your passport and flip it over and place it next to your subject with the color chart and grey card bars facing out:
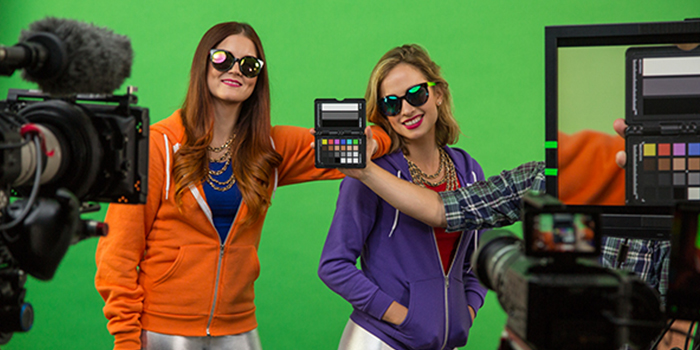
Zoom out so that your frame is back to where you would like it. You are now going to bring up the levels monitor in your camera and use the grey reference bars, at the top of the passport, to set your black and white points, using your exposure settings.
Set your levels so that the white bar in the passport is going to be around 90% of your top limit. The black bar should be between 0-10%. This will give you wiggle room in post if you would like to make your image more contrast-y than it was in real life.

It also gives your image room to breathe if you have some particularly bright or dark features in the frame that go beyond the black and white points of the passport.
Note. If you are working in a flat or even LOG color profile on your camera then you will need to use the levels monitor to ensure your image is within these values because doing it by eye in these profiles is incredibly difficult and may result in and incorrect exposure value.
Hit record!
But what about the color chart part?
Well, that’s the part we want to record. We need a snippet of that chart before every take so that we can use it in post. It’s also useful to have the grey card too but at the very least we need the color chart.
If you have set your exposure and white balance correctly before this then we won’t need to touch those in post again (assuming you’re not working in a flat or LOG color space – though I would prefer to shoot flat or LOG for extra dynamic range).
You just need to ensure the color chart is in shot before your take so that we can see that part of the footage in the timeline.
That’s it!
That’s it for the set up on set anyway. You can go ahead and film your piece now. Safe in the knowledge your color will be perfectly reproduced in post.
If you change location, lighting set up or even talent, then go through this quick process above each time.
Note. It’s worth mentioning that if your are shooting flat or LOG then use a codec with a high dynamic range and high bit depth so that your footage has the ability to be manipulated in post. If you don’t you could end up with tearing or banding.
Designed for Filmmakers: this color tool will help you get a better camera-to-camera match, achieve perfect exposure & easily edit for mixed lighting in a convenient portable protective case. Reduce video editing time & Get to your creative look faster.
Using the X Rite Color Chart in Post
Ok, let’s match these shots up!
For this part it really does not matter which NLE you are using as they pretty much all have the same functionality that we need; to be able to change the shadows, highlights and midtones, the saturation and ideally a three way color wheel.
I’m going to be using Adobe Premiere for this part but as long as you have the above abilities then it could be any editing software.
Bring your footage into your timeline and find the beginning part of the take with the X Rite Color Chart in view.
Add an adjustment layer over the top of the shot (if that’s how you prefer to grade) and apply a Lumatri Color effect to it. You can also just apply it to the shot itself if your prefer to work that way.
Change your workspace layout to the Color workspace so that you can see the Lumetri sidebar.
The next thing you want to do is bring up your Waveform (RGB) in Lumetri Scopes and change it to Luma:
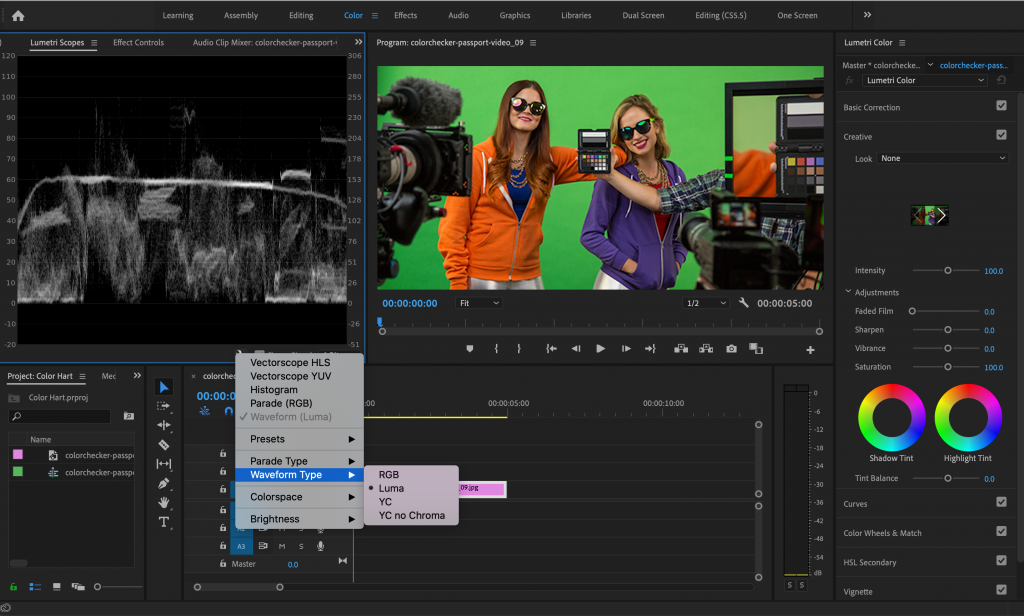
Zoom in to the image slightly so that the passport grey bars are filling the screen slightly:
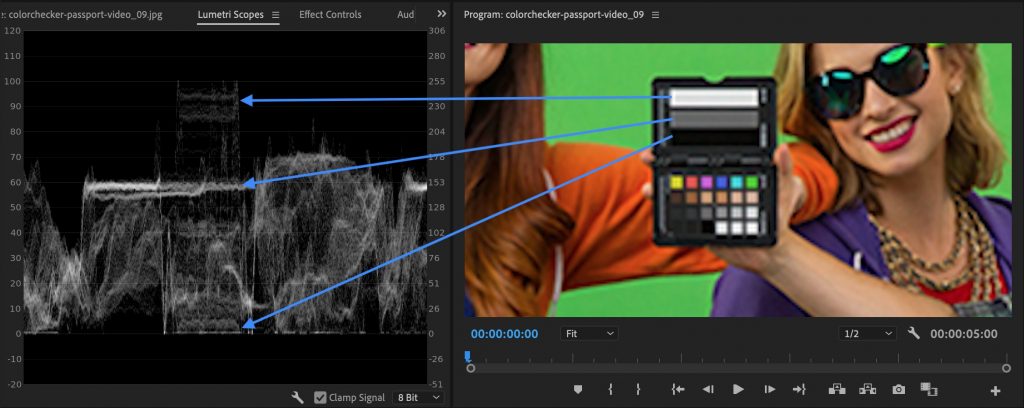
You should now see on your waveform monitor, the three bars represented middle of your monitor.
If you correctly exposed your image on set then you shouldn’t have to adjust anything here.
If you shot in a flat or LOG color space then you will need to move the white and black bars to where they should be on the waveform.
Grab your shadows adjustment tool and move the black bar until it hits 0 IRE on the monitor. Next use the highlights adjustment tool to move your white bar to between 90-100 IRE. Your grey bar should then sit around 60 IRE.
Now your image should look properly exposed.
On to Color!
Change your Lumetri Scopes from Waveform to Vectorscope YUV.
This scope represents all the colours of your image but highlights in particular yellow, red, magenta, blue, cyan and green. All the colors that are present at the top of your X Rite Color Passport Video.
Line going round the scope at about half way up represents the ideal saturation value for those colors.
Zoom into your image until the color chart fills the screen and you can see all of the colors.
Your vectorscope should now show each of those colors with a spike eminating from the middle towards those colors:
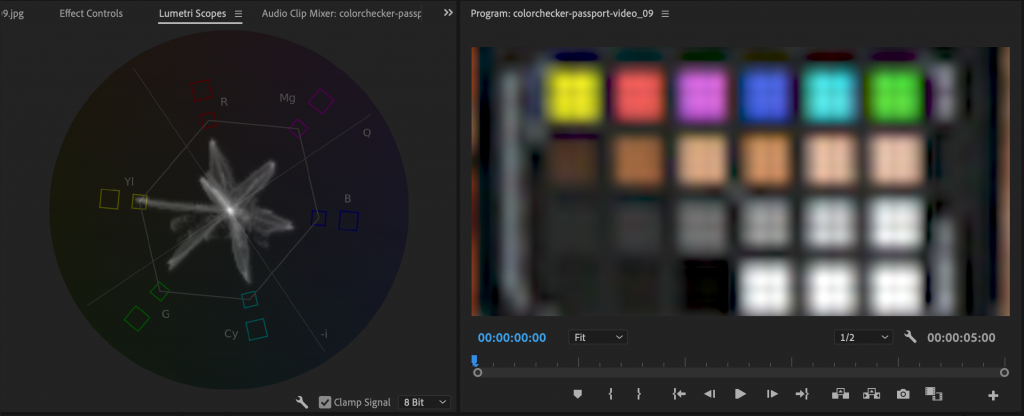
If you shot in a standard or neutral color space, in camera, then you may find some of those color values touch that line already. If you shot flat or LOG then you will need to adjust your image to saturate it properly.
Go to your saturation setting and push the saturation up until your spikes start to hit that line.
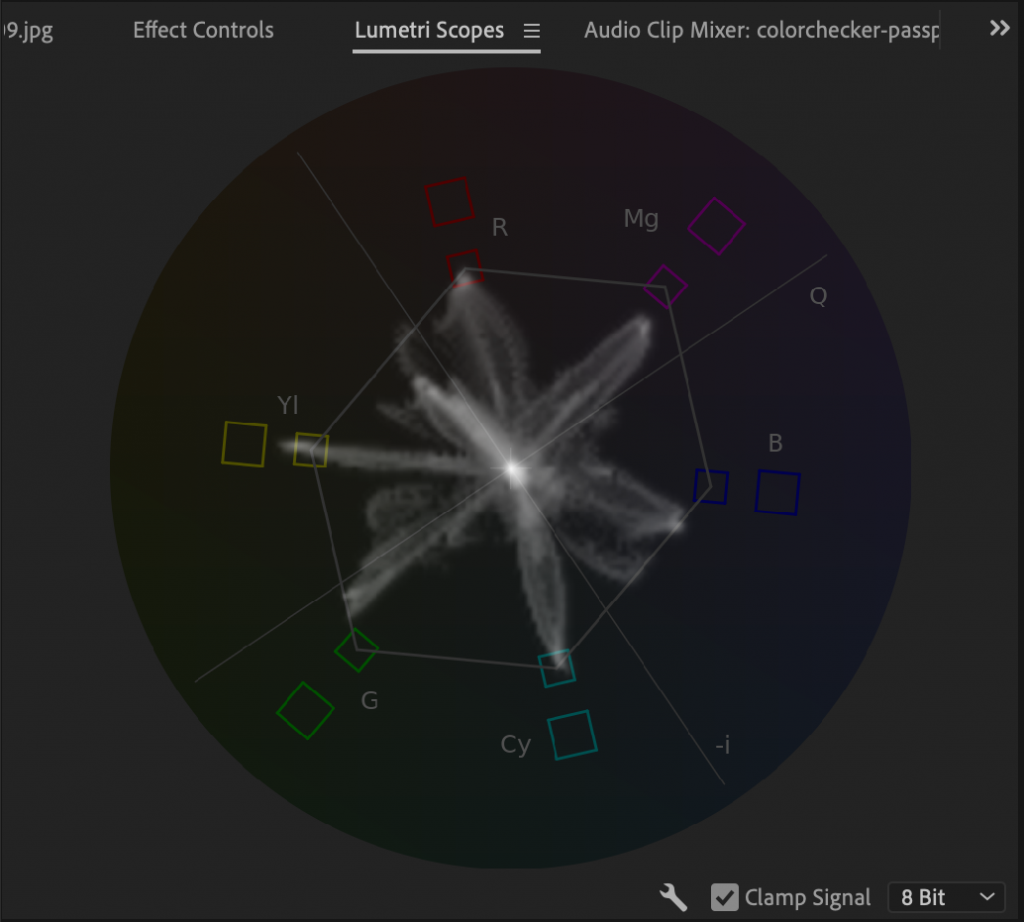
You want as many of the colors to hit that line without going past it.
Reset your framing to check your result. You can adjust the saturation depending on your preference from here, if you feel it has gone too far.
If your color spikes do not seem to line up with their corresponding values on the vectorscope you can also change the hue to line them up better. However, if you set the white balance in camera correctly, this should not be necessary.
All Done!
Now you just need to do those quick checks on each piece of footage that was shot in a different location or on a different camera. Once you have, you can copy and apply the effect or adjustment layer on to any pieces of footage from those specific set ups and have matched shots across your timeline.
Now, that is far more efficient and time saving than trying to match your exposure, white balance and color saturation by eye. Think how much time this will save you over the course of your videography career!
Grab a X Rite Color Chart now and save yourself the hassle further down the line.
Designed for Filmmakers: this color tool will help you get a better camera-to-camera match, achieve perfect exposure & easily edit for mixed lighting in a convenient portable protective case. Reduce video editing time & Get to your creative look faster.
For more shooting tips, check my guide to flicker-free video for any shoot:

And for more tutorials on color, check out how to use the Adobe Color Themes extension in After Effects:
DigiProTips

