Bad News Everyone… You Can’t Export GIFs Directly From After Effects (without a plug-in)
But! It’s still very easy to export a GIF using After Effects and Photoshop CC.
There is a very easy-to-learn workflow to export GIFs, with control over quality and file size.
In fact, there are a few methods to export a GIF using After Effects in your workflow. I’ll go through them all below.
How do I know what I’m talking about? Head to the DigiProTips Experience and Background page to find out how I’ve built up my knowledge over a career spanning feature film, broadcast TV and digital content production.
Exporting GIFs with Photoshop CC
The main way to get a GIF from After Effects is to actually use Photoshop once you’ve rendered out your comp.
Photoshop CC comes with the Adobe Creative Cloud Suite, so if you have access to After Effects then you’ll also have access to Photoshop.
This method is probably the most longwinded out of the four but it gives you the most control and therefore it is the best method, in my opinion, for creating GIFs of your creations.
Step 1 – Export your comp from After Effects
This may sound obvious but Photoshop needs a file to work from in order to export a GIF. You can’t use the Adobe Dynamic Link for this part, unfortunately.
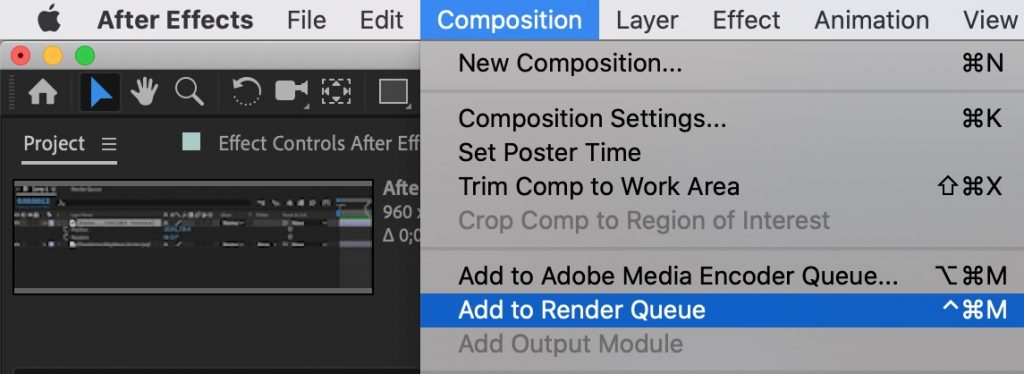
So go ahead and add your composition to the render queue or Adobe Media Encoder Queue to export to mp4 if you need to.
An important part to remember at this point, is to downscale your output resolution.
GIFs use a lot of space for what they are, the bigger the resolution and the number of colors within the frame, the higher the resulting file size will be.
For use on websites, GIFs should be as small as possible in file size, so that they load quickly. Downscaling your comp is a good way of making sure your resulting GIF isn’t MBs in size.
I recommend a max of 960×540 pixels, to ensure you are starting with a good but not extreme resolution size to work from in Photoshop.
Step 2 – Import into Photoshop CC
Once you have your comp from After Effects it’s time to bring it into Photoshop.

Open up Photoshop and head to File-> Import-> Import Video Frames to Layers.
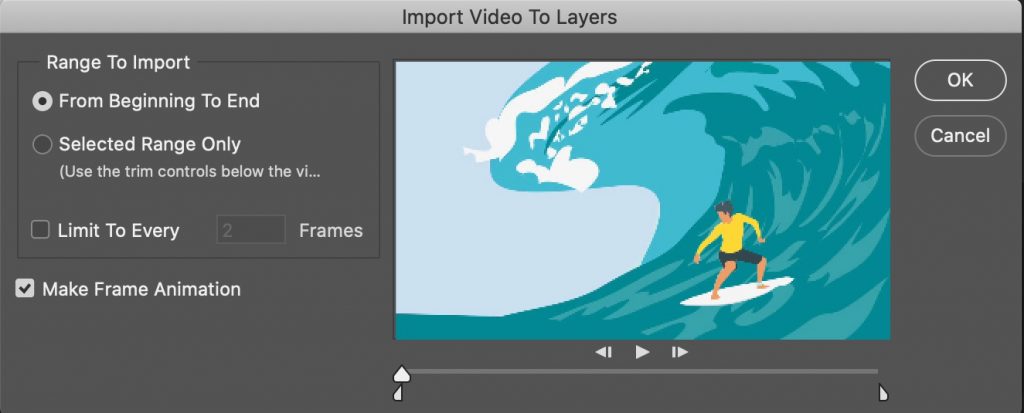
The dialog box will ask you if you want to import the whole video or part of it. I’m presuming you have exported your desired length from After Effects, so go ahead and import the whole video file.
Make sure you have the ‘Make Frame Animation’ checkbox ticked here.
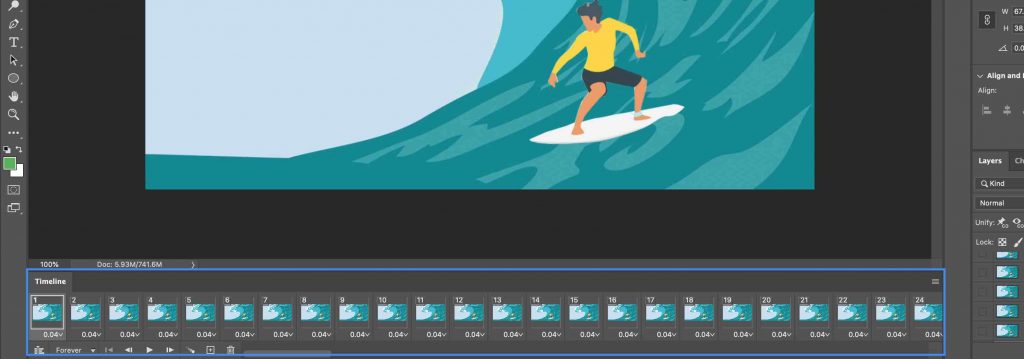
This will create a timeline of frames from your video at the bottom of the window.
Step 03 – Export GIF
And now we create the GIF.
It really is as simple as this.
Note. If you need to downsize your resolution at this point then you should do this now by changing the image size under Edit->Image Size
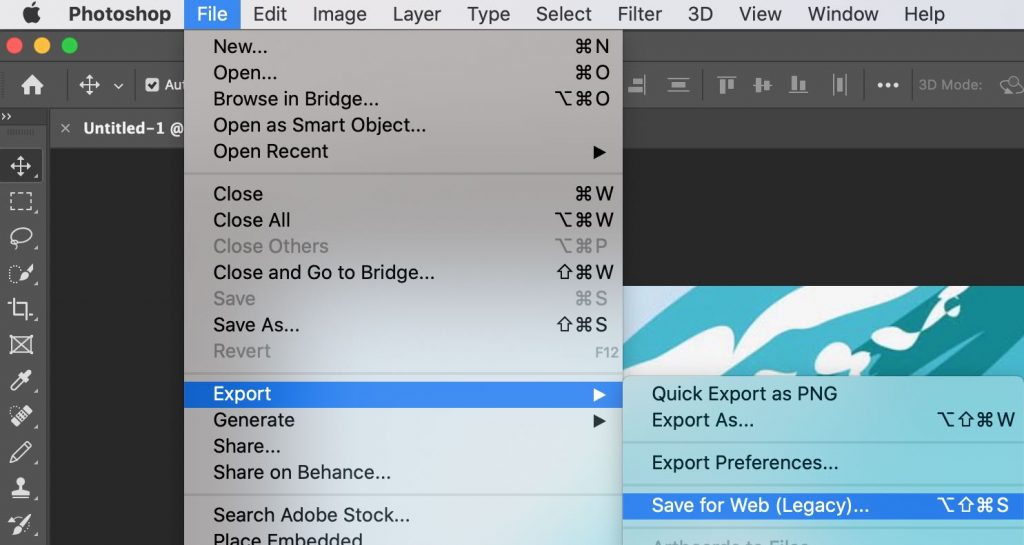
To export, we need to use a legacy tool under File-> Export-> Save for Web (Legacy)
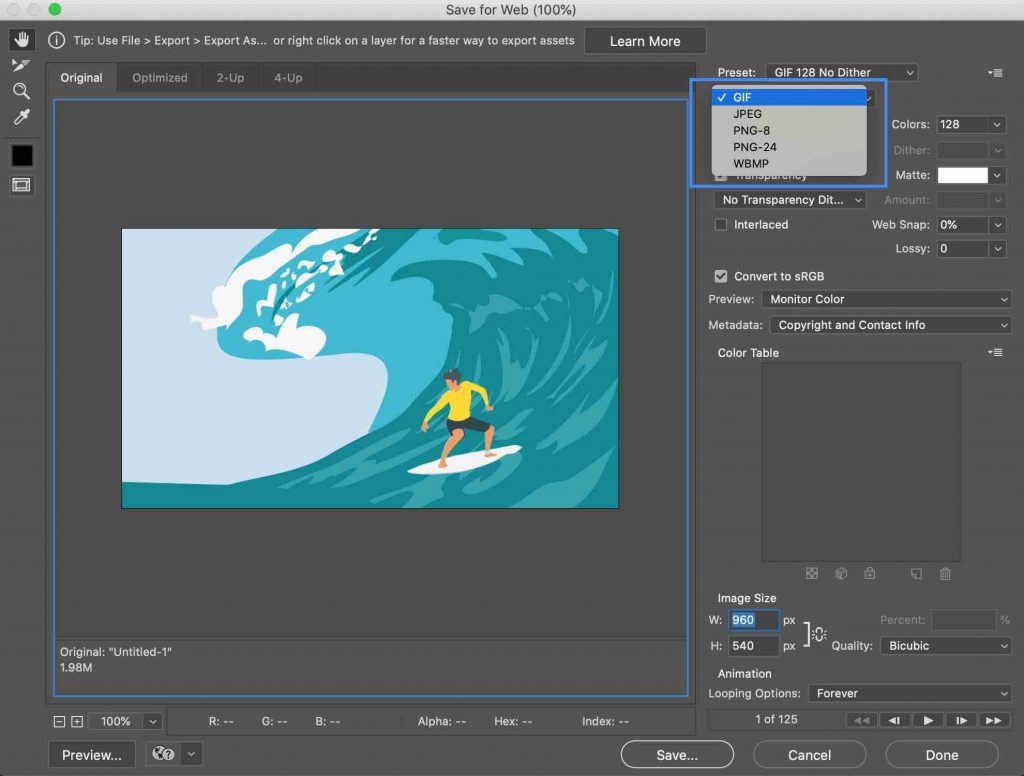
This will give us access to options in the export dialogue to change certain parameters.
When it comes to GIF size and quality, there are three parameters that really matter; duration, resolution and number of colours.
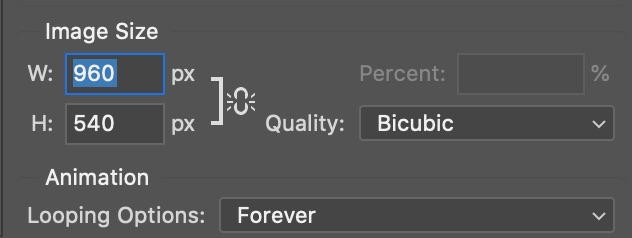
By downscaling your video file earlier we have already addressed one of those. In the export dialogue box here you can also see the option to change the sizing. If you didn’t downscale earlier, you have a chance to do that here again.
The duration is stipulated by the duration you exported your comp to or the duration you imported the file into Photoshop at.
That only leaves color.
Color effects file size because the more colors that are present in a GIF, the more data it needs to hold to replicate them. Therefore, fewer colors equals a smaller file size.
You should bear this in mind when creating your comp but if you have no choice over the matter you can alter the amount of colors Photoshop will represent in the final output using the export dialogue box.
I would not go any higher than 64 colors if you want a small file size.
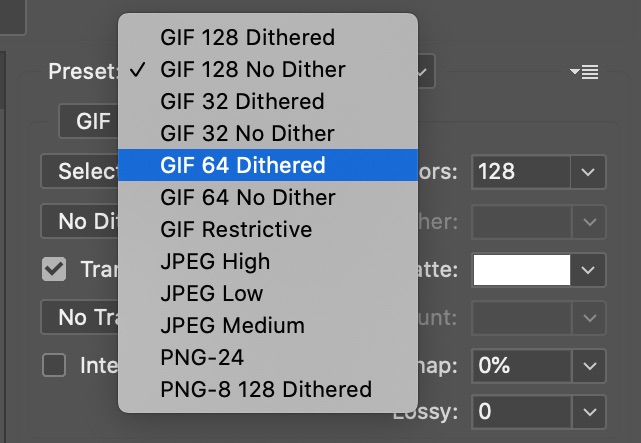
32 is even better, if you can live with only 32 colors. If you do need more then select the option to dither.
This smoothes out colors within the frame and can reduce the file size of a GIF with a lot of colors in it.
Hit Save and you’re done!
See, it’s easy once you know how and what parameters you should be looking out for.
DISCLAIMER: This post may contain affiliate links. We make a small commission if you buy the products from these links (at no extra cost to you). As a Toolfarm Affiliate, we earn from qualifying purchases. But we only recommend products we would use ourselves. For more information, click here to see our disclosures.
GifGun
If the above all sounds a little too invloved for what you need to do, then there is another, automated, alternative.
It’s called GifGun from the makers extrabite.io.
It’s an all-in-one After Effects plugin that can turn your comp into a GIF with no external software or workflows needed.
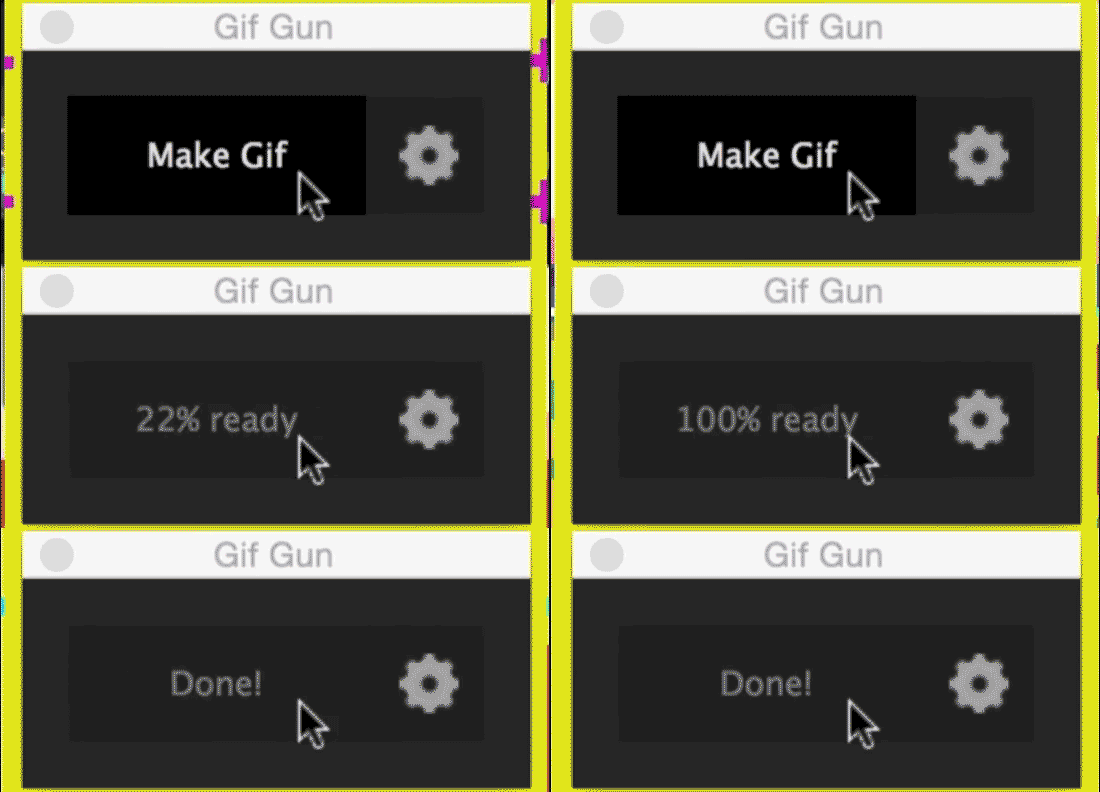
You simply install the plugin, click ‘Make GIF’ and it will spit out the GIF for you.
The plugin has been updated recently to include some settings over quality and compression amount.
You will find that you don’t have the same control as you do in Photoshop but it is much simpler!
The only other drawback is that it’s not free but it’s also not extortionate either. The plugin costs $29.99 and can be purchased here. A happy medium for ease of use!
GifMaker.me/Hnet.com
If the workflow of Photoshop is too much and you don’t want to pay to export GIFs from After Effects using plugins, then there is another way. A free service called GifMaker.me/Hnet.com can handle creating GIFs from your After Effects comps for free.
All you need, to be able to take advantage of the service, is to have your comp exported as jpeg/png sequences or video files. Once you’ve visited GifMaker.me it will give you the option of uploading your image sequence or a video file. If you choose a video file it will take you to another site called Hnet.com.
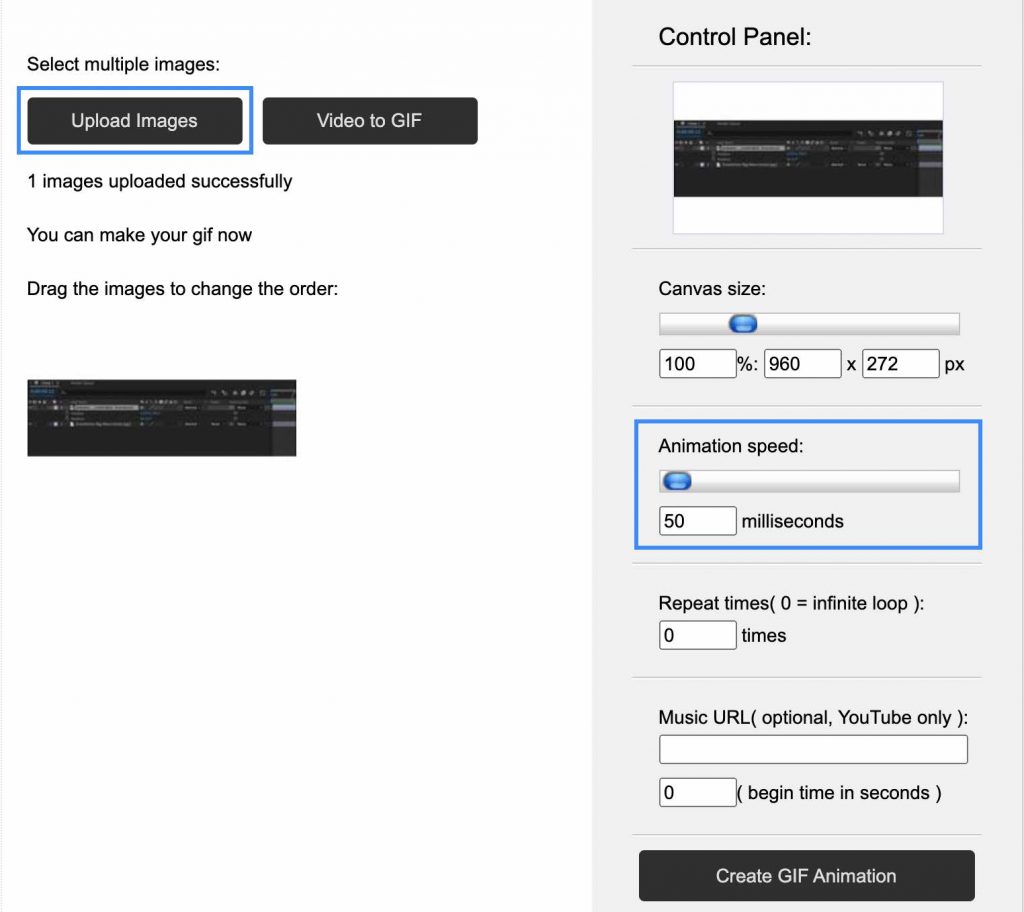
With GifMaker.me there is no option to downscale your comp, so I would do this from After Effects instead. You also need to give GifMaker.me the duration of your comp because there is no time data with image sequences.
With Hnet.com, you can change the image size of your resulting GIF, the frame rate and the duration.
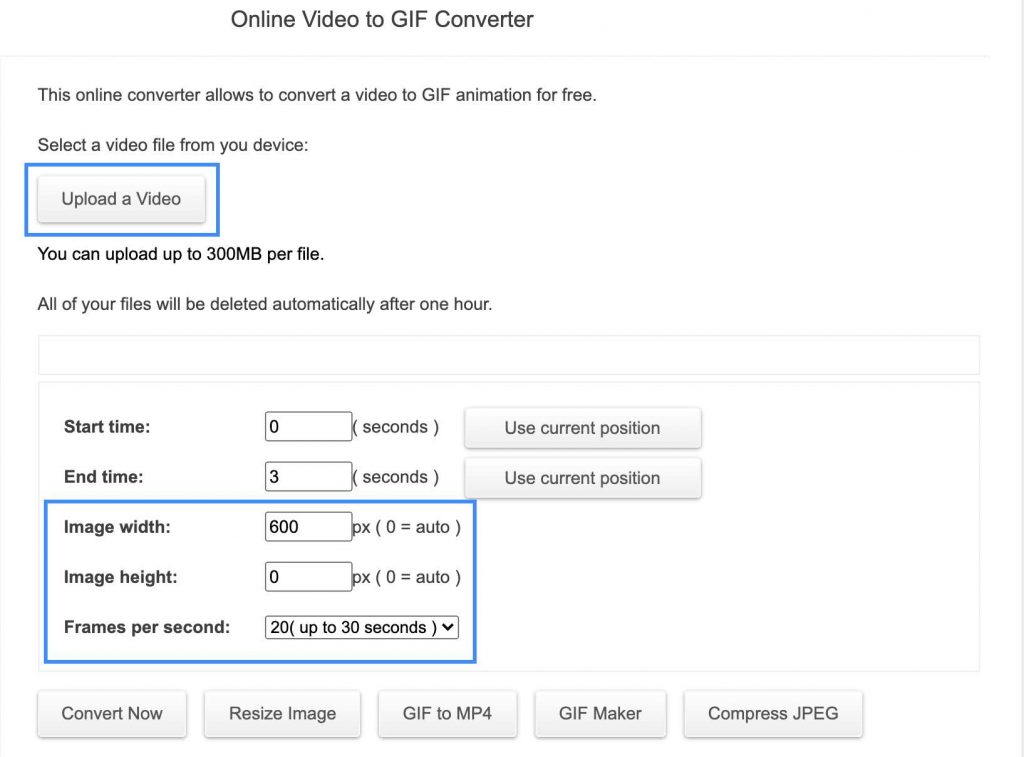
Both of the services lack any features for changing color or dither options and the resulting file sizes are dependent on image size and duration alone. For reference, a 3 second GIF I exported from Photoshop CC at 960×272 was 261KB in size, from Hnet.com it was between 761KB, roughly three times the size. From GifMaker.me it was 4.9MB. I used their in-built GIF optimizer to reduce the file size by reducing colors and this brought it down to 2.8MB but that is still quite large for a GIF.
Adobe Media Encoder
The last way to export a GIF from After Effects is to send it directly to Adobe Media Encoder and use the built-in ‘Animated GIF’ format.
Yep, that’s right, there’s been a feature there the whole time.
Why haven’t I mentioned this further up?
Well, it’s not got great results when it comes to file size. That 960×272 pixel GIF I talked about a second ago, that came out of Media Encoder at a whopping 6.2MB!
Obviously, if you’re stuck for time and/or you don’t need the file to be minuscule in size then this could be the easy answer you were looking for the whole time.
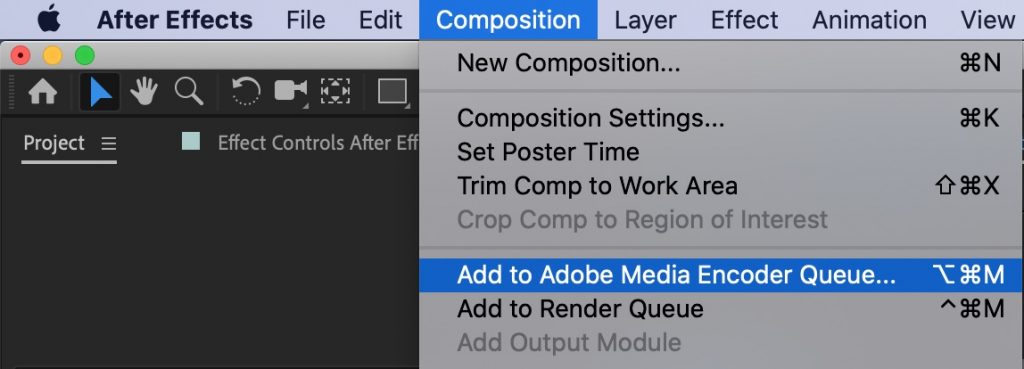
To take advantage of this method, just head to Composition in After Effects and then choose ‘Add to Adobe Media Encoder Queue’.
This will open up Media Encoder automatically and bring in your comp for export using the Adobe Dynamic Link.
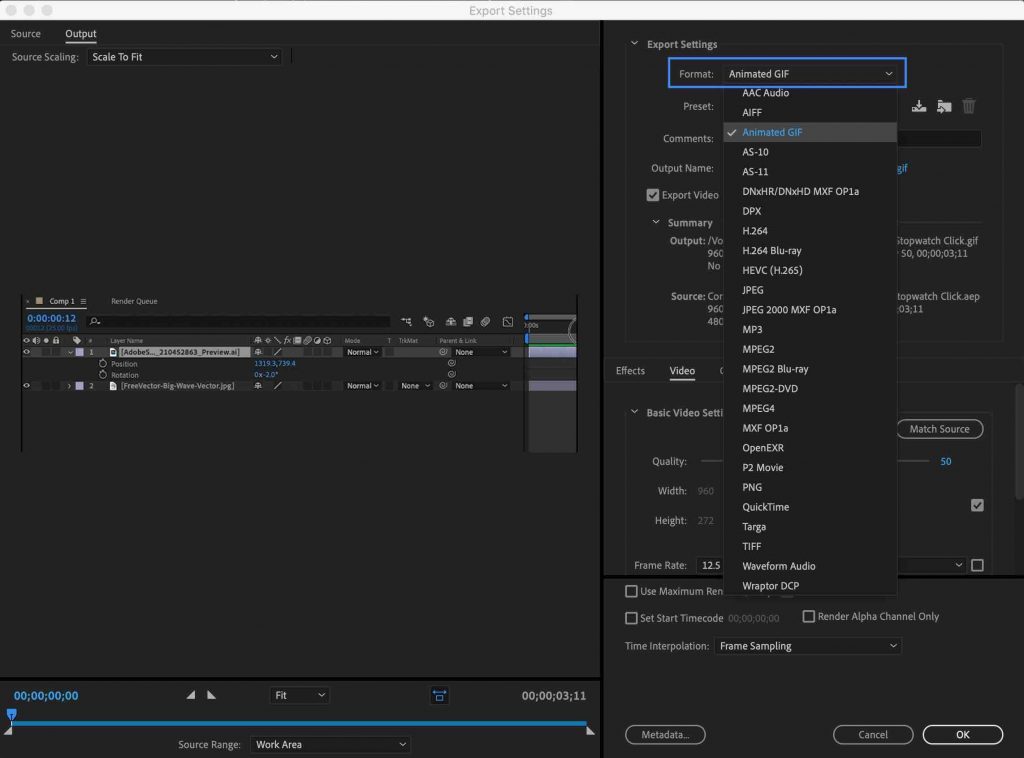
Once in the queue, click on the Preset and choose ‘Animated GIF’ from the dropdown next to Format. There aren’t any options for different codecs in this format.
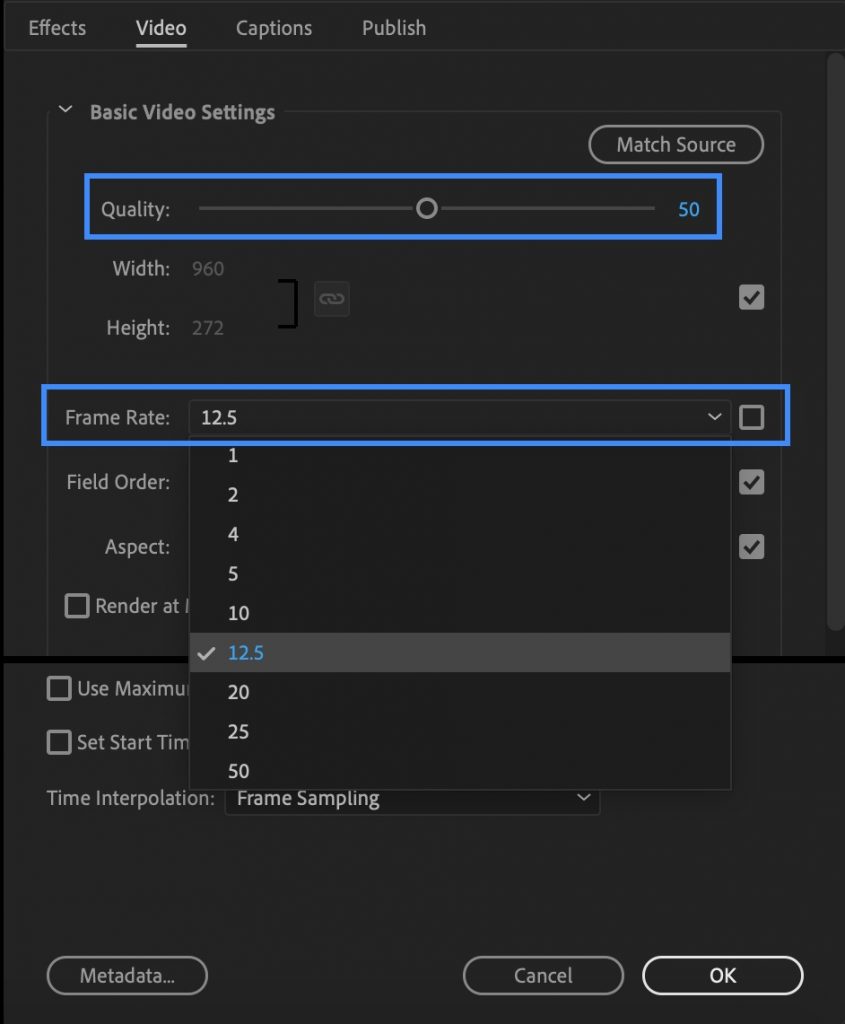
In the video settings below you can change the quality, image size and framerate to try and have a bearing on the resulting file size. By choosing 50% quality and only 12.5FPS I was able to bring the GIF size down to 3.1MB.
Once you’re happy with your settings, click OK and then press the green play button in the top right corner to start your export.
That’s 4 Ways to Export a GIF From After Effects
So there you have it, four different and distinct methods for exporting GIFs using your After Effects comp.
Each have their own merits depending on how much control you want over file size, quality and whether you have budget to pay for a quick solution as well.
For more After Effects tutorials then also check out my guide to masking in After Effects:
And how to split or trim a clip in After Effects:
If there’s more topics you would like to see covered on DigiProTips then let me know in the comments below.
Work Smarter, Not Harder.
DigiProTips

