What is a Keyframe, Why do You Need To Use Them, How do You Add Them and How do You Animate With Them in After Effects?
You’ve got the basics of After Effects down and are feeling comfortable with its interface and many tools on offer. However, you know to get into motion graphics and animation of any sort, you need to keyframe.
But how?
Well, the answer is fairly simple to do and once you master it your creative potential will be unleashed.
In this article I’ll show you how to add a key frame in After Effects and also , briefly, how to use keyframes to animate with.
Let’s dig in!
How do I know what I’m talking about? Head to the DigiProTips Experience and Background page to find out how I’ve built up my knowledge over a career spanning feature film, broadcast TV and digital content production.
The Simple Answer to Adding a Keyframe in After Effects
Toggle down the Transform properties of any layer in your timeline and click the stopwatch symbol to set your first keyframe. Set your desired end keyframe with the diamond symbol to add another keyframe.
You can also press ALT/OPTION + A, P, S, R, or T from the keyboard with a layer selected to add a keyframe in your timeline for any of the transform properties; anchor point, position, scale, rotation, or opacity.
The More Detailed Answer For Keyframing
After Effects is built for animation, visual effects, and motion graphics creation. To do any of those tasks effectively and professionally, will involve keyframing extensively.
But let’s take it back.
What is a Keyframe and What Does it do?
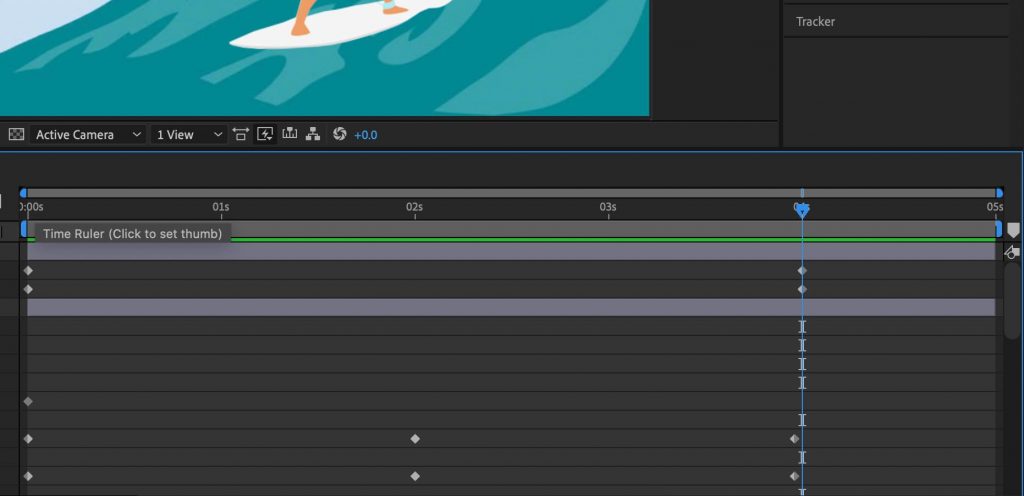
Keyframes are a tool for animators/motion graphic designers to tell After Effects that they want a specific layer and a specific property within that layer to stay exactly as it is on that exact frame in the timeline.
By creating exact properties at different intervals on the timeline After Effects knows it needs to move/alter the layer or property in between those frames to get from one to the other.
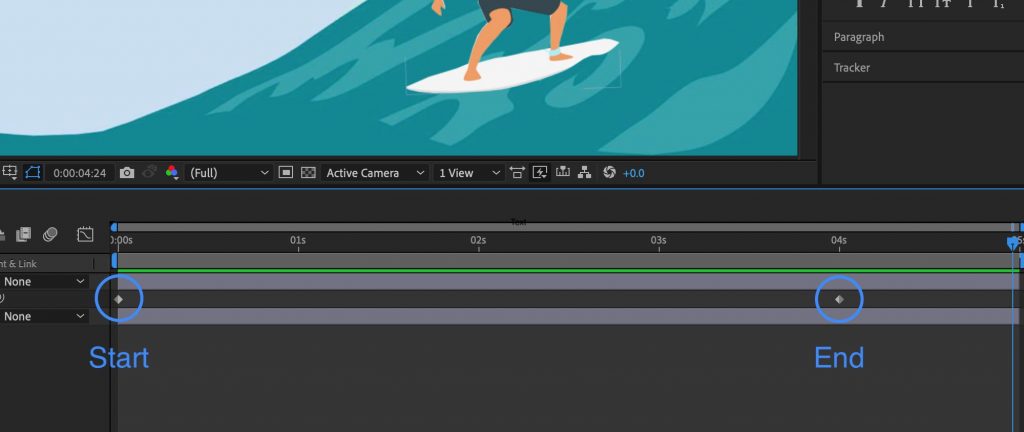
It does this through interpolation and that in turn results in the movement of a layer or property, creating motion/animation.
Do this with enough layers and properties and you can create a sequence of motion/animation within your timeline.
Why do You Need Keyframes in After Effects?
As I mentioned above, keyframes are an essential part of creating motion/animation/moving visual effects within After Effects. Without keyframes, you wouldn’t be able to create the incredible array of effects and motion graphics that creators come up with every single day.
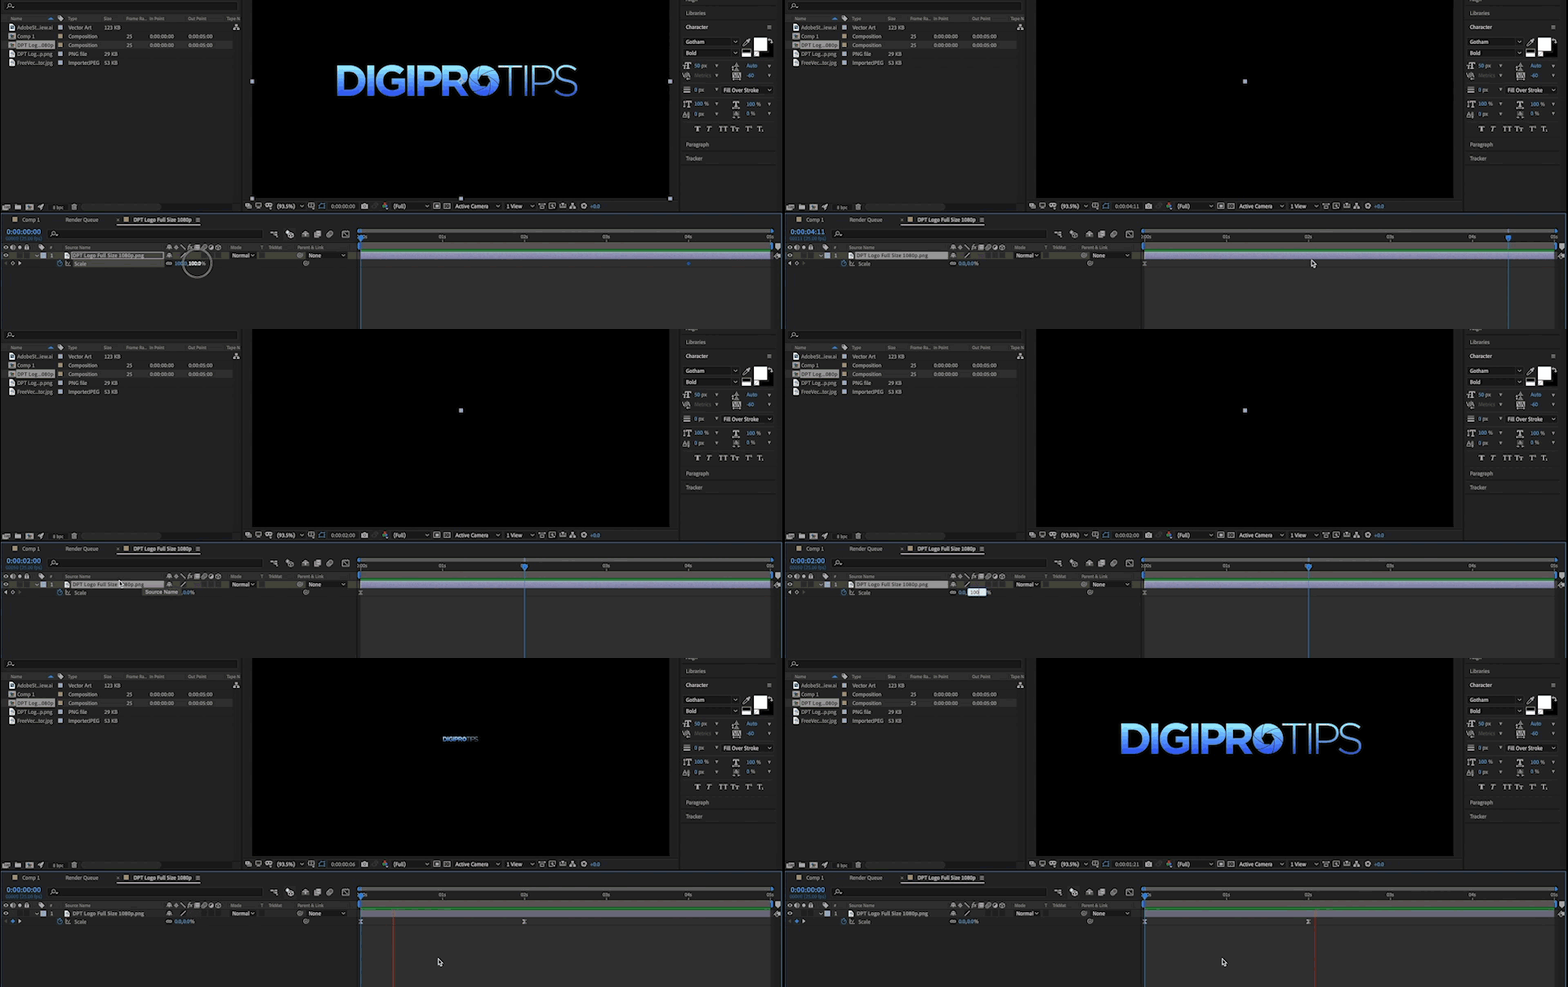
All motion graphic software has the ability to keyframe and it is the basis of all animation.
Keyframes aren’t for just moving layers in 2D or 3D space. You can change pretty much any property you want on a layer with keyframes.
Rotation, color, opacity, particle distribution, wave simulations, zoom in and out, almost anything that is possible to be created in After Effects is possible to be keyframed.

How to Add Keyframes in After Effects
Ok, so we know what keyframes are, what they do, and why we need them so let’s use a short exercise to demonstrate how to add and use keyframes in After Effects.
I’m going to use an example of a vector shape surfer surfing over a moving wave. The wave is, however, made from one single 2D image, and using the puppet tool I’ll simulate the movement of a wave.
The reason for this is that while the movement of the surfer is simple and easy to understand, the wave shows you how multiple keyframes come together to create animation/motion.
Let’s jump in at the starting point.
1. Select your starting position and add a keyframe with the stopwatch icon
Set the first keyframe by moving your layer or property value to its desired setting.
Once in this position, toggle down the property that you want to animate. In my case this is the position and rotation.

Here you can see a stopwatch icon next to the position and rotation words. Click that icon.
This will turn the icon blue and will also have added a diamond shape under the playhead on that layers property that you are keyframing.
The diamond shapes are keyframes.
2. Move to the second/end position
Now that we’ve set out first keyframe successfully, we need to set another to create movement between the two.
Move the playhead along in the timeline to the duration that you would like the movement to animate to.
3. Change the layer property value
Now that you have the timestamp you’d like to add a new keyframe at, you can go ahead and tweak the property you want to animate.
So, for me, I’ll change the position and rotation values.
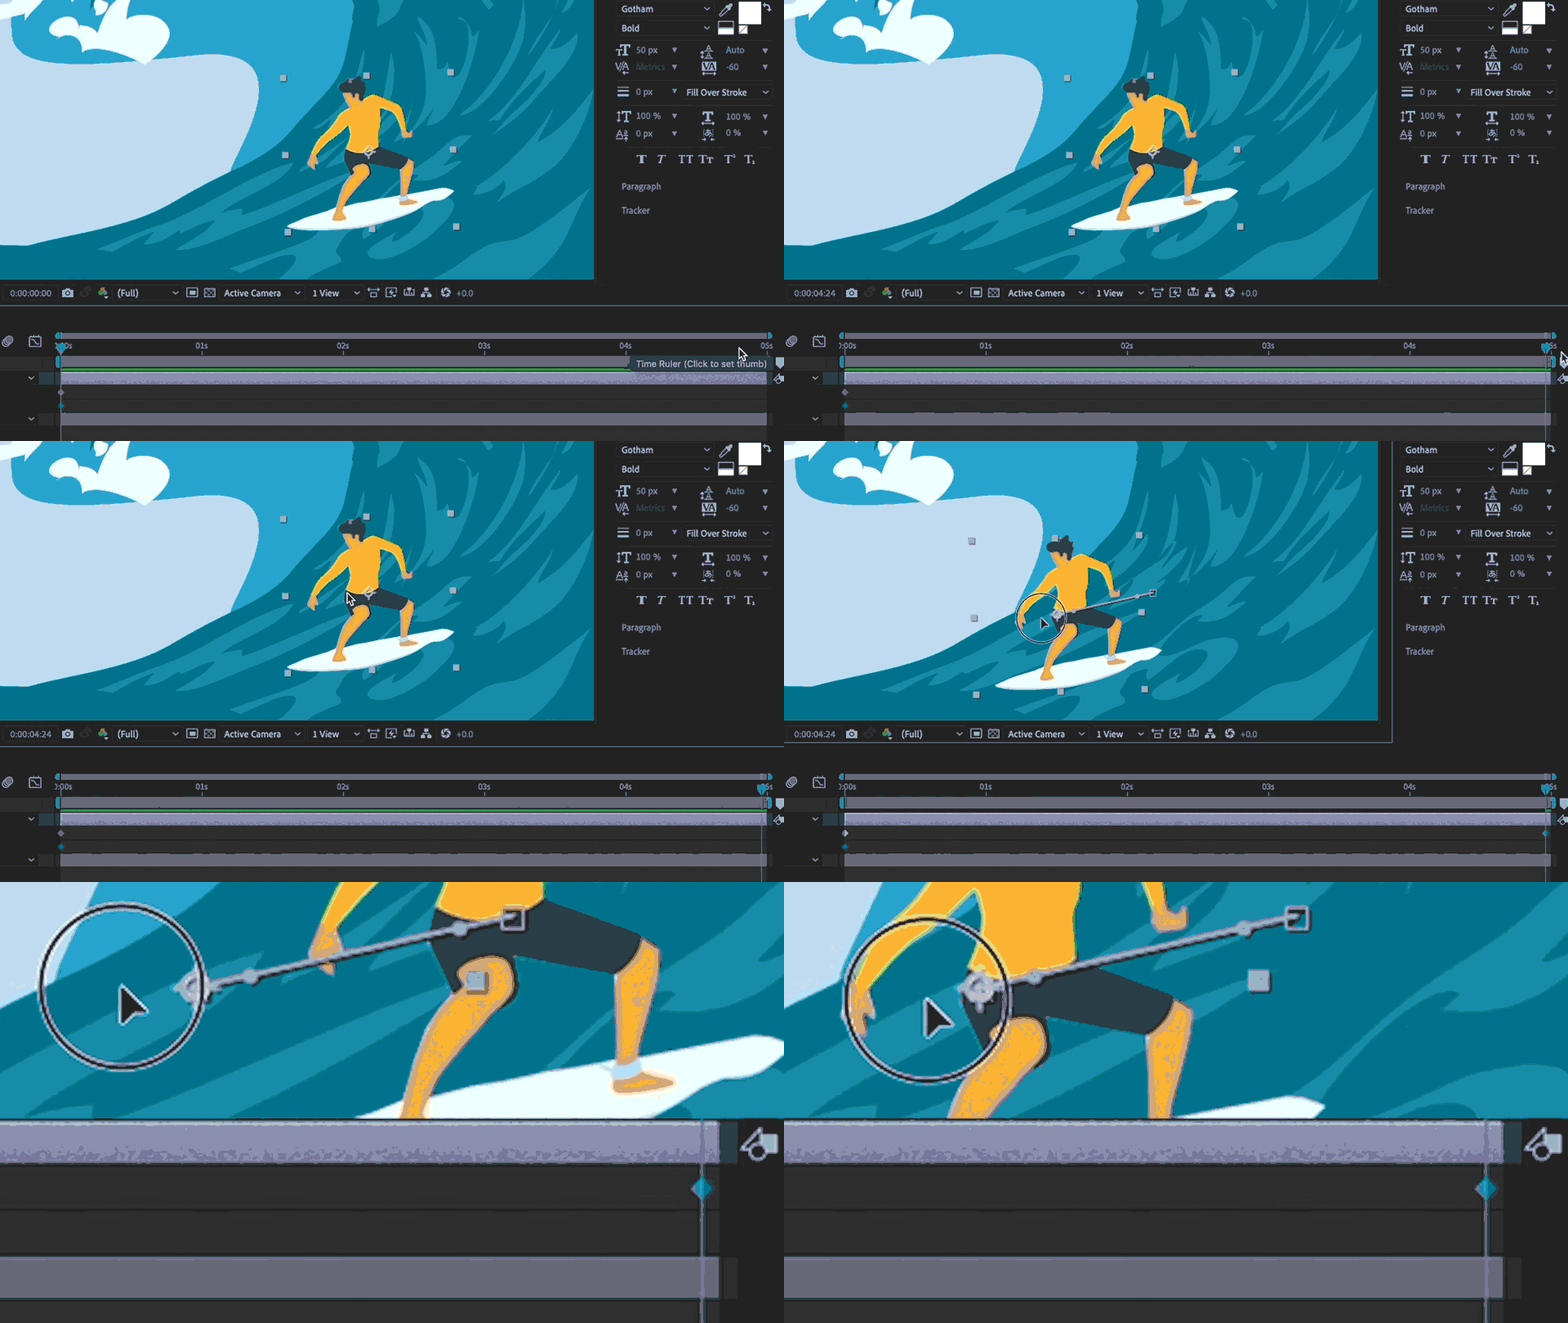
By changing those values After Effects instantly adds another keyframe on the timeline to indicate that change in state from the first keyframe you set.
If you RAM-preview this now (Spacebar) then you will see your layer animate between those two keyframes.
Using Multiple Keyframes
Now we’ve set two Keyframes and seen how in doing so you can create animation, let’s take a quick look at using multiple keyframes to create more complex animation.
4. The puppet tool
In my example I’ve got a 2D image of a wave.
I’m going to bring that in to my comp and click the puppet tool at the top of the toolbar.
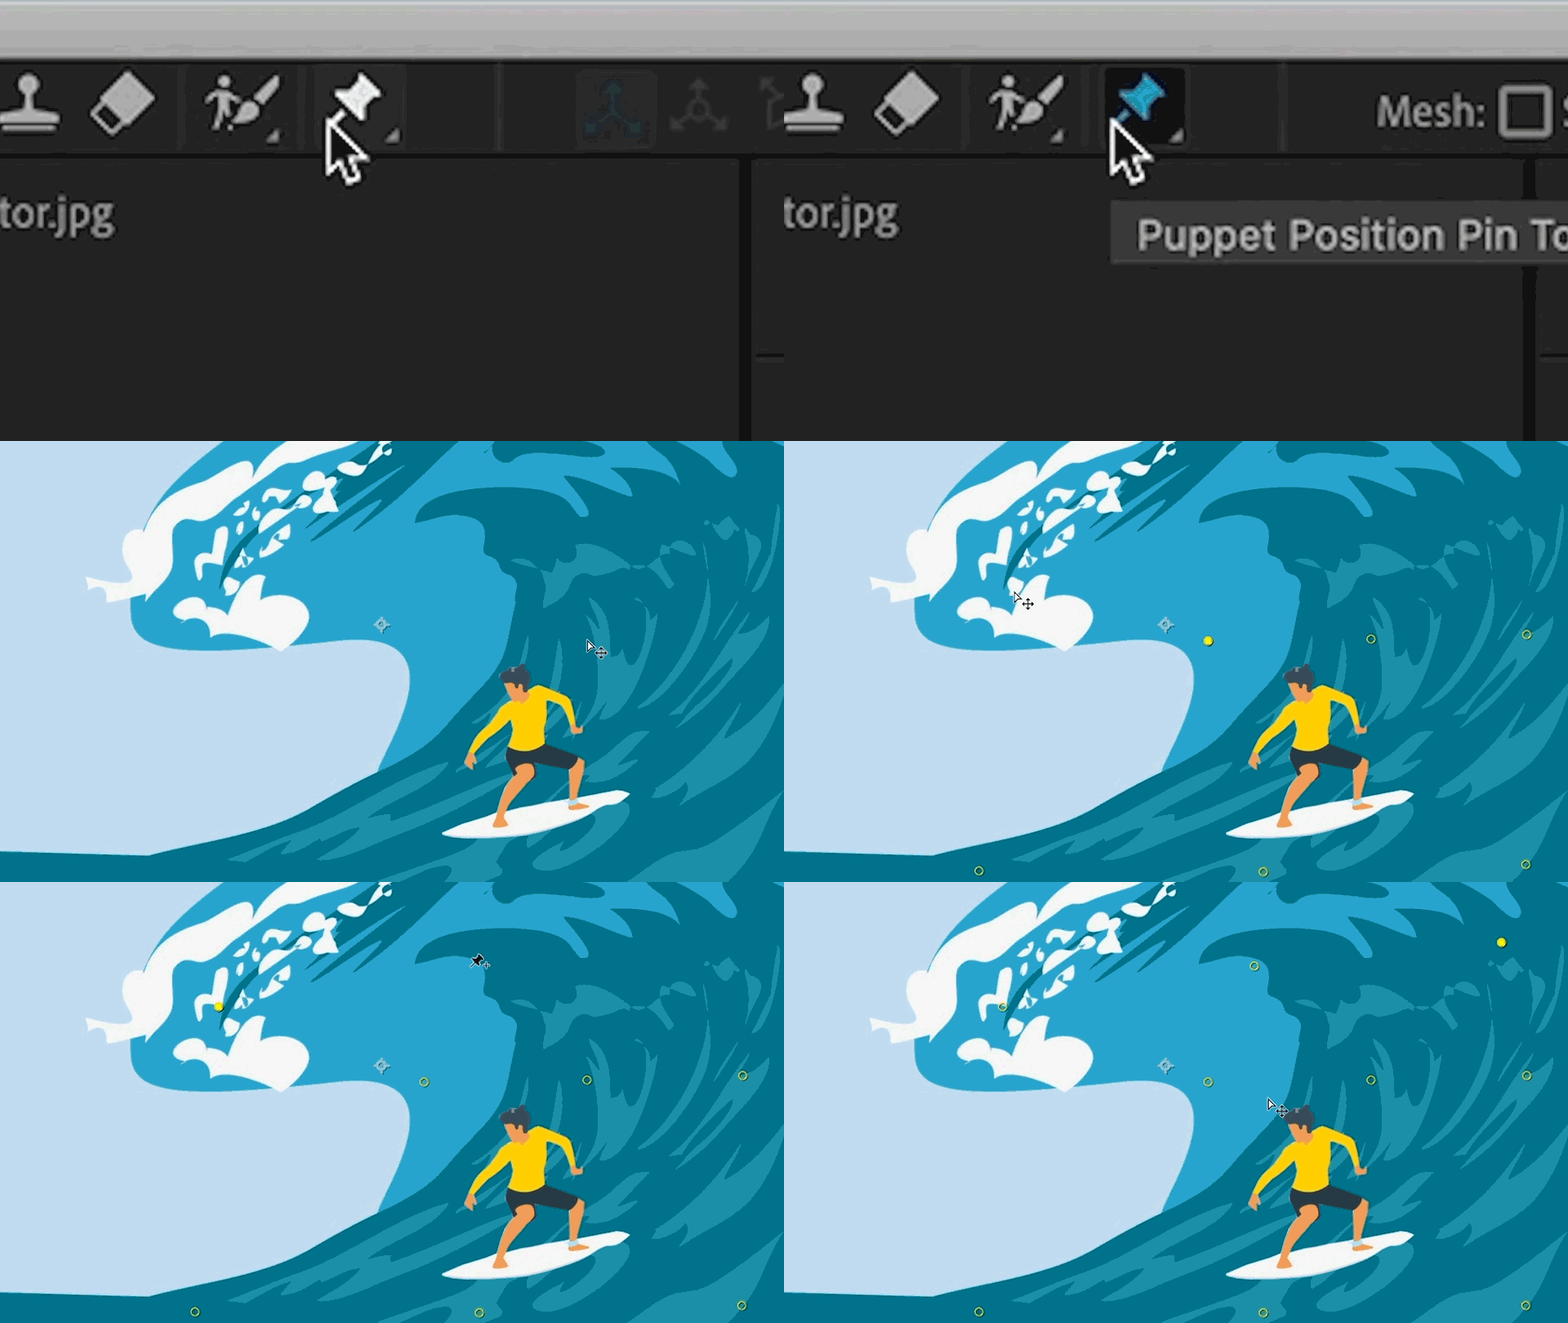
With the puppet tool selected I’m going to click areas of the wave image that I want to manipulate. The bottom, middle, and crest of the wave.
If I toggle down the properties of the puppet tool effect, you can see I have multiple new puppet pins, each with its own initial Keyframe.

5. Keyframe away!
Now the job is simply moving the playhead along the timeline and then moving my puppet pins to their new destinations.
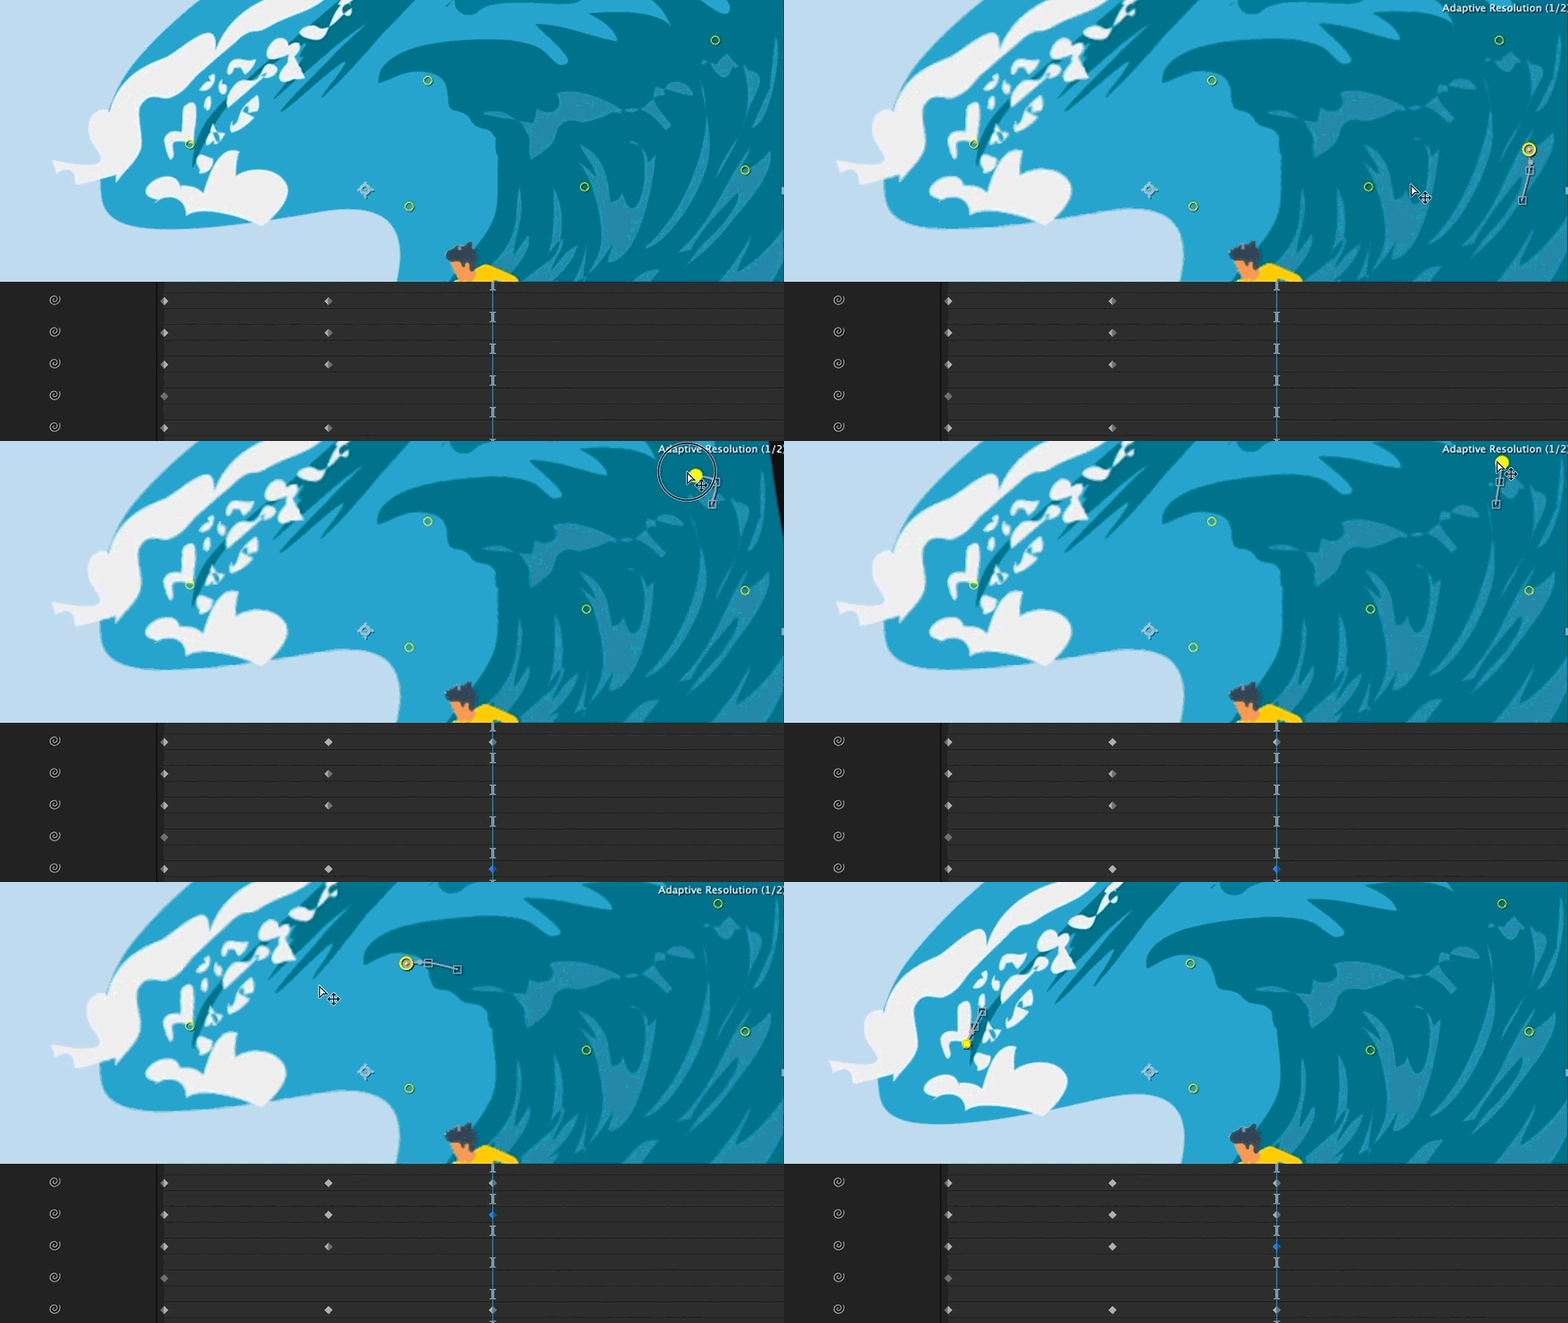
Each time I move a point another keyframe is automatically generated by After Effects.

A few movements later and a RAM preview and you can see my crude but illustrative animation, the wave looks like it is moving in slow motion and the surfer is surfing down it as well.
All the keyframes to achieve this are visible in the timeline below it and it took barely any time at all.
With practice and creativity the possibilities are endless.
Some Useful Keyframing Shortcuts in After Effects
Now that you’re up and running with keyframing, there are some keyboard shortcuts that could speed up your workflow and make you even more efficient.
The Keyframe Navigator
When you create a keyframe in After Effects is opens up the keyframe navigator in the timeline.
You can move to the next keyframe by pressing (K) on your keyboard and you can also move the previous keyframe by pressing (J) on the keyboard.
Remove Keyframes
You can remove a keyframe from the timeline by using the same shortcut you used to set it; ALT/OPTION + A, P, S, R, or T.
Just ensure your playhead is over the keyframe and your layer selected and it will remove the keyframes for that layer.
Removing Multiple Keyframes
You’ll have noticed that keyframes you set are grey in the timeline and keyframes you have selected or have just created and the playhead is over, are blue.
If you marqee select multiple keyframes, turning them blue, you can delete these by pressing backspace or delete.
You can also undo this if you deleted a keyframe by mistake.
For more useful keyboard shortcuts in After Effects check out my post on the Most Underrated shortcuts here:

There are also more beginner tutorials available, such as how to split a clip in After Effects:
Let me know in the comments below if there’s anything you would like to know or learn in After Effects that I can cover for you on DigiProTips.
We aim to work smarter and not harder here, so all tips and tricks you learn at DigiProTips are geared towards making you more efficient so that you have more time to be creative.
DigiProTips

